Overview
This knowledge base article provides step-by-step instructions on how to setup TAPS with CIS 3.0.0 L1 + BL.
Devicie will use our automation to push out the CIS 3.0.0 L1 + BL policies and Win32 app to your tenant.
The following will be covered in this article:
- Enable the Temporary Access Pass Policy
- Create a Temporary Access Pass
- Create a Configuration Profile
- Log into device with Username and TAPs
Requirements
The following roles can perform various actions related to a TAP:
- Global Administrators can create, delete, and view a TAP for any user (except themselves).
- Privileged Authentication Administrators can create, delete, and view a TAP for admins and members (except themselves).
- Authentication Administrators can create, delete, and view a TAP for members (except themselves).
- Global Readers can view TAP details for the user (without reading the code itself).
Enable the Temporary Access Pass Policy
1. By navigating to Microsoft Entra admin center (with at least Authentication Policy Administrator) assigned.
2. Under Protection, then select Authentication methods then select Policies then select Temporary Access Pass.
3. Under Enable and Target tab, under, select Enable then target: All users or select groups to target an optional group. 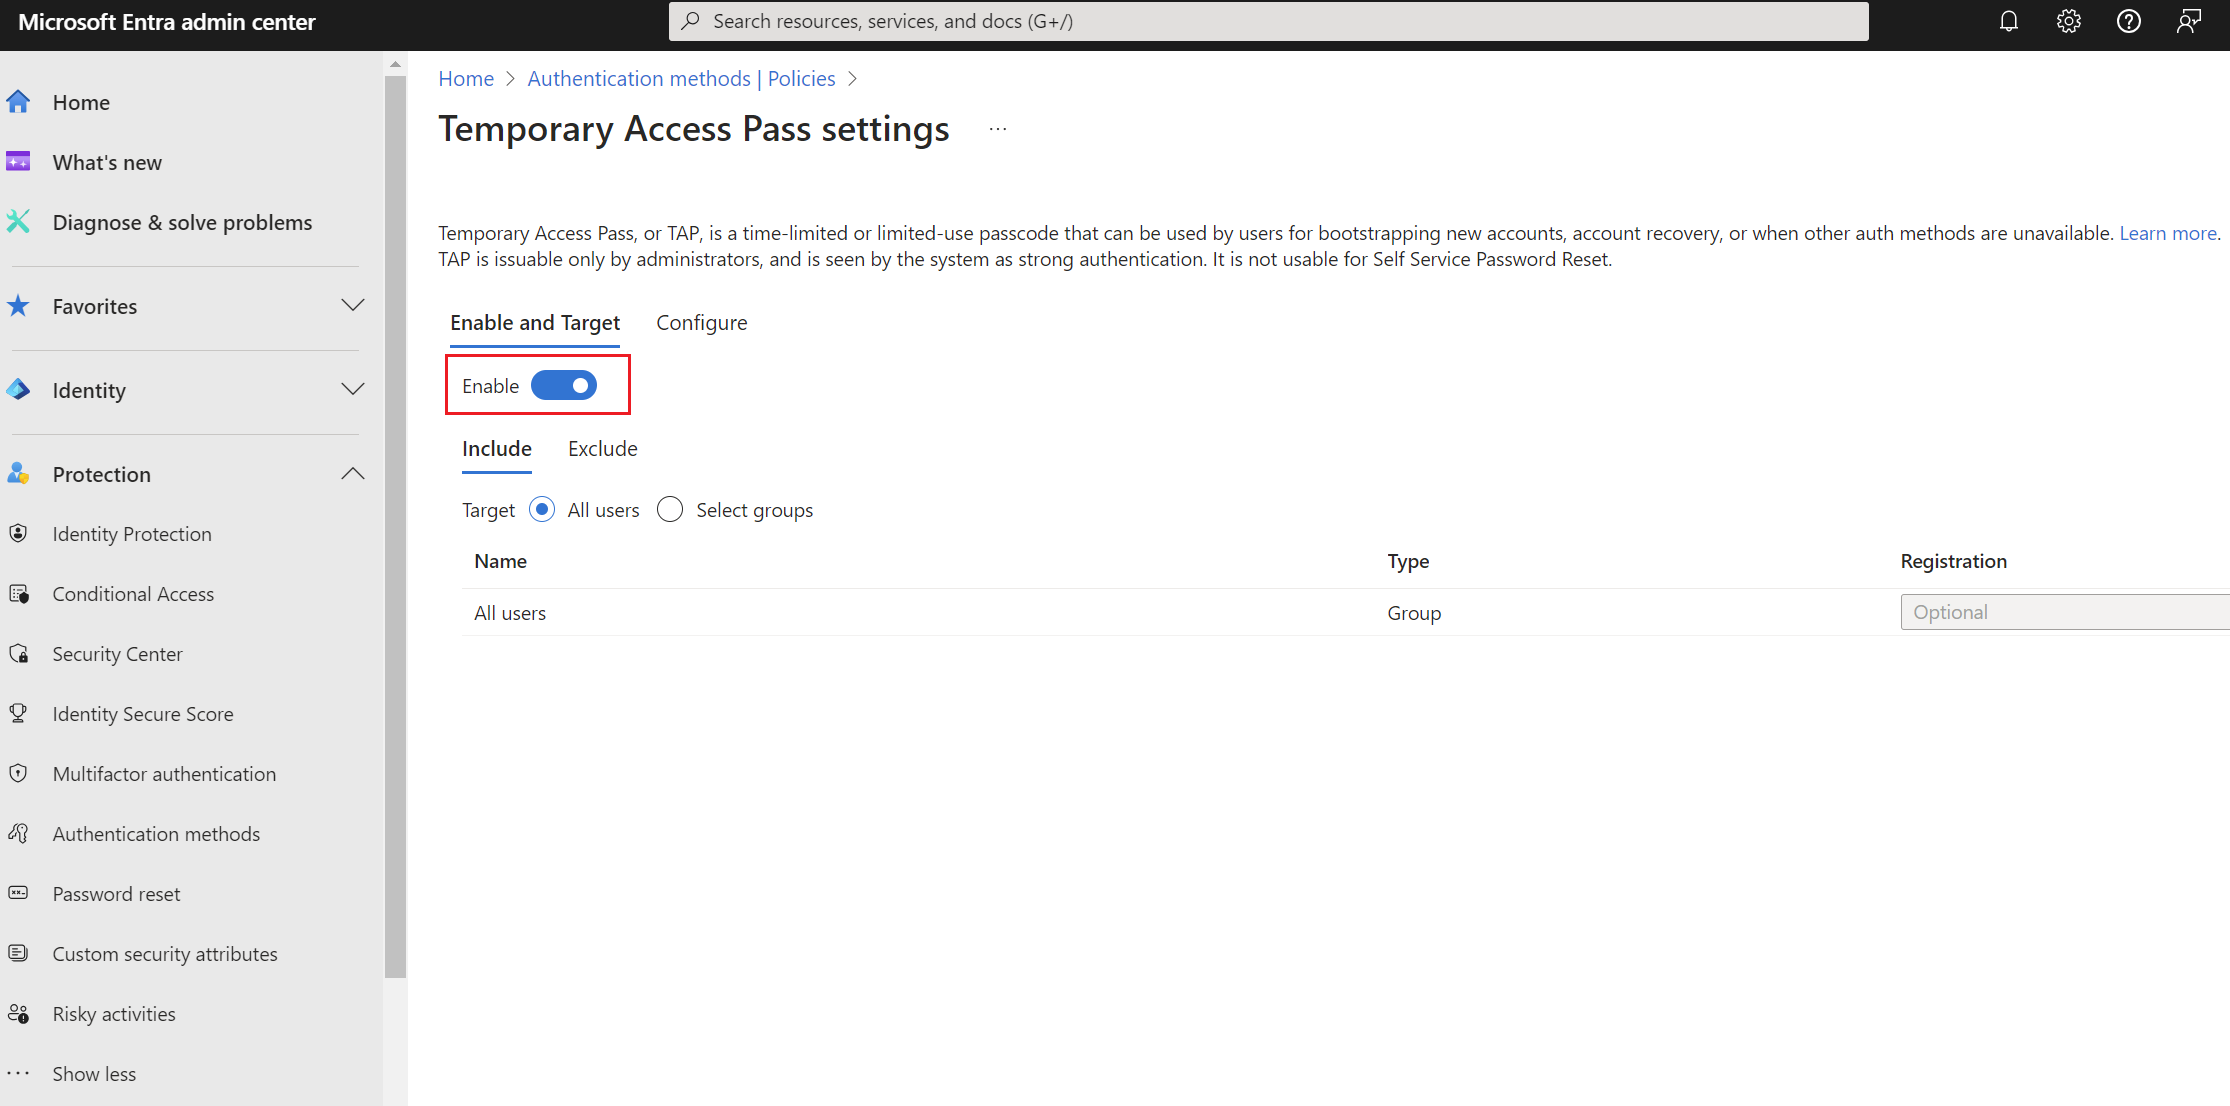
4. Under Configure, select Edit then adjust the minimum, maximum and default lifetime settings. Select Require one-time use to Yes or No. Then select Update.
5. Select Save.
The default value and range of allowed values are:
| Setting | Default values | Allowed values | Comments |
| Minimum lifetime | 1 hour | 10 – 43,200 Minutes (30 days) | Minimum number of minutes that the TAP is valid. |
| Maximum lifetime | 8 hours | 10 – 43,200 Minutes (30 days) | Maximum number of minutes that the TAP is valid. |
| Default lifetime | 1 hour | 10 – 43,200 Minutes (30 days) | Individual passes within the minimum and maximum lifetime configured by the policy can override default value. |
| One-time use | False | True/False | When the policy is set to false, passes in the tenant can be used either once or more than once during its validity (maximum lifetime). By enforcing one-time use in the TAP policy, all passes created in the tenant are one-time use. |
| Length | 8 | 8-48 characters | Defines the length of the passcode. |
Create a Temporary Access Pass
After enabling a TAP policy, you can create TAP for users in Microsoft Entra ID.
1. By navigating to Microsoft Entra admin center (with at least Authentication Policy Administrator) assigned.
2. Under Identity, select Users then select All users then select the user to create a TAP for.
3. Select Authentication methods, then from the drop-down menu, select Temporary Access Pass.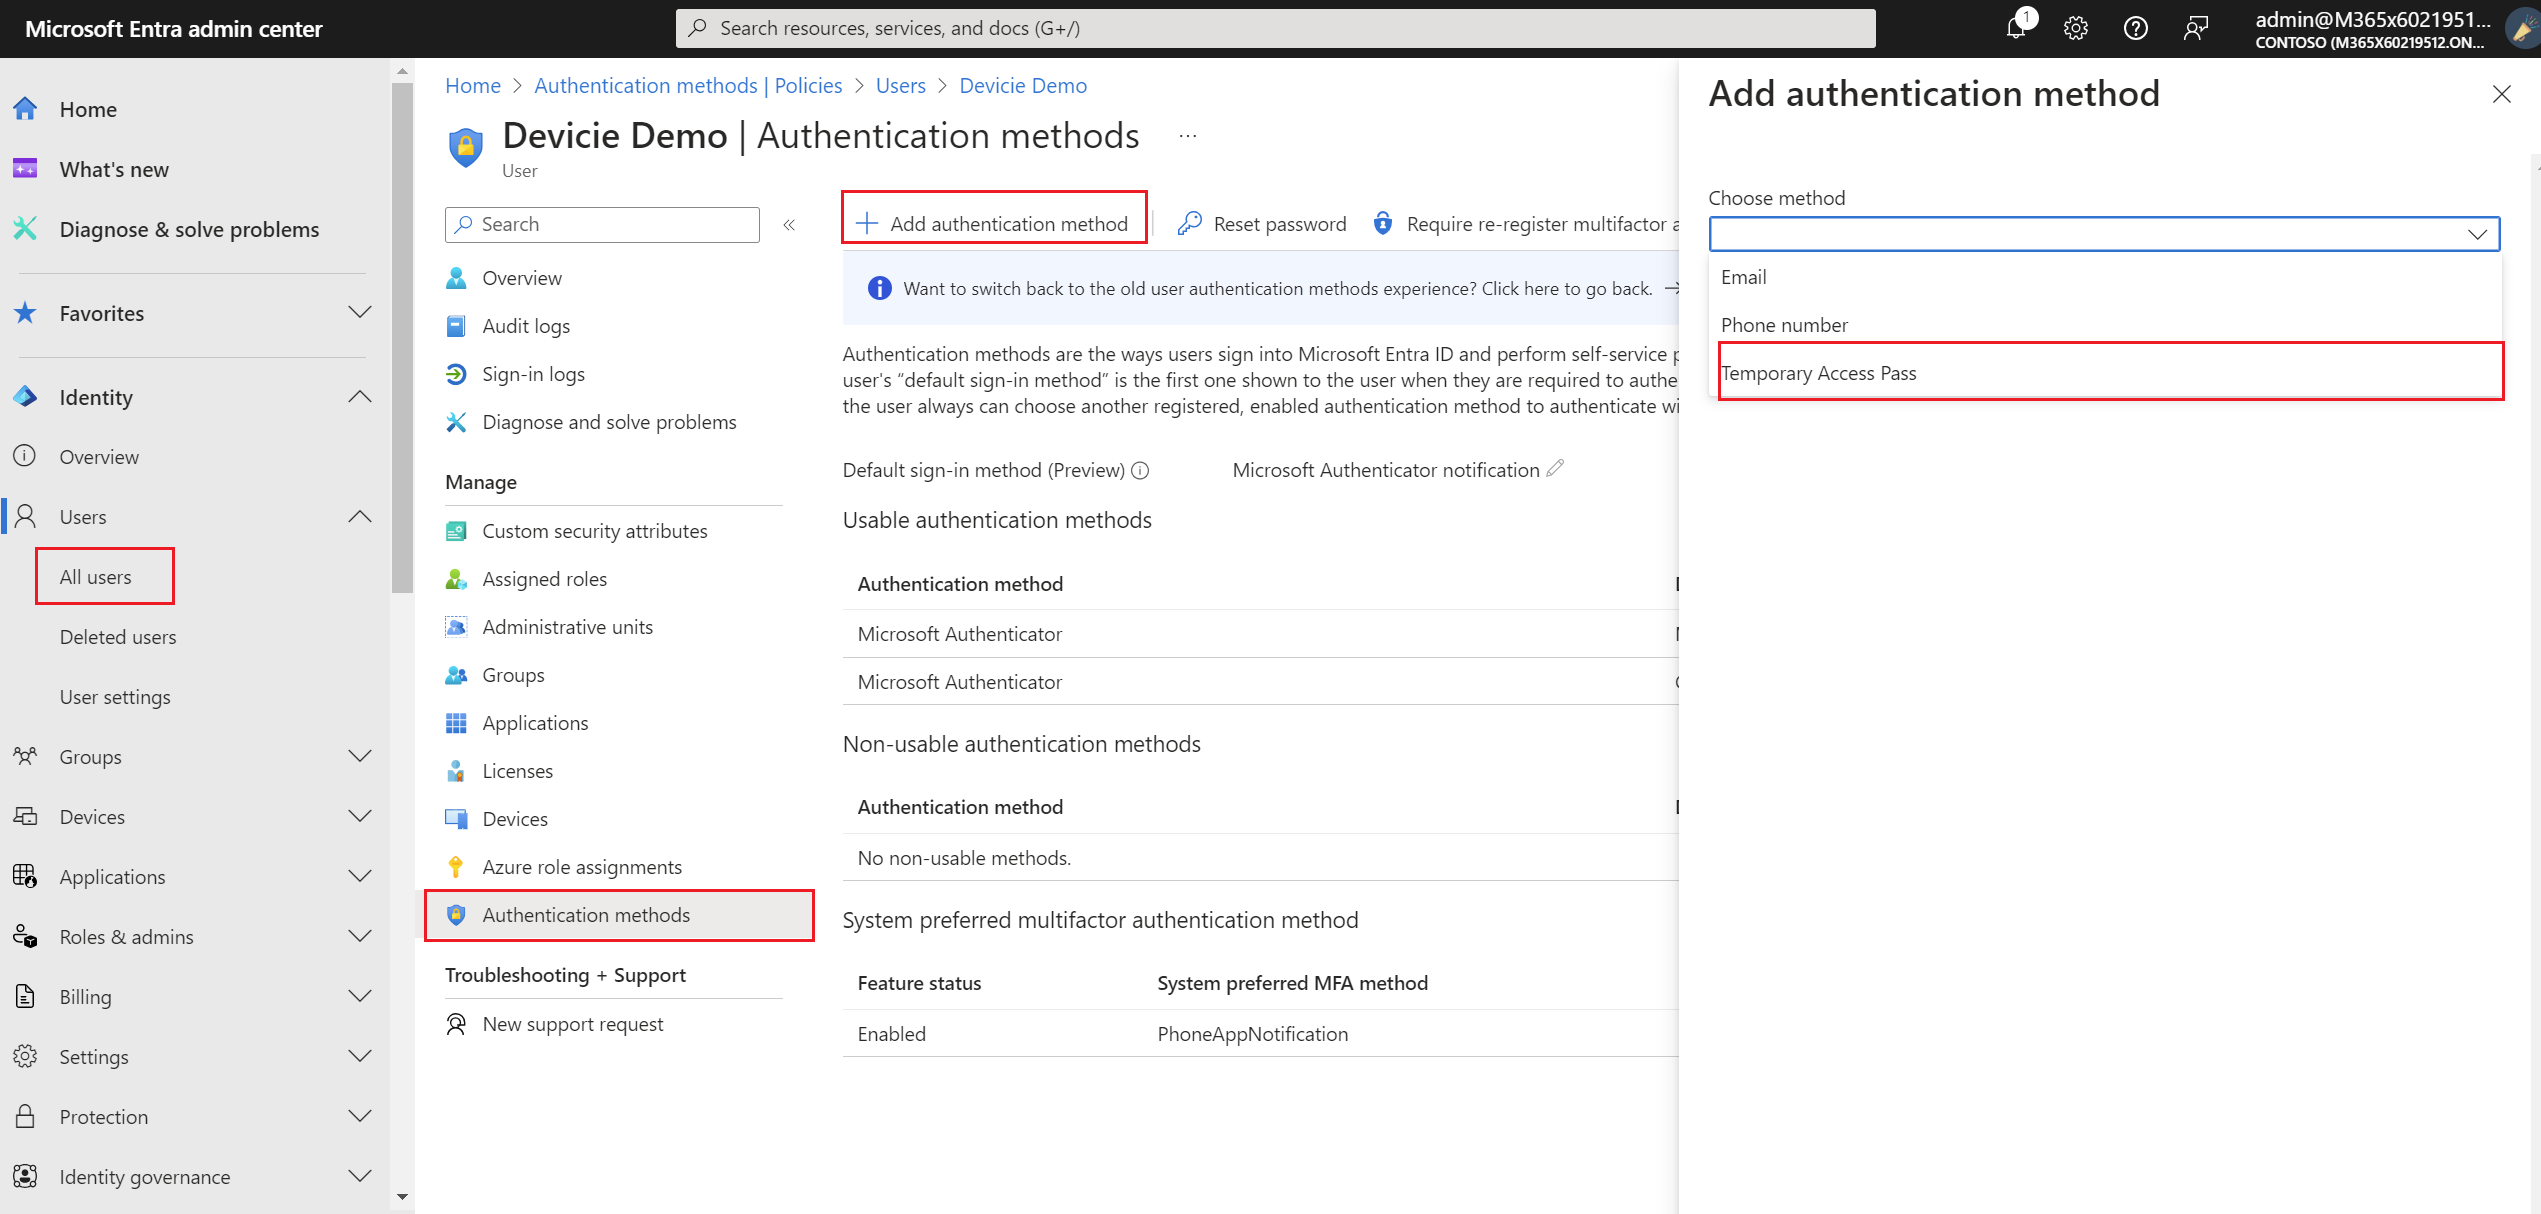
4. Then select Add.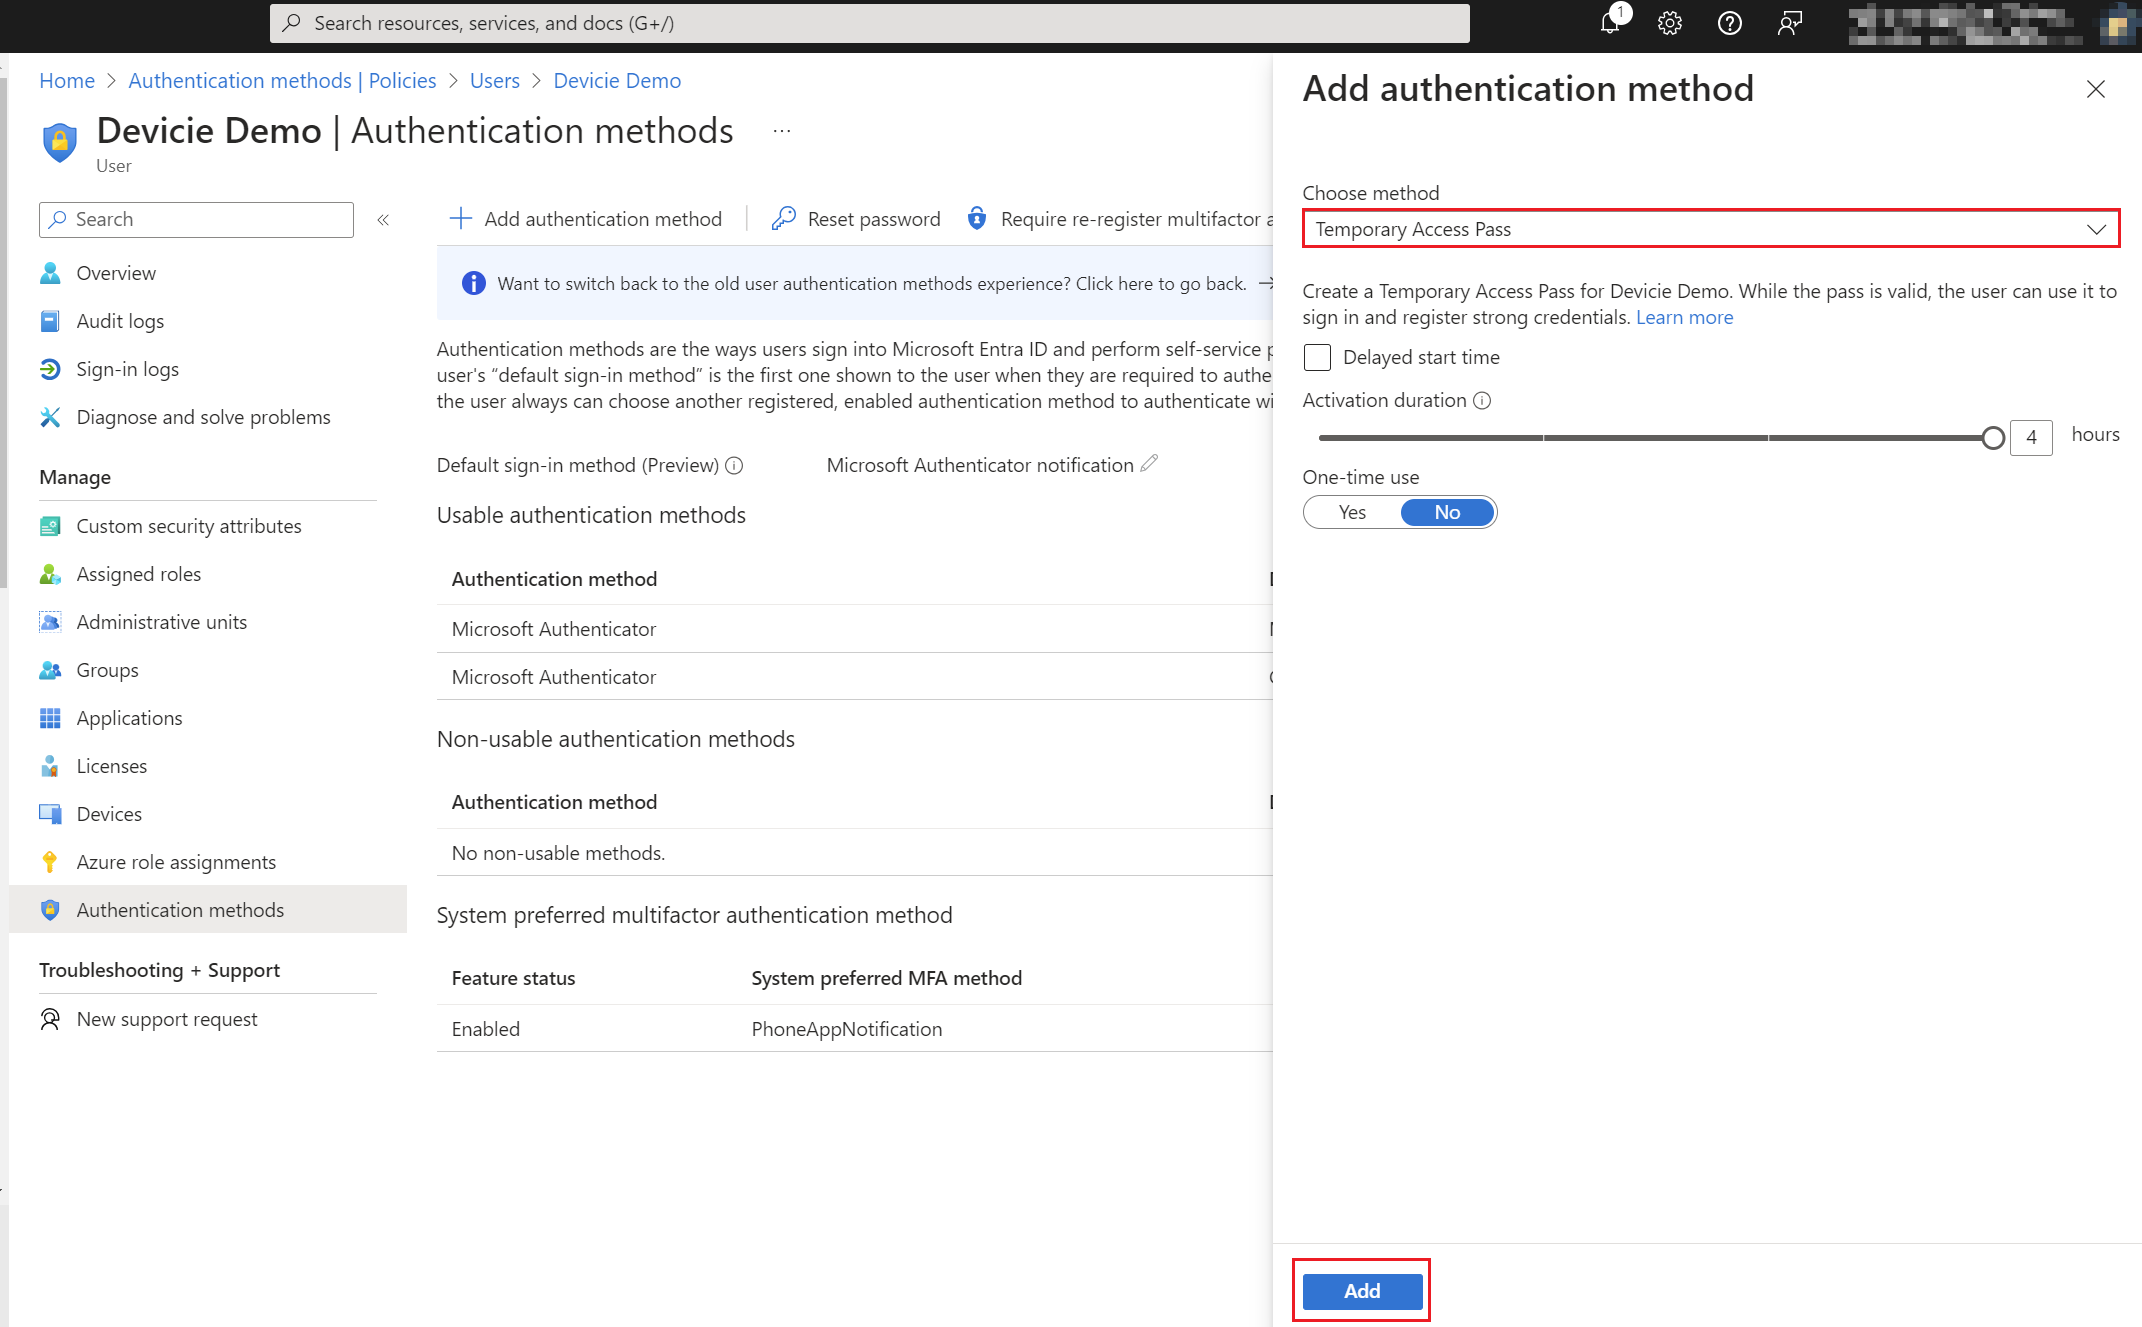
5. This will then generate a temporary access pass (provide this to the user as it will only show up one time).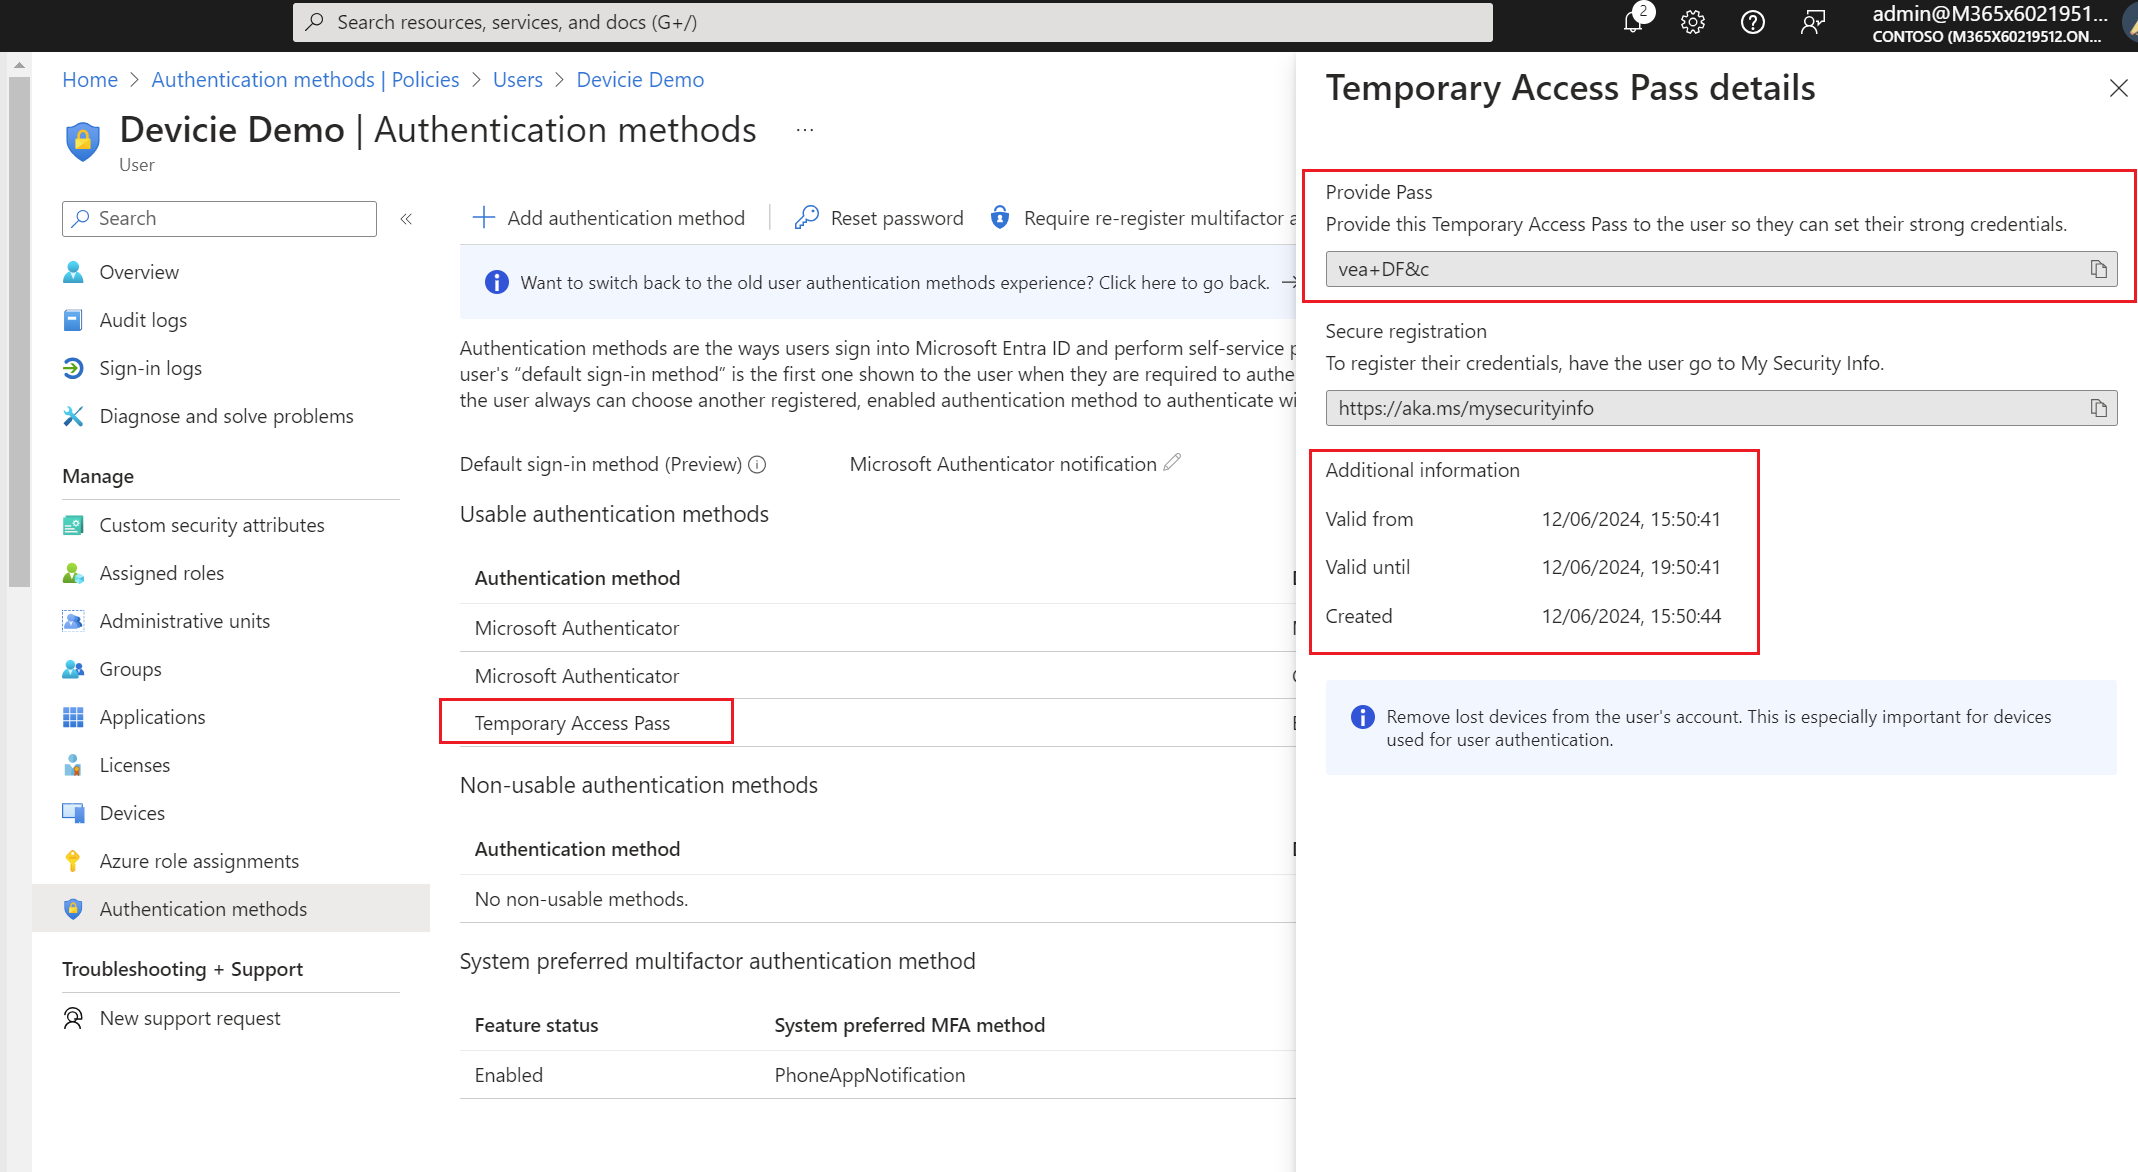
Create a Configuration Profile
1. By navigating to Windows Configuration Profiles, select Create then select New Policy then select By platform: Windows 10 and later and Profile type: Settings Catalog then select Create.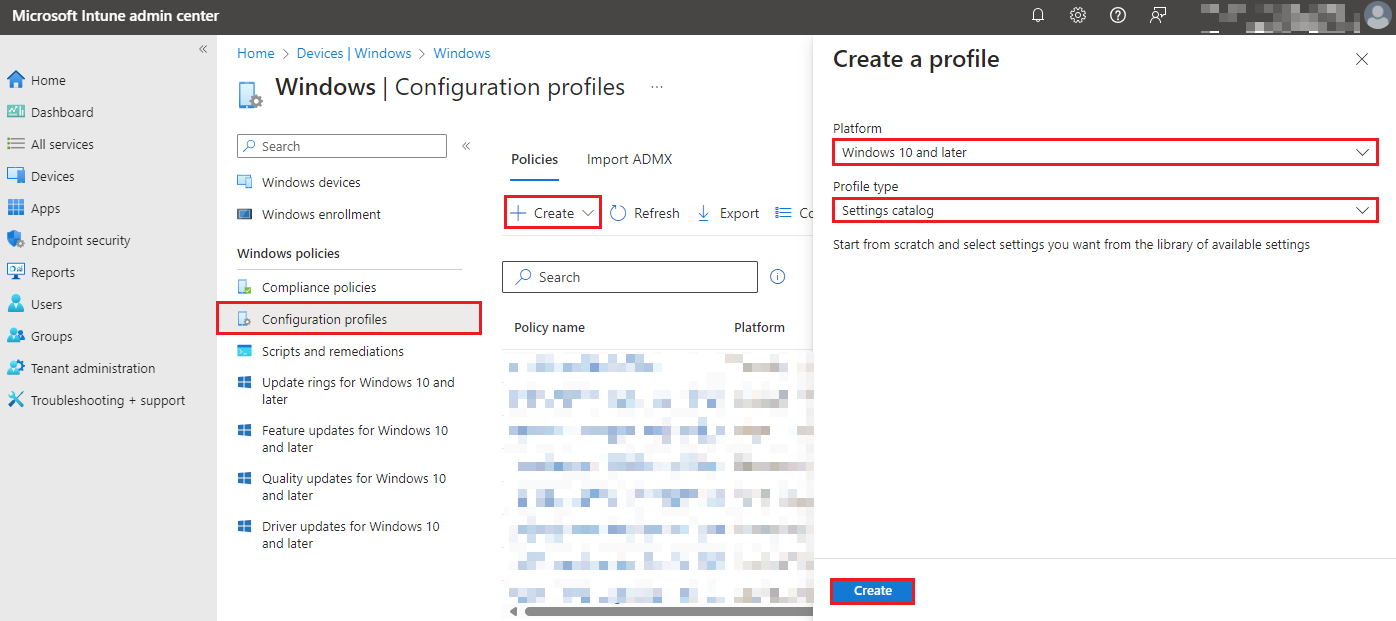
2. Under Basics tab, enter the following:
Name: Enable TAP Web Sign-In
Description: Enable TAP Web Sign-In
Then select Next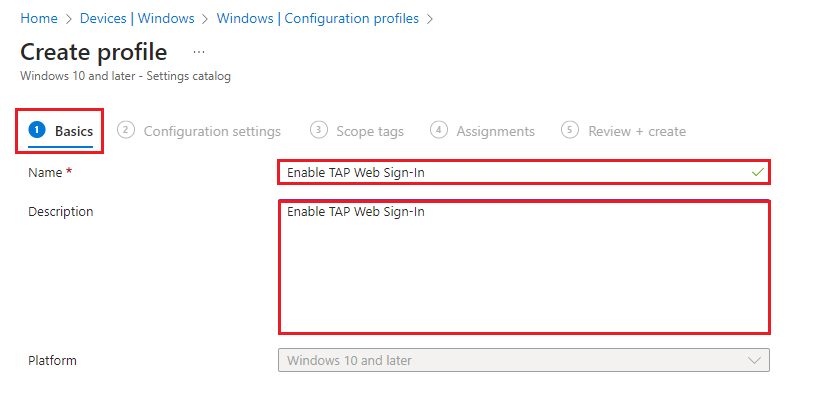
3. Under Configuration Settings tab, select Add Setting. In the search for a setting, enter in: Authentication.
Then select the following:
Enable Passwordless Experience
Enable Web Sign In
Preferred Aad Tenant Domain Name
4. Then enter the required
Enable Passwordless Experience: Enabled. The Passwordless experience will be enabled on Windows
Enable Web Sign In: Enabled. Web Sign-in will be enabled for signing in to Windows
Preferred Aad Tenant Domain Name: domainname.com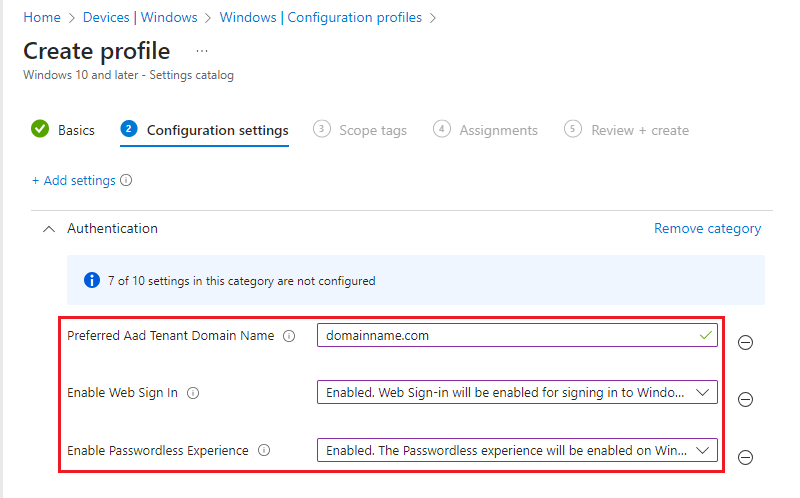
5. Under Scope tags, leave as default and select Next.
6. Under Assignments, select the required assignments and select Next.
7. Under Review + create, select Create.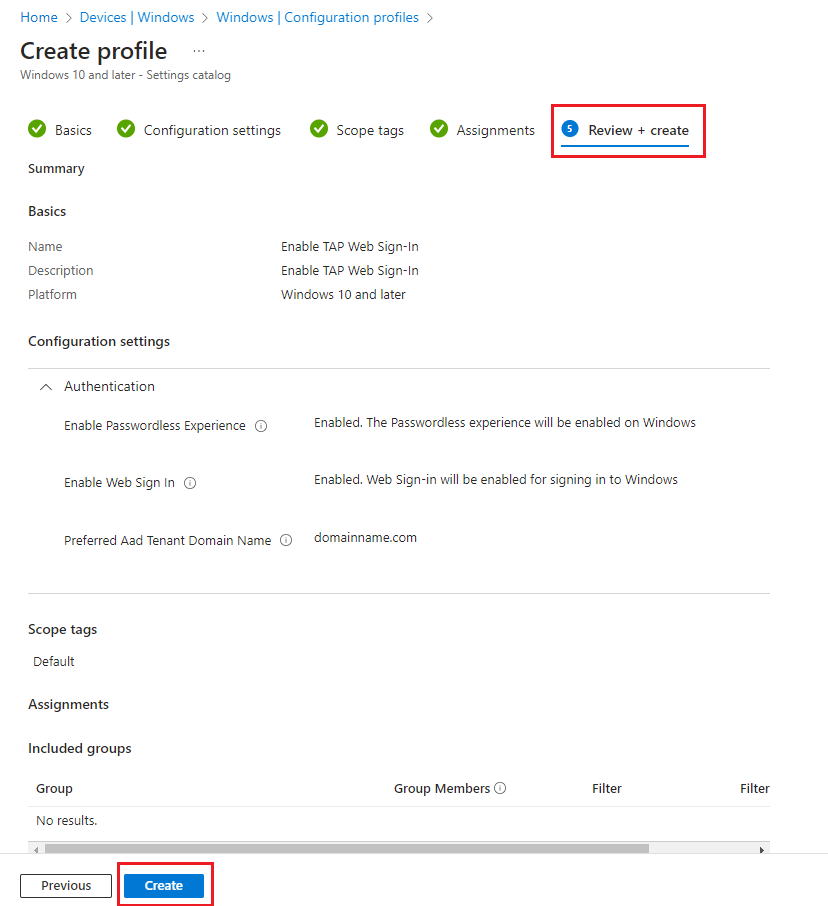
Log into device with Username and TAPs
1. On the device, login with your username and Temporary access pass. Then select Sign In.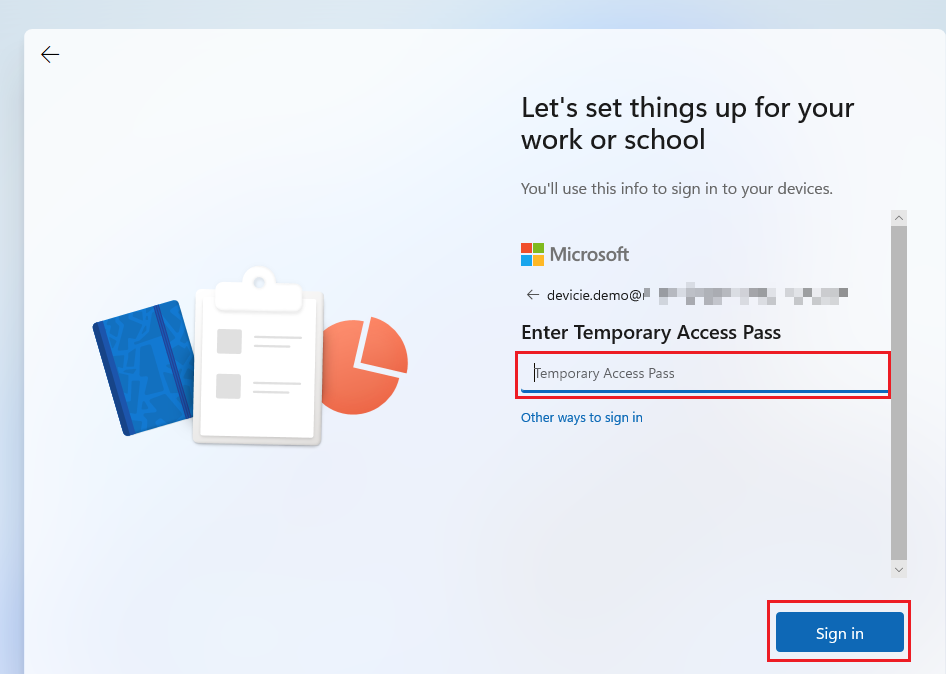
2. After logging with the username and Temporary Access Pass, this will load the ESP.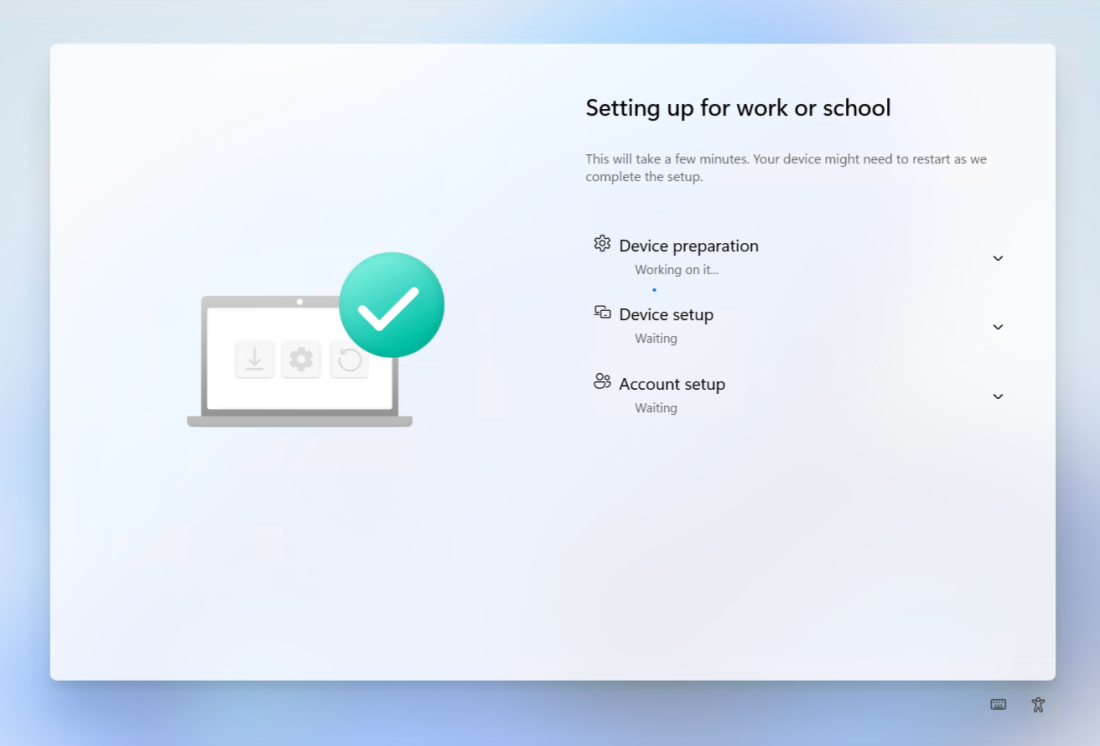
3. After Device setup is done, it will then load to this screen.
You will have the option to choose to:
- Sign in to domainname.com
- Sign in to another domain
- Sign in options
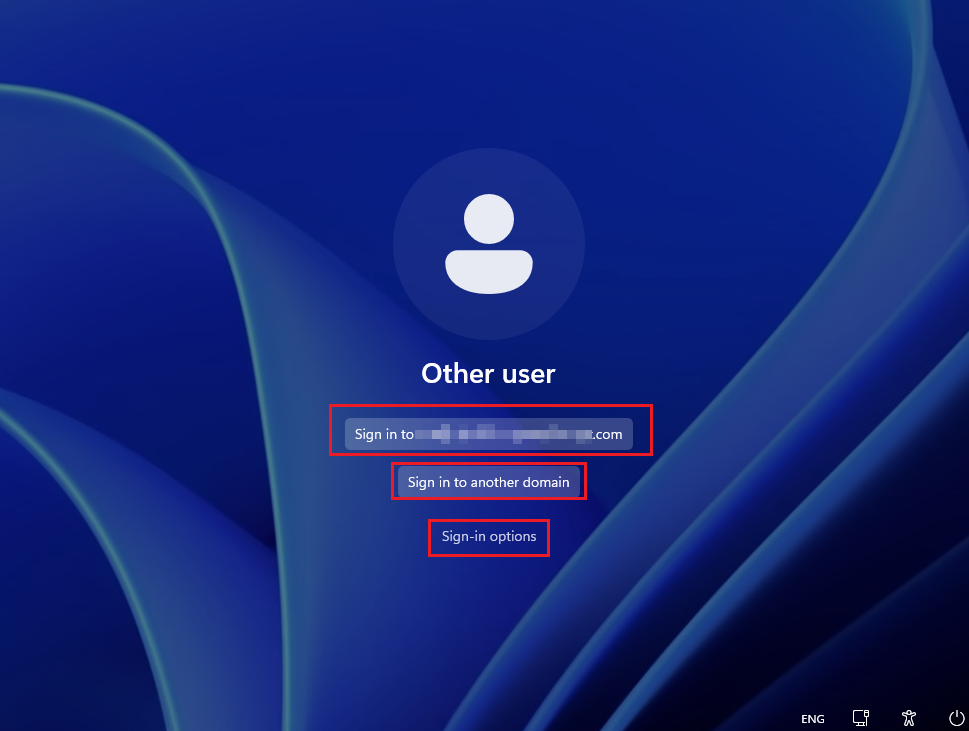
With Sign in to domainname.com, it will prompt with a box to login with the username followed by TAPs to login to the desktop.
With Sign in to another domain, it will prompt with a box to login with the username followed by TAPs to login to the desktop.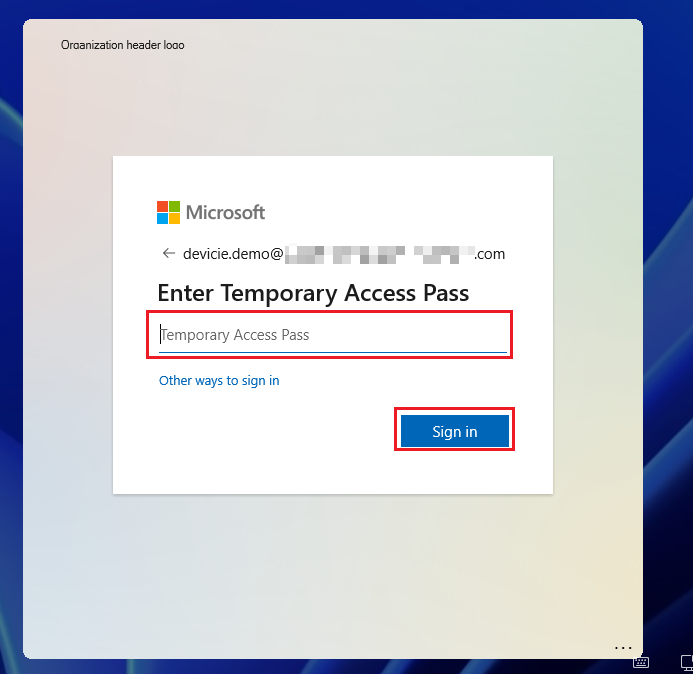
With Sign in options, it will prompt with a box to login with the username followed by normal login password to the desktop.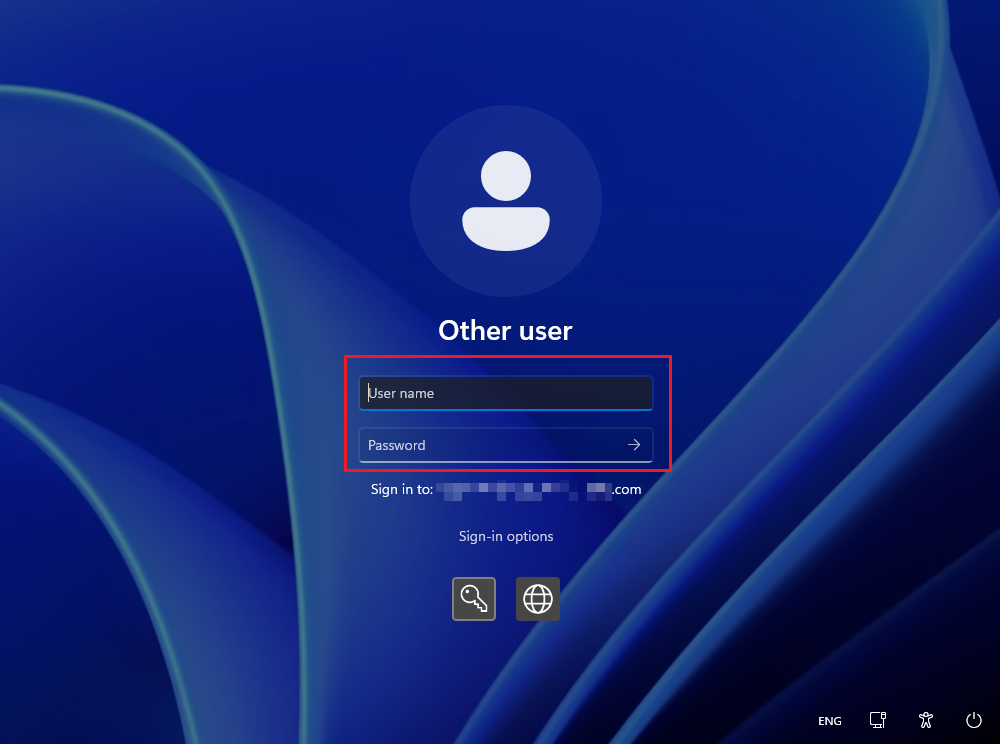
4. It will then log into desktop screen.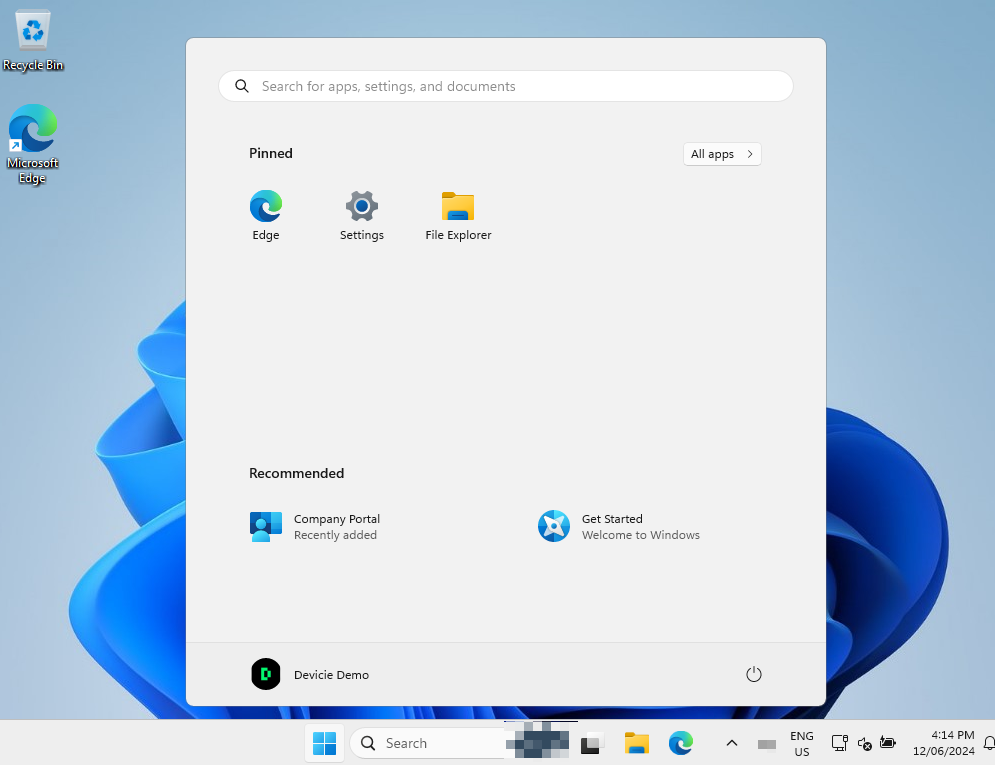
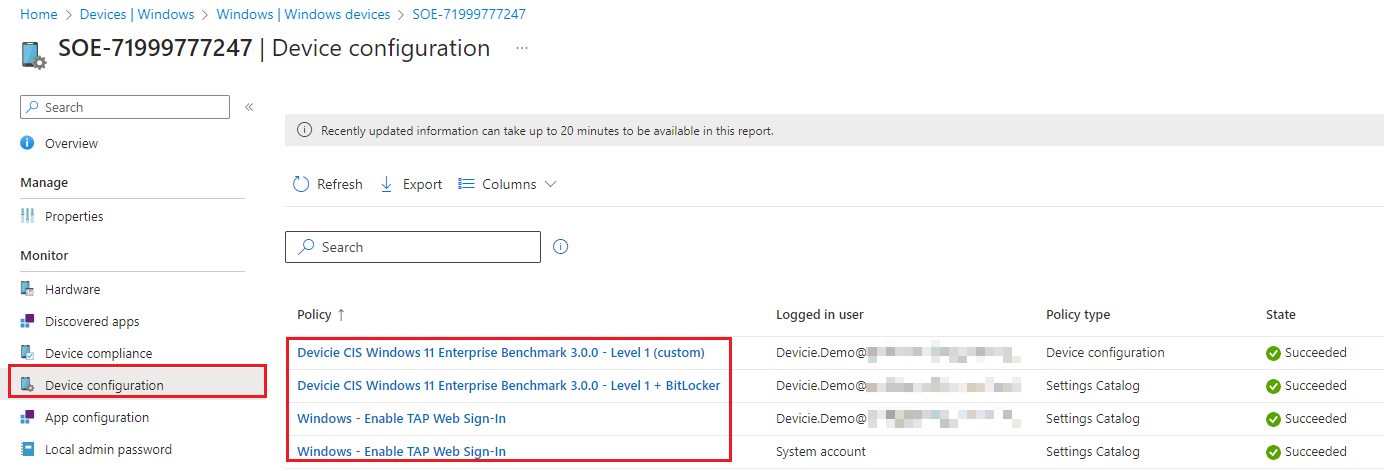
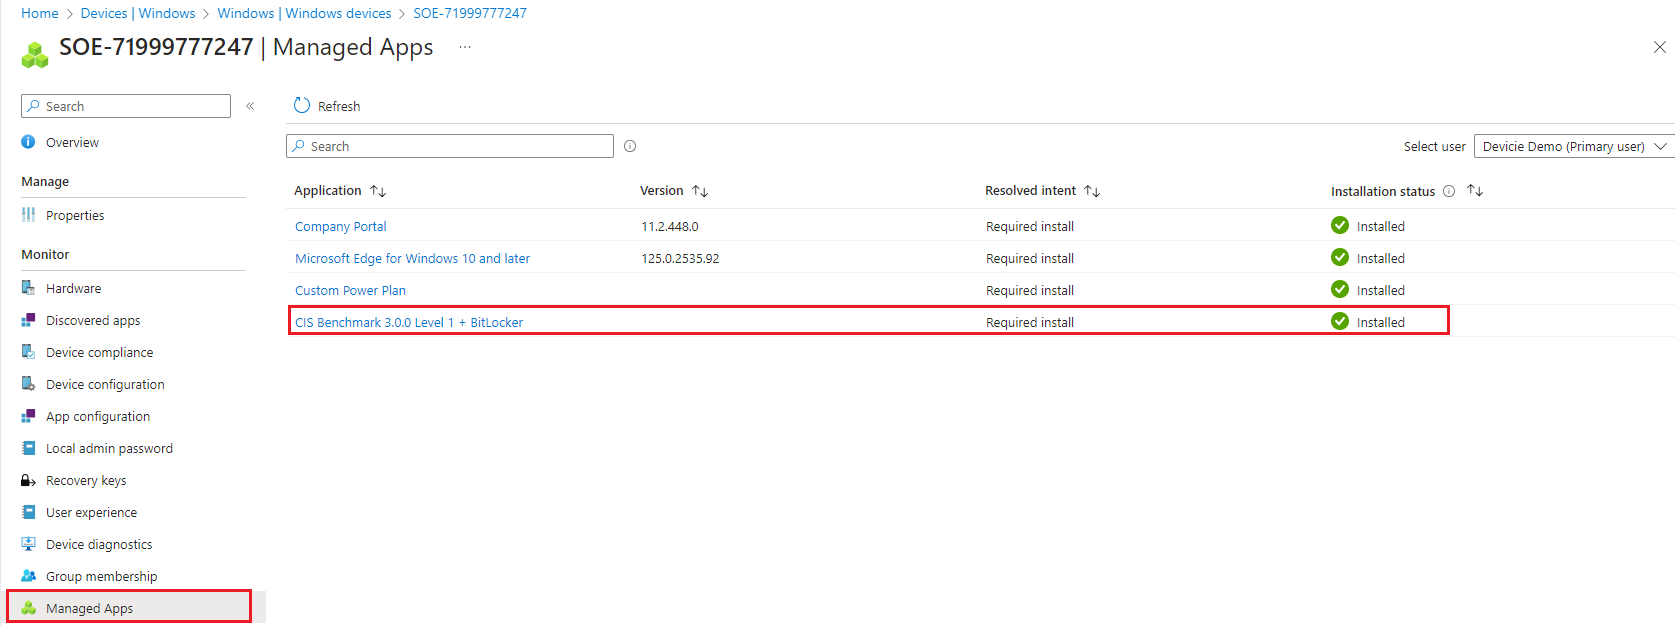
5. Which it has successfully applied all CIS 3.0 settings and Win32 app as part of the autopilot process with TAPS.