Overview
This knowledge base article provides step-by-step instructions on how to setup Shared PC with CIS 3.0.0 L1 + BL.
Devicie will use our automation to push out the CIS 3.0.0 L1 + BL policies and Win32 app to your tenant.
The following will be covered in this article:
- Shared PC: Enrollment Status Page
- Shared PC: Windows Autopilot Deployment Profile
- Shared PC: Power Management Profile
- Shared PC: Multi-User Profile
To setup OneDrive working on Shared PC, refer to KB: Setting up OneDrive enabled for Shared PC
Enrollment Status Page
1. By navigating to Enrollment Status Page, select Create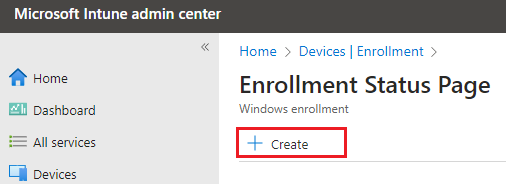
2. Under Basics, enter a name of the Enrolment Status Page like: ESP - Kiosk. Then select Next.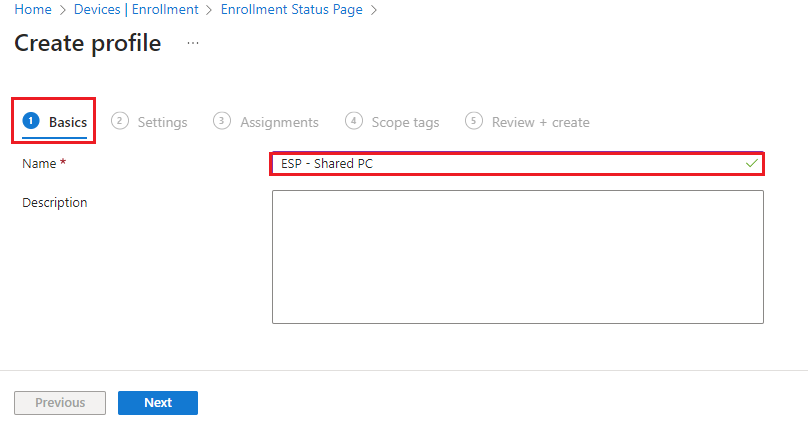
3. Under Settings, select Show app and profile configuration progress to Yes.
Select the other settings highlighted in red.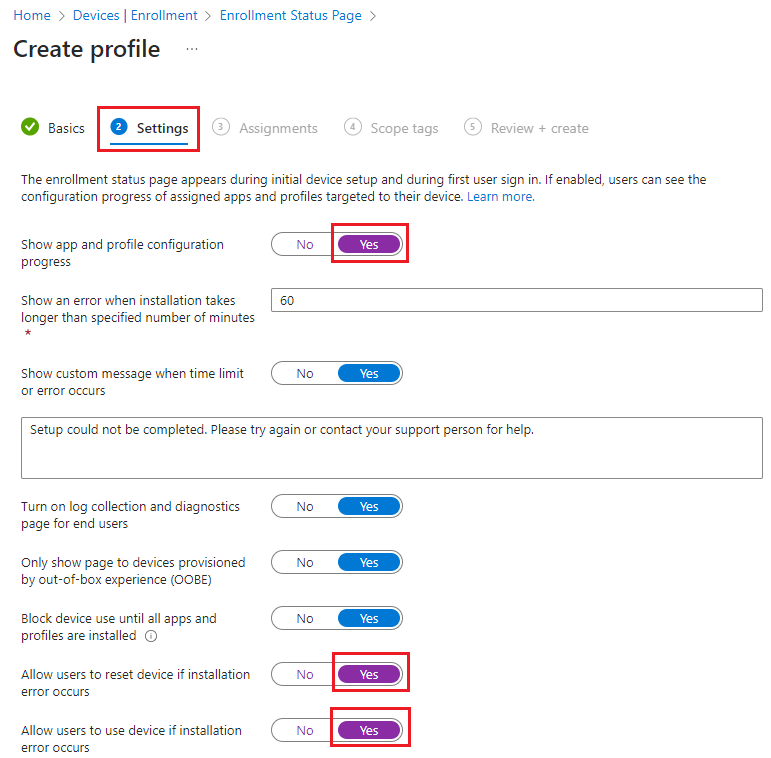
4. Under Block device use until required apps are installed if they are assigned to the user/device, click on Select apps, then choose the required.
5. Under Assignments, select your desired Kiosk Group. Then select Next.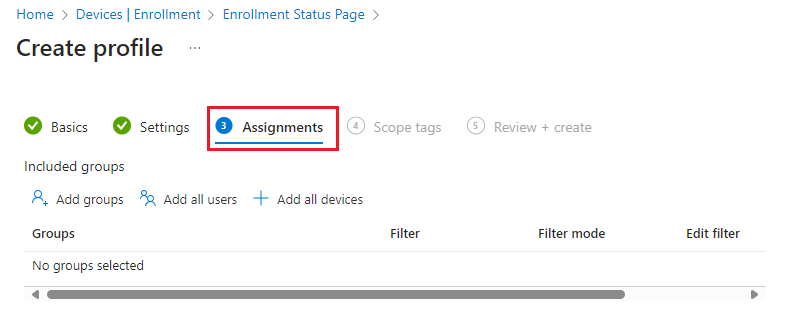
6. Under Scope tags, leave as default and select Next.
7. Under Review + create, review any settings and select Create.
Windows Autopilot Deployment Profile
1. By navigating to Windows Autopilot Deployment profile, select Create Profile then select Windows PC. Then select Next.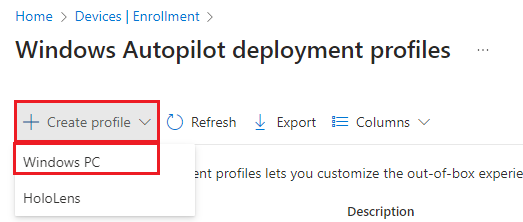
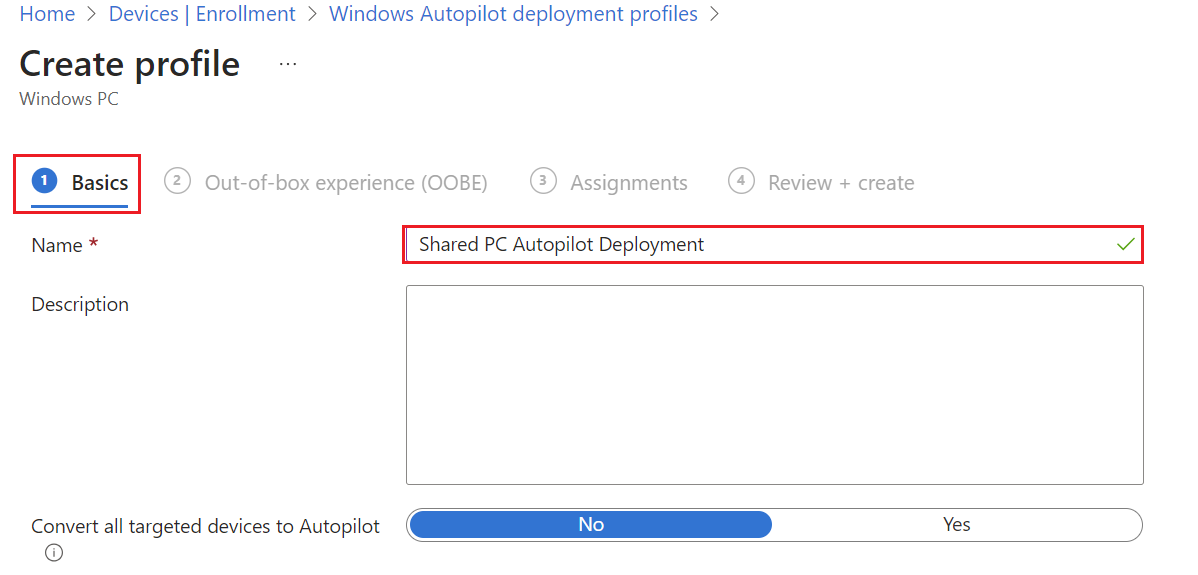
2. Under Basics, enter a name for the deployment profile. Then select Next.
3. Under Out-of-box experience (OOBE), configure the following:
Deployment mode: Self-deploying
Language (Region): Operating system default (Optional to change to English: Australia)
Automatically configure keyboard: Yes
Apply device name template: Yes
Enter a name: SHARED-%SERIAL%
Then select Next.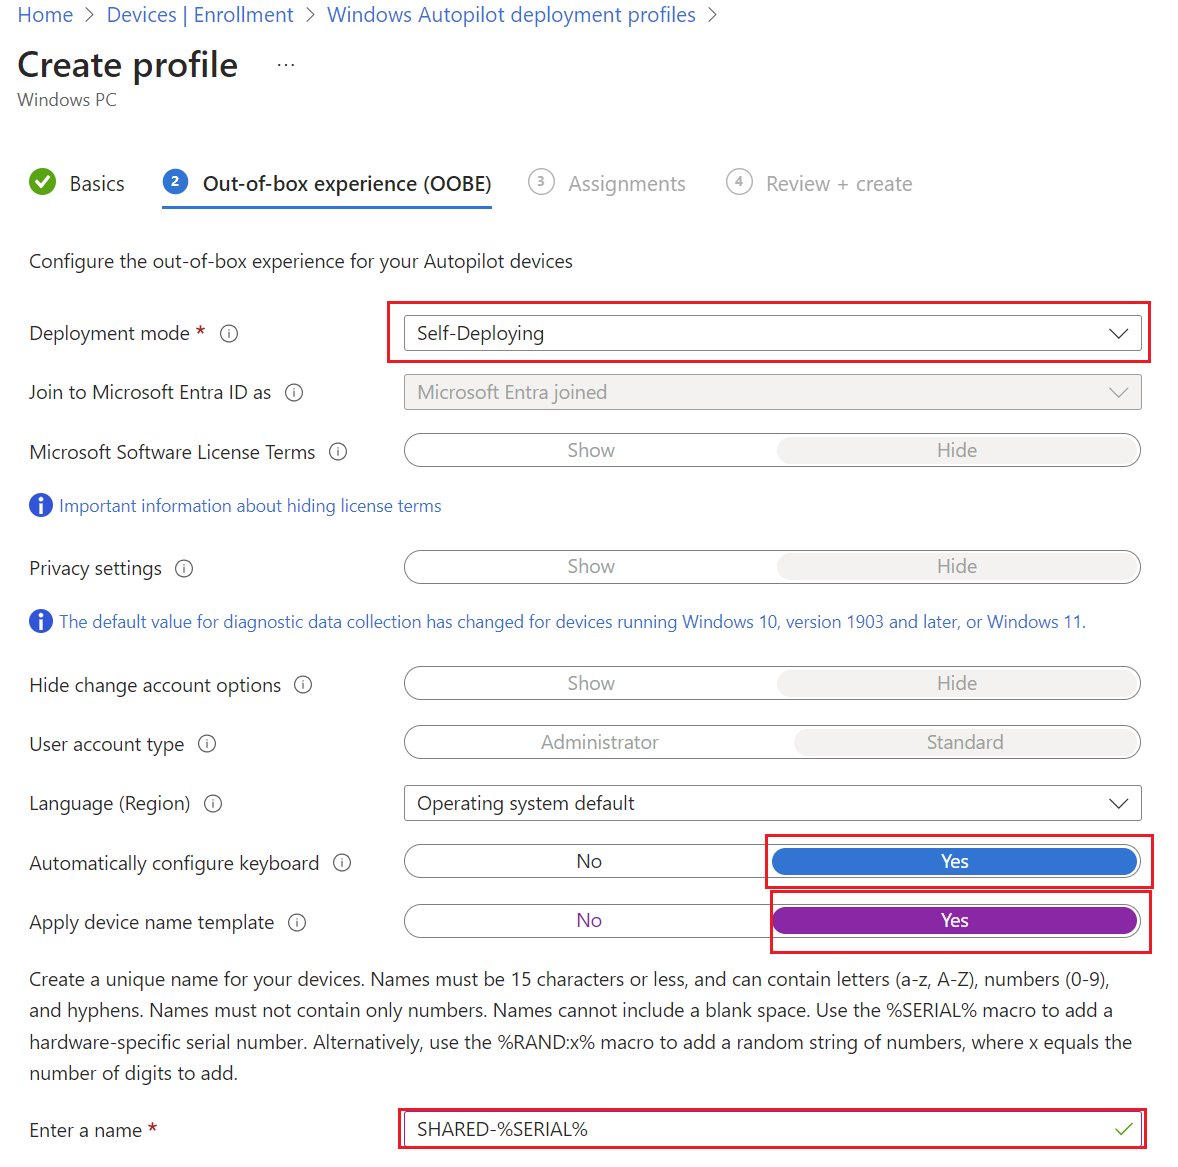
4. Under Assignments, select the required Shared PC assignments then select Next.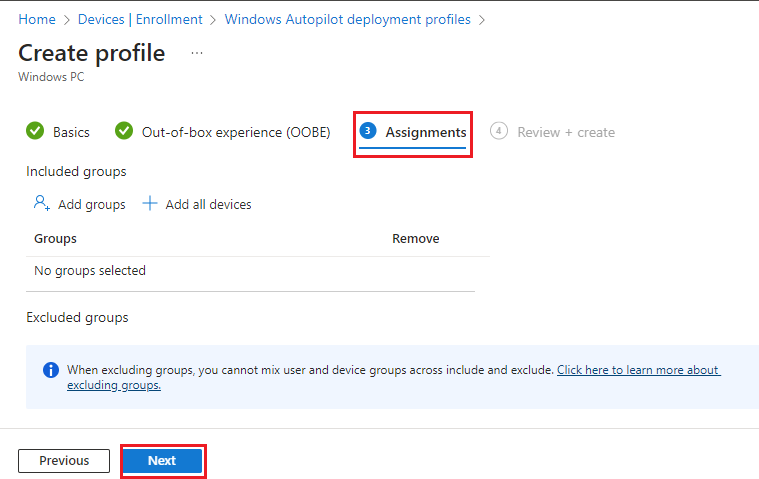
5. Under Review + Create, review the settings then select Create.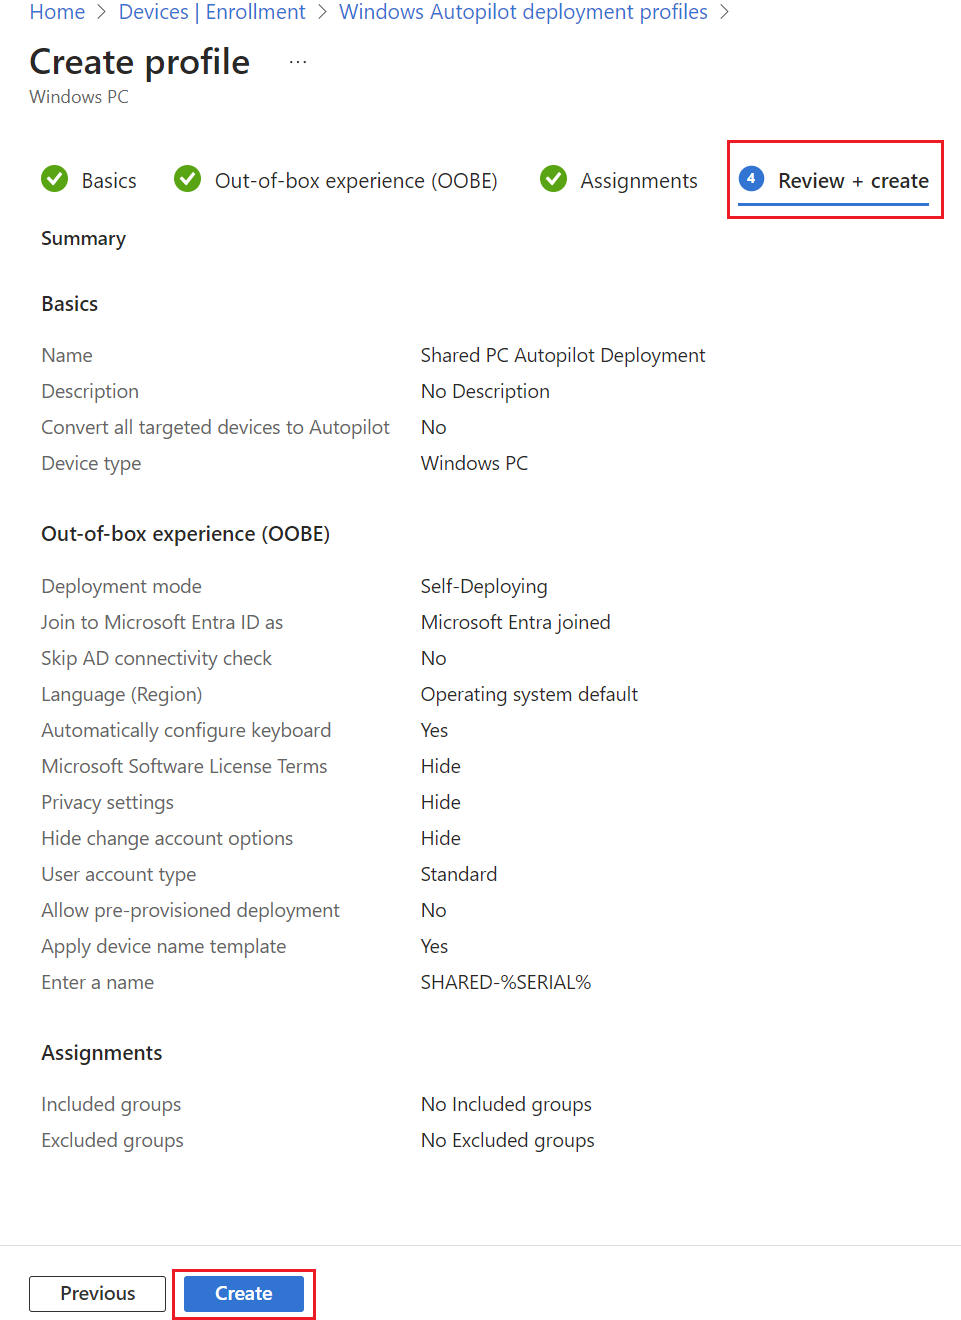
Power Management Profile
1. By navigating to Windows Configuration Profiles, select Create then select New Policy then select By platform: Windows 10 and later and Profile type: Settings Catalog then select Create.
2. Under Basics tab, enter the following:
Name: Shared PC - Power Management
Description: Shared PC - Power Management
Then select Next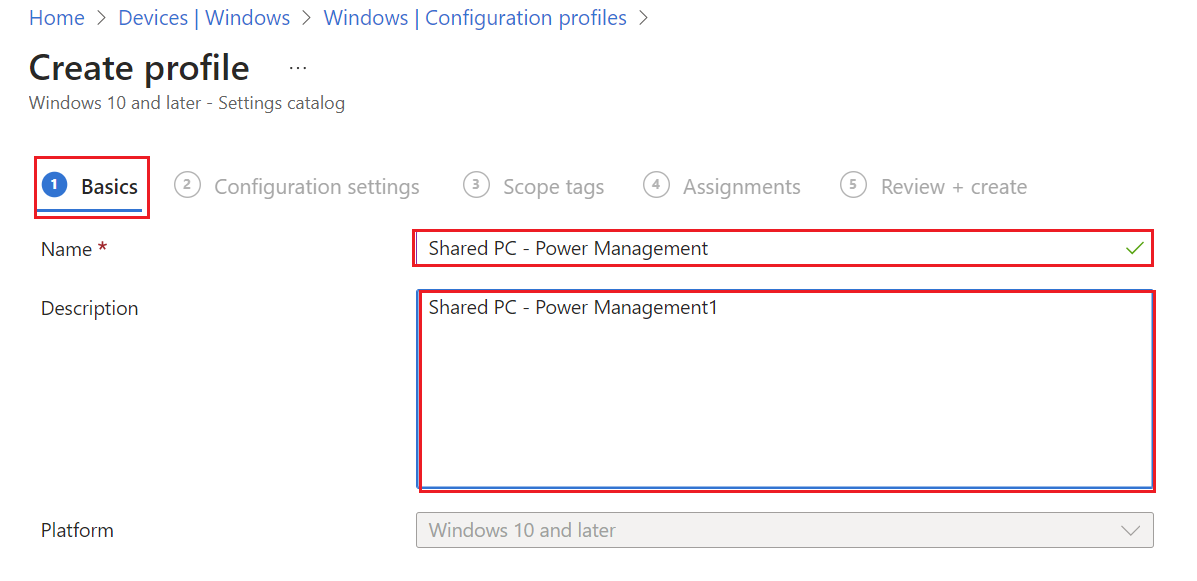
3. Under Configuration Settings tab, select Add Setting. In the search for a setting, enter in: Power Management.
Then select the following:
Administrative Templates\System\Power Management
Administrative Templates\System\Power Management\Hard Disk Settings
Administrative Templates\System\Power Management\Sleep Settings
Administrative Templates\System\Power Management\Video and Display Settings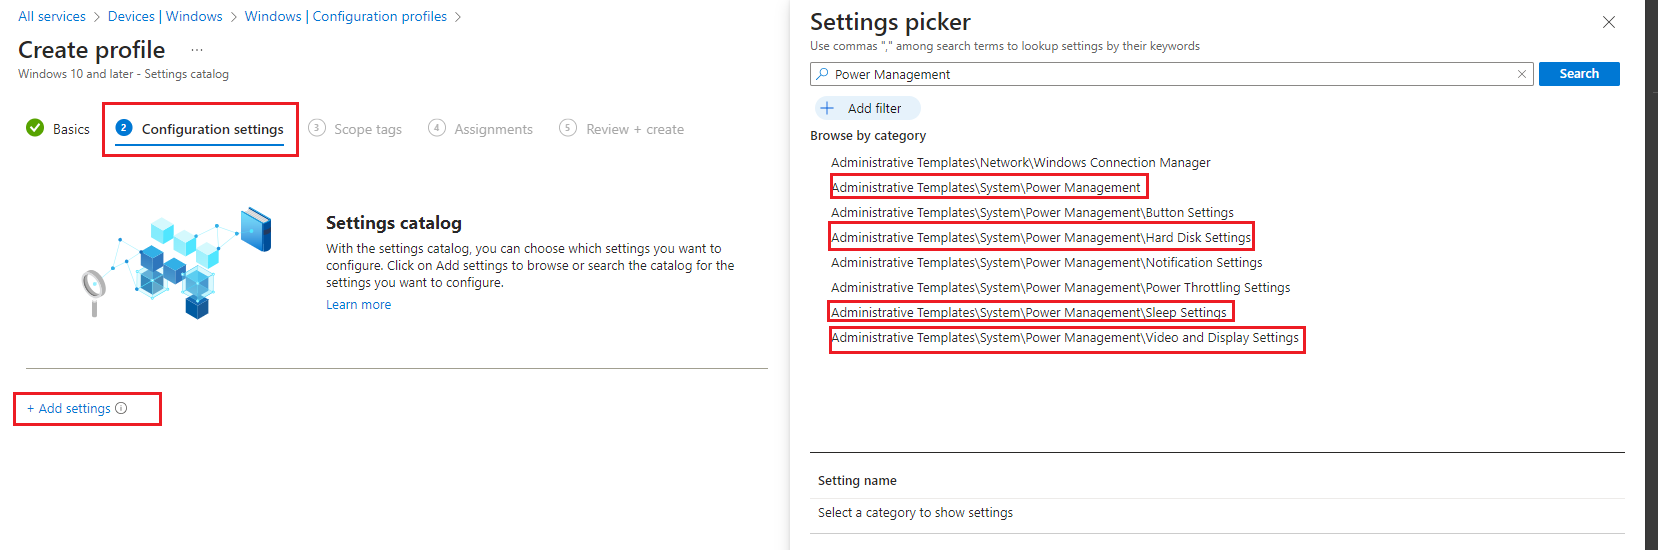
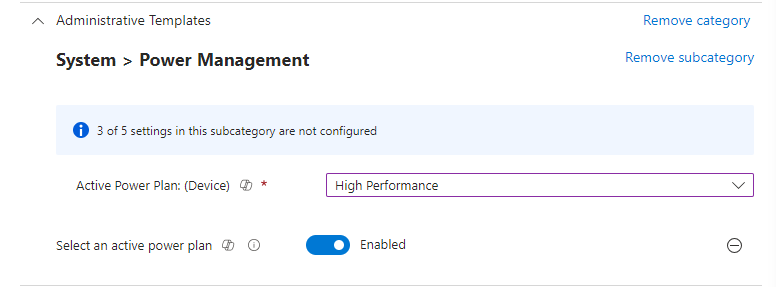
Under Administrative Templates\System\Power Management, select the following:
- Select an active power plan as Enabled
- Select Action Power Plan (Device): High Performance
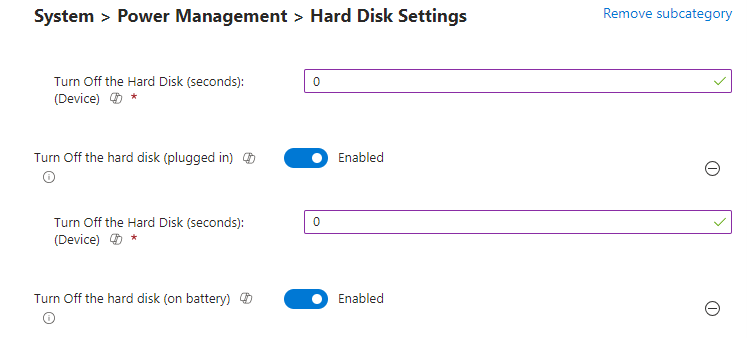
Under Administrative Templates\System\Power Management\Hard Disk Settings, select the following:
- Turn Off the hard disk (on battery) as Enabled
- Turn Off the Hard disk (seconds) Device: 0
- Turn Off the hard disk (plugged in) as Enabled
- Turn Off the Hard disk (seconds) Device: 0
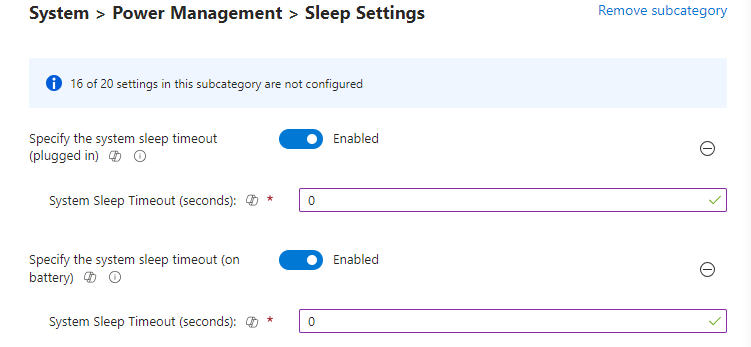
Under Administrative Templates\System\Power Management\Sleep Settings
- Specify the system sleep timeout (on battery) as Enabled
- System Sleep Timeout (seconds): 0
- Specify the system sleep timeout (plugged in) as Enabled
- System Sleep Timeout (seconds): 0
Under Administrative Templates\System\Power Management\Video and Display Settings, select the following:
- Turn off the display (on battery) as Enabled
- When plugged in, turn display off after (seconds): 0
- Turn off the display (plugged in) as Enabled
- On battery power, turn display off after (seconds): 0

Then select Next.
4. Under Scope tags, leave as default then select Next.
5. Under Assignments, select your required Kiosk group then select Next.
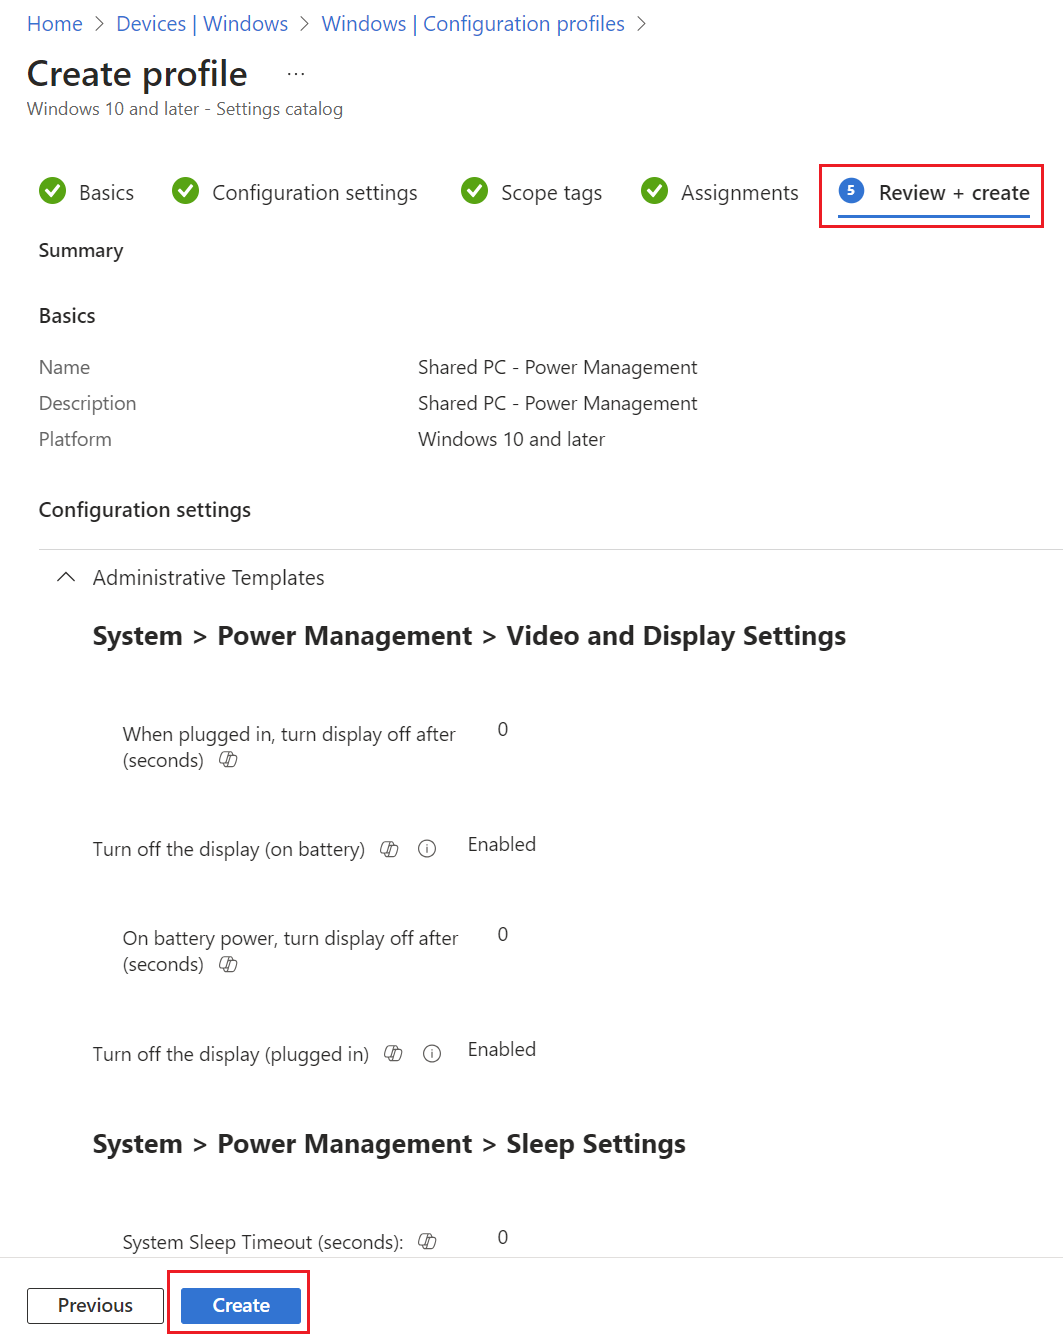
6. Under Review + create, review your settings then select Next.
Shared PC Multi-User Profile
1. By navigating to Windows Configuration Profiles, select Create then select New Policy then select By platform: Windows 10 and later and Profile type: Settings Catalog then select Create.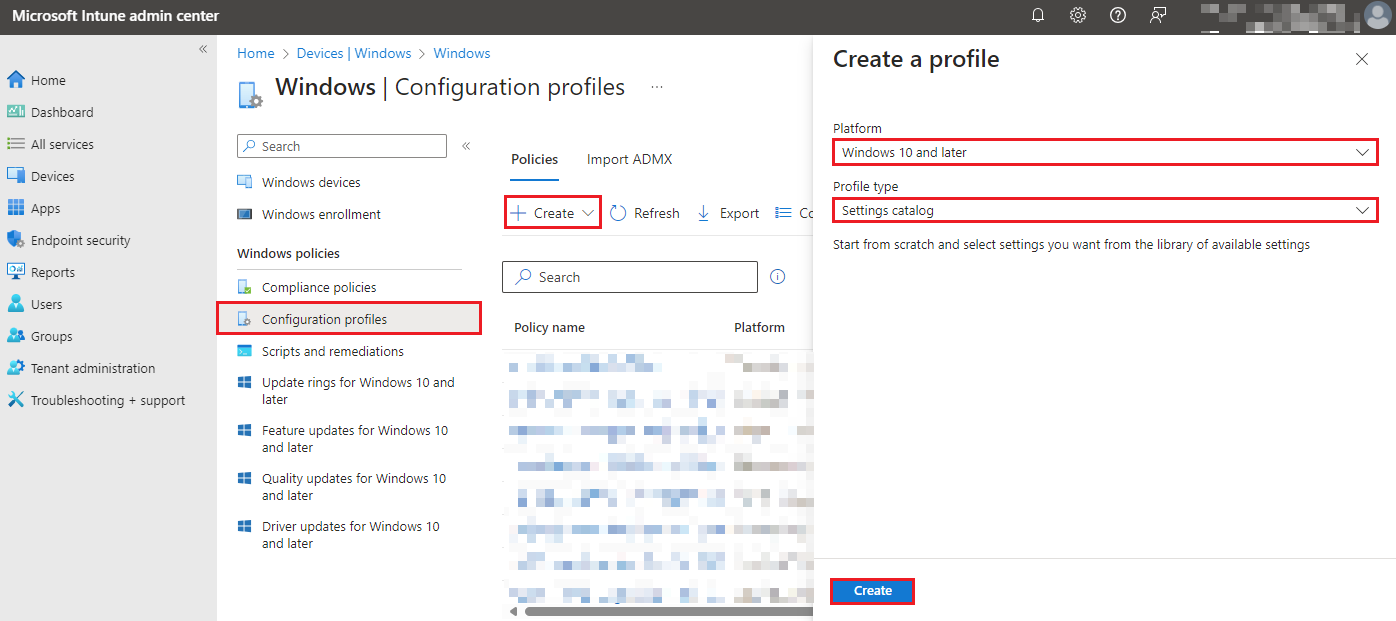
2. Under Basics tab, enter the following:
Name: Shared PC - Multi-User Profile
Description: Shared PC - Multi-User Profile
Then select Next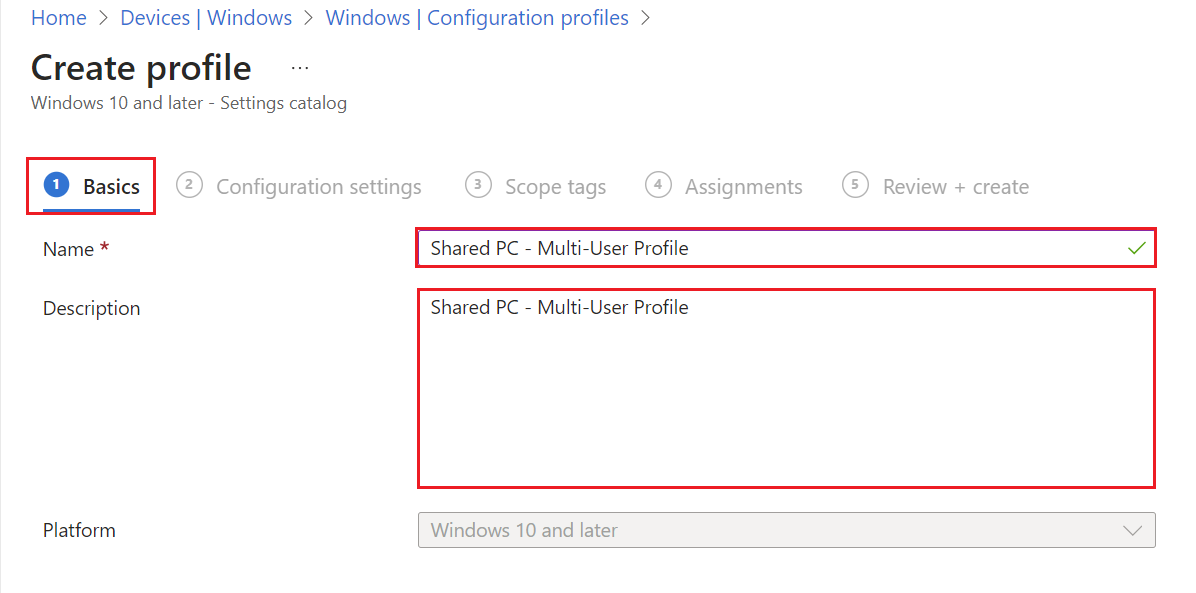
3. Under Configuration Settings tab, select Add Setting. In the search for a setting, enter in: Shared PC.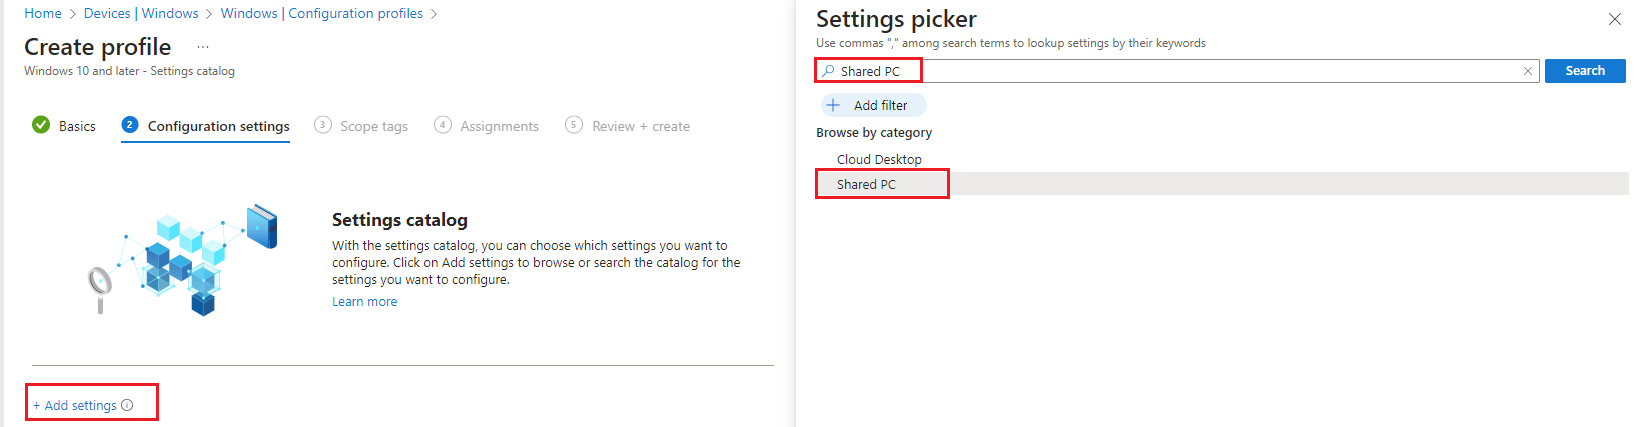
Then select the following:
- Account Model: Guest and Domain
- Deletion Policy: Delete at disk space threshold and inactive threshold
- Enable Account Manager: True
- Enabled Shared PC Mode: False
- Inactive Threshold: 360 (days)
- Maintenance Start time: 130 (Default is 0 which is 12 AM counted in minutes)
- Set Edu Policies: True
- Set Power Policies: True
- Sign In On Resume: True

Then select Next.
4. Under Scope tags, leave as default then select Next.
5. Under Assignments, select your required Kiosk group then select Next.
6. Under Review + create, review your settings then select Next.