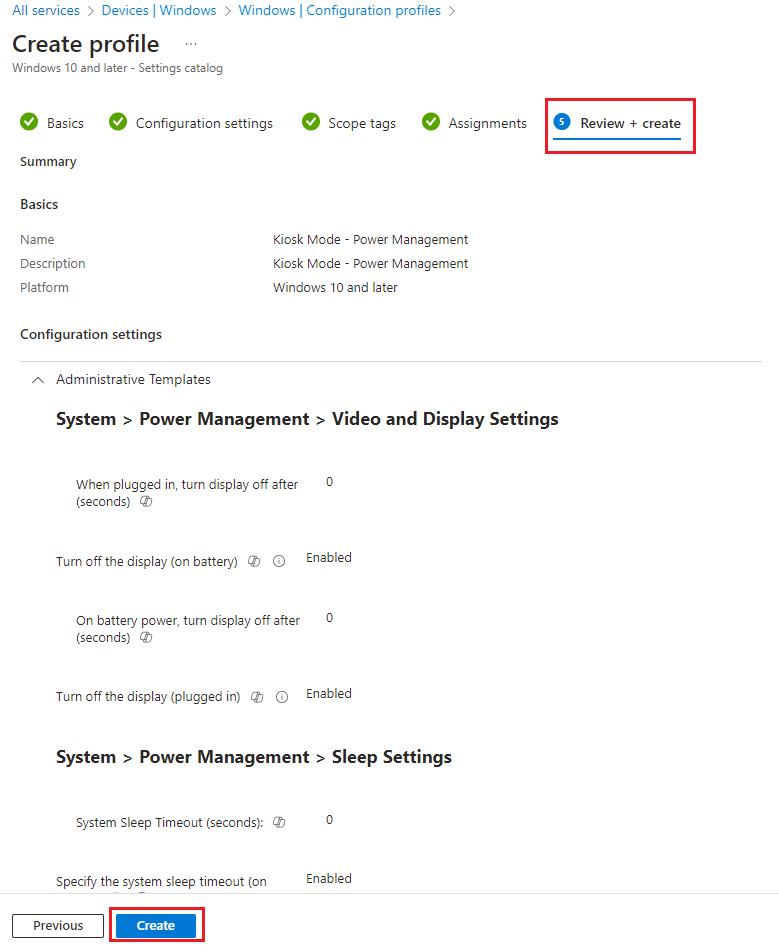
Setting up Multi-App Kiosk Mode (Local User with Assigned Access) with CIS 3.0.0 L1 + BL
Overview
This knowledge base article provides step-by-step instructions on how to setup Multi-App Kiosk with CIS 3.0.0 L1 + BL. This article includes the local user feature where a local user auto logon account is created, deployed and automatically logons on each restart.
Excluded settings from CIS 3.0.0 for Kiosk
To find out what settings need to be excluded from CIS 3.0.0 for Multiple-App Kiosk need to work What CIS 3.0.0 settings are excluded from Single or Multi-App Kiosk? – Devicie Support Home.
Devicie will use our automation to push out the CIS 3.0.0 L1 + BL policies and Win32 app to your tenant.
The following will be covered in this article:
- Create Device Configuration: Assigned Access (Local User)
- Create Win32 App for Local User Account
- Deploy Win32 Apps as Required
- Create Enrolment Status Page (ESP)
- Create Windows Autopilot Deployment Profile
- Create Device Configuration Profile: Power Management
Create Device Configuration: Assigned Access (Local User)
1. By navigating to Windows Configuration Profiles, select Create then select New Policy then select By platform: Windows 10 and later and Profile type: Templates then select Custom then select Create.

2. Under Basics tab, enter the following:
Name: Kiosk Mode - Assigned Access - Local User
Description: Kiosk Mode - Assigned Access - Local User
Then select Next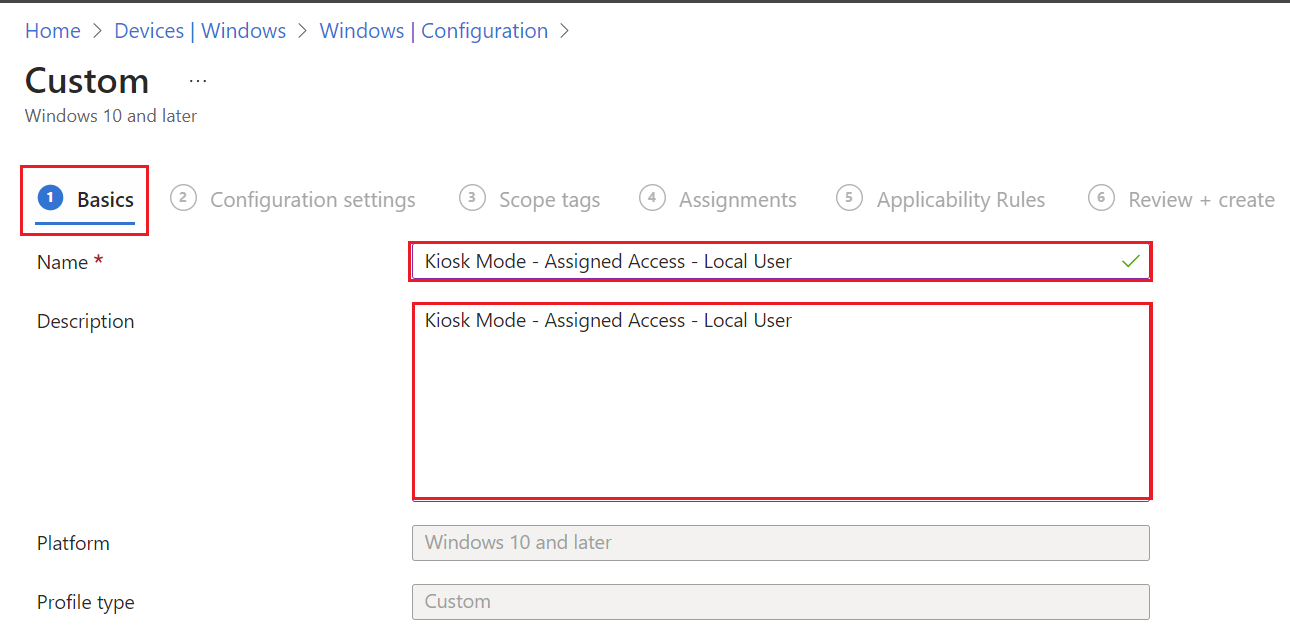
3. Under Configuration Settings tab, select Add Setting.
Note: In the XML, update it according to what name you desire for it to show. In this example, I have entered Kiosk (as the local user account).
<Config>
<Account>Kiosk</Account>
<DefaultProfile Id="{bceca31b-867e-4694-ad7d-cfc680019be3}" />
</Config>
The enter the following:
Name: AssignedAccess
Description: Not Configured
OMA-URI: ./Vendor/MSFT/AssignedAccess/Configuration
Data type: String (XML file)
Custom XML: Upload the XML
Save the following XML as Kiosk-Autologon-kiosklocaluser.xml
<?xml version="1.0" encoding="utf-8" ?>
<AssignedAccessConfiguration
xmlns="http://schemas.microsoft.com/AssignedAccess/2017/config"
xmlns:win11="http://schemas.microsoft.com/AssignedAccess/2022/config"
xmlns:rs5="http://schemas.microsoft.com/AssignedAccess/201810/config">
<Profiles>
<Profile Id="{bceca31b-867e-4694-ad7d-cfc680019be3}">
<AllAppsList>
<AllowedApps>
<App DesktopAppPath="%ProgramFiles%\Mozilla Firefox\firefox.exe" />
<App DesktopAppPath="%ProgramFiles%\Google\Chrome\Application\chrome.exe" />
<App DesktopAppPath="%PROGRAMFILES(X86)%\Microsoft\Edge\Application\msedge.exe" />
</AllowedApps>
</AllAppsList>
<win11:StartPins>
<![CDATA[
{ "pinnedList":[
{"desktopAppLink":"%ProgramFiles%\\Mozilla Firefox\\firefox.exe"},
{"desktopAppLink":"%ProgramFiles%\\Google\\Chrome\\Application\\chrome.exe"},
{"desktopAppLink":"%PROGRAMFILES(X86)%\\Microsoft\\Edge\\Application\\msedge.exe"}
] }
]]>
</win11:StartPins>
<Taskbar ShowTaskbar="true"/>
</Profile>
</Profiles>
<Configs>
<Config>
<Account>KioskUser</Account>
<DefaultProfile Id="{bceca31b-867e-4694-ad7d-cfc680019be3}" />
</Config>
</Configs>
</AssignedAccessConfiguration>
It should look like this: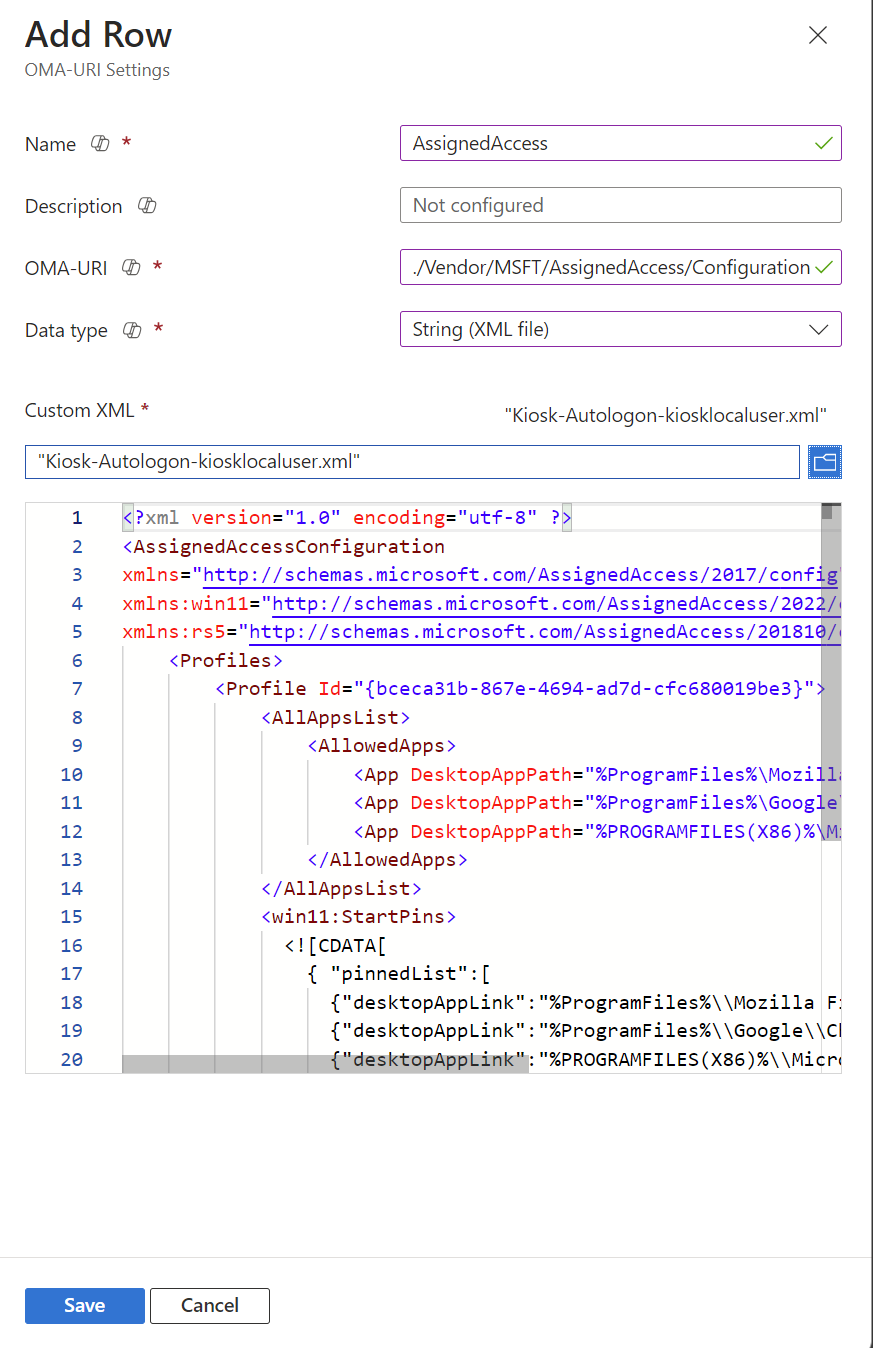
Select Save.
3. Under Scope tags, tab, leave as default and select Next.
4. Under Assignments, select the required group and select Next.
5. Under Applicability Rules, leave as default and select Next.
6. Under Review + create, review the settings then select Create.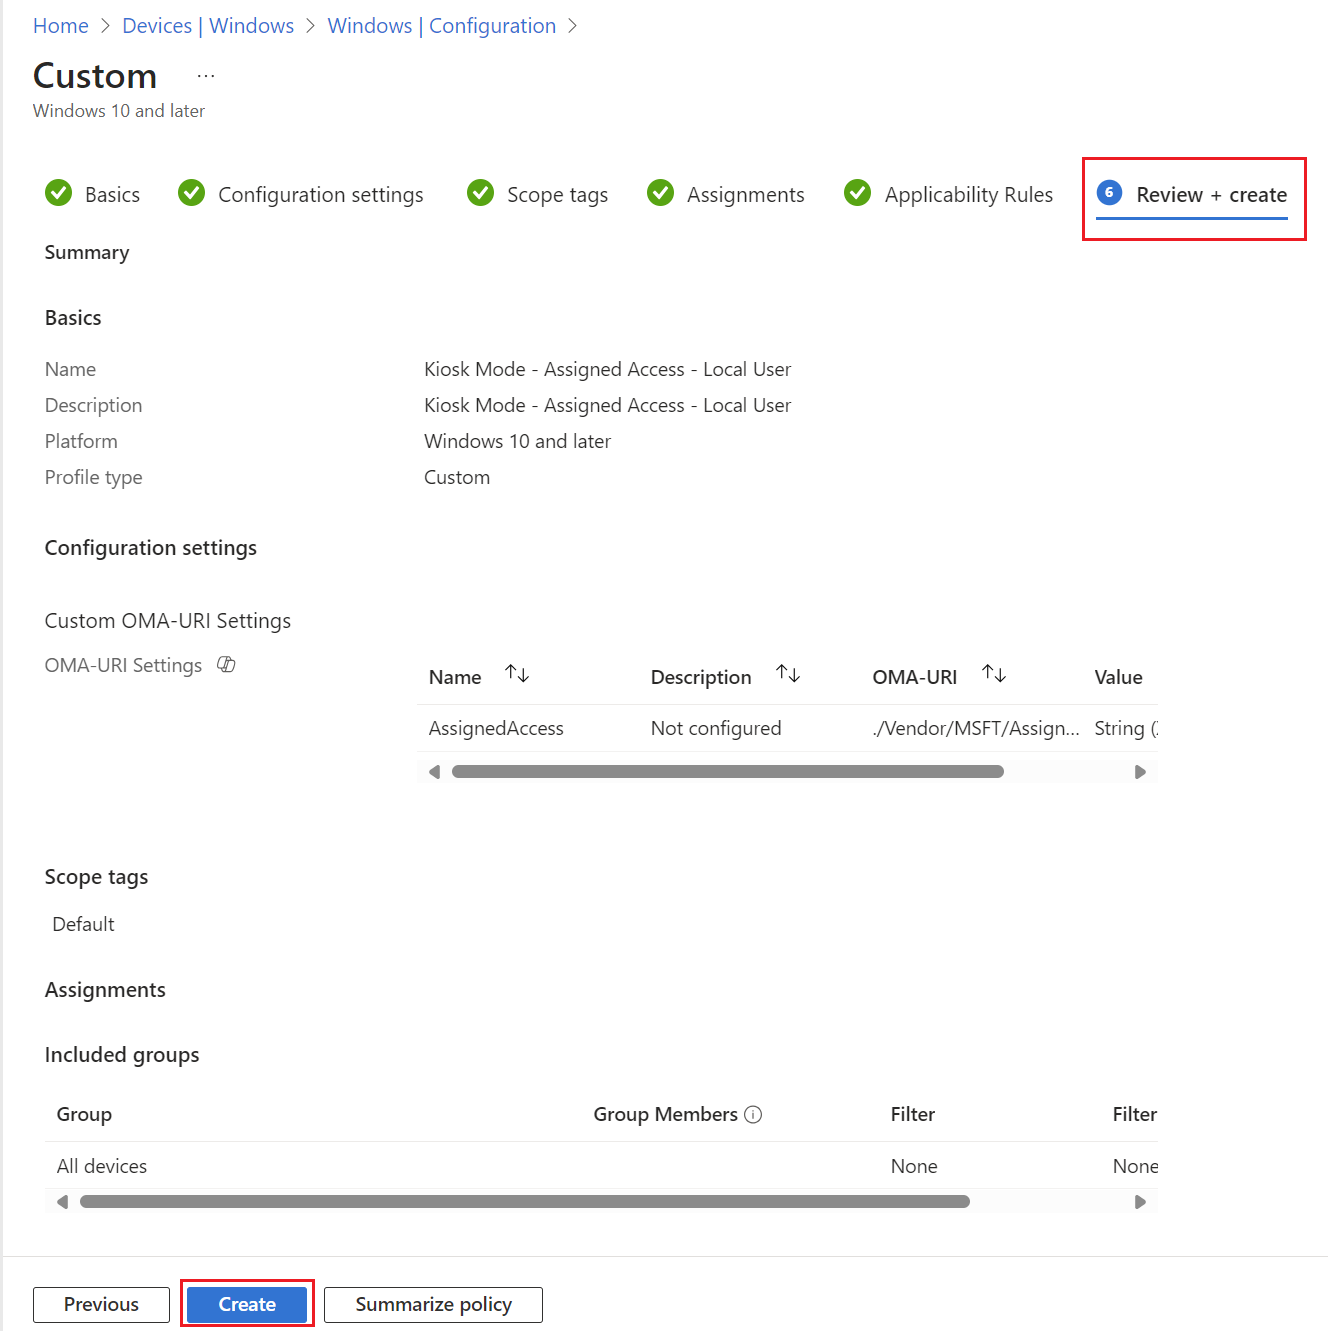
Create Win32 App (Local User Account)
1. By creating a Win32 App with a Install.ps1 and Detect.ps1
For Install.ps1, update the changes in:
$username
$password
DefaultUserName
DefaultPassword
LastUsedUsername
# Create Username and Password
$username = "KioskUser"
$password = ConvertTo-SecureString "ZEz8oJkj" -AsPlainText -Force
# Creating the user
New-LocalUser -Name "$username" -Password $password -FullName "$username" -Description "Kiosk Admin Account"
Add-LocalGroupMember -Group "Administrators" -Member $username
Set-LocalUser -Name "$username" -PasswordNeverExpires 1

if((Test-Path -LiteralPath "HKLM:\SOFTWARE\Microsoft\Windows NT\CurrentVersion\Winlogon") -ne $true) { New-Item "HKLM:\SOFTWARE\Microsoft\Windows NT\CurrentVersion\Winlogon" -force -ea SilentlyContinue };
New-ItemProperty -LiteralPath 'HKLM:\SOFTWARE\Microsoft\Windows NT\CurrentVersion\Winlogon' -Name "DefaultDomainName" -Value ".\" -PropertyType String -Force -ea SilentlyContinue;
New-ItemProperty -LiteralPath 'HKLM:\SOFTWARE\Microsoft\Windows NT\CurrentVersion\Winlogon' -Name "DefaultUserName" -Value ".\KioskUser" -PropertyType String -Force -ea SilentlyContinue;
New-ItemProperty -LiteralPath 'HKLM:\SOFTWARE\Microsoft\Windows NT\CurrentVersion\Winlogon' -Name "AutoLogonCount" -Value "1" -PropertyType String -Force -ea SilentlyContinue;
New-ItemProperty -LiteralPath 'HKLM:\SOFTWARE\Microsoft\Windows NT\CurrentVersion\Winlogon' -Name "AutoAdminLogon" -Value "1" -PropertyType String -Force -ea SilentlyContinue;
New-ItemProperty -LiteralPath 'HKLM:\SOFTWARE\Microsoft\Windows NT\CurrentVersion\Winlogon' -Name "ForceAutoLogon" -Value "1" -PropertyType DWord -Force -ea SilentlyContinue;
New-ItemProperty -LiteralPath 'HKLM:\SOFTWARE\Microsoft\Windows NT\CurrentVersion\Winlogon' -Name "DefaultPassword" -Value "ZEz8oJkj" -PropertyType String -Force -ea SilentlyContinue;
New-ItemProperty -LiteralPath 'HKLM:\SOFTWARE\Microsoft\Windows NT\CurrentVersion\Winlogon' -Name "LastUsedUsername" -Value "KioskUser" -PropertyType String -Force -ea SilentlyContinue;

Restart-Computer -Force
For Detect.ps1, update the changes for $value
$Path = "HKLM:\SOFTWARE\Microsoft\Windows NT\CurrentVersion\Winlogon"
$Name = "DefaultUserName"
$Type = "STRING"
$Value = ".\KioskUser"

Try {
$Registry = Get-ItemProperty -Path $Path -Name $Name -ErrorAction Stop | Select-Object -ExpandProperty $Name
If ($Registry -eq $Value){
Write-Output "Detected"
Exit 0
}

Exit 1
}

Catch {

Exit 1
}
2. Package the scripts using Intune Win32 Packaging Tool.
Where source folder is containing where the scripts are placed.
Where setup file is containing the file that should be converted, that is Install.ps1
Where output folder is containing where the converted file will be located at
Where specify catalog file is set to N.
The output of file will look like this:
3. Navigate to https://intune.microsoft.com then select Apps then select By platform: Windows then select Add.
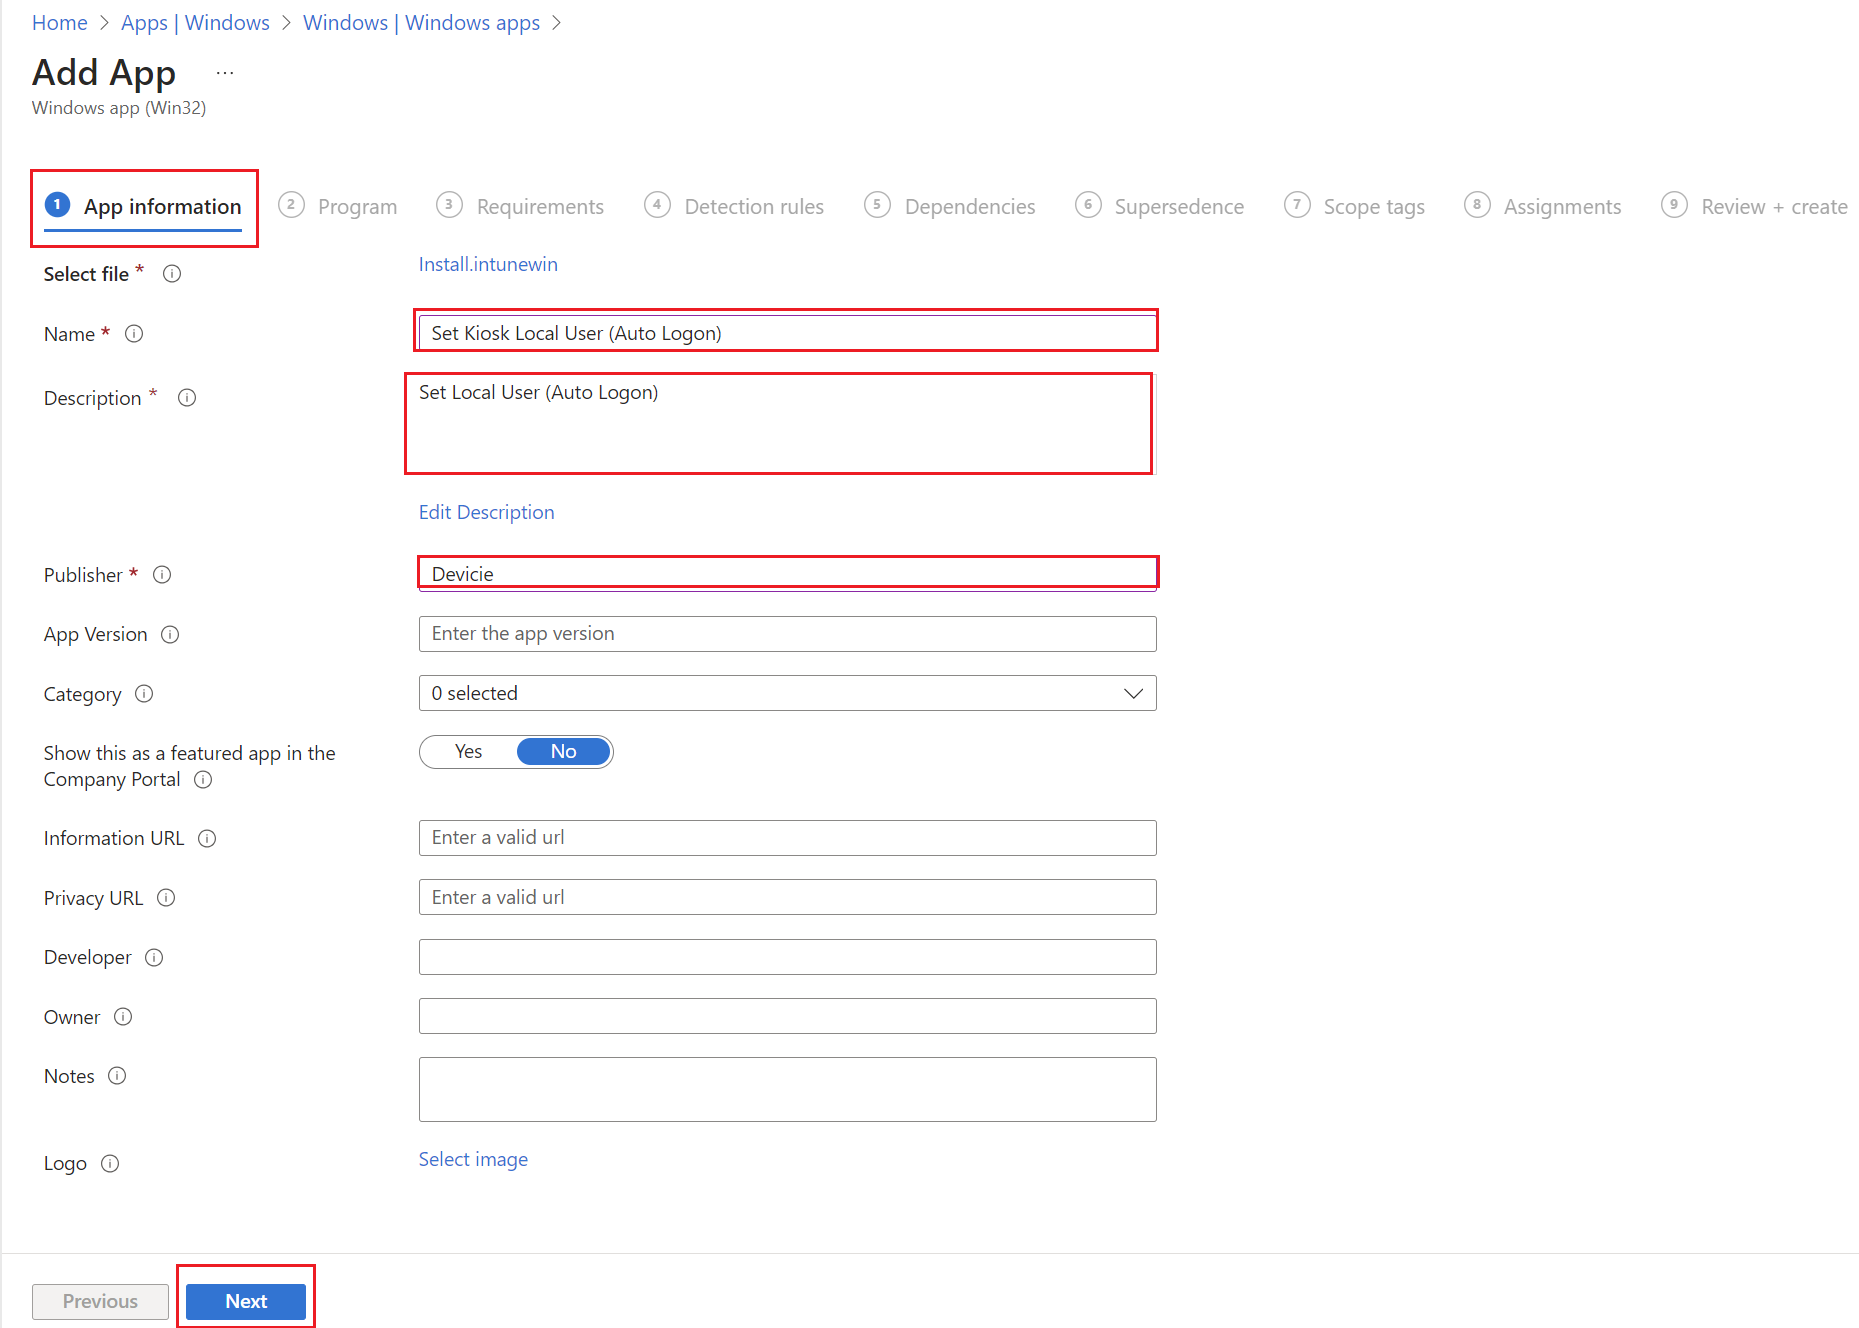
4. Under Program, use the following:
Install command: %windir%\sysnative\windowspowershell\v1.0\powershell.exe -executionPolicy bypass -windowstyle hidden -file .\Install.ps1
Uninstall command: nouninstallcmd
Installation time required (mins): 60
Allow available uninstall: Yes
Install behaviour: Yes
Device restart behaviour: Determine behaviour based on return codes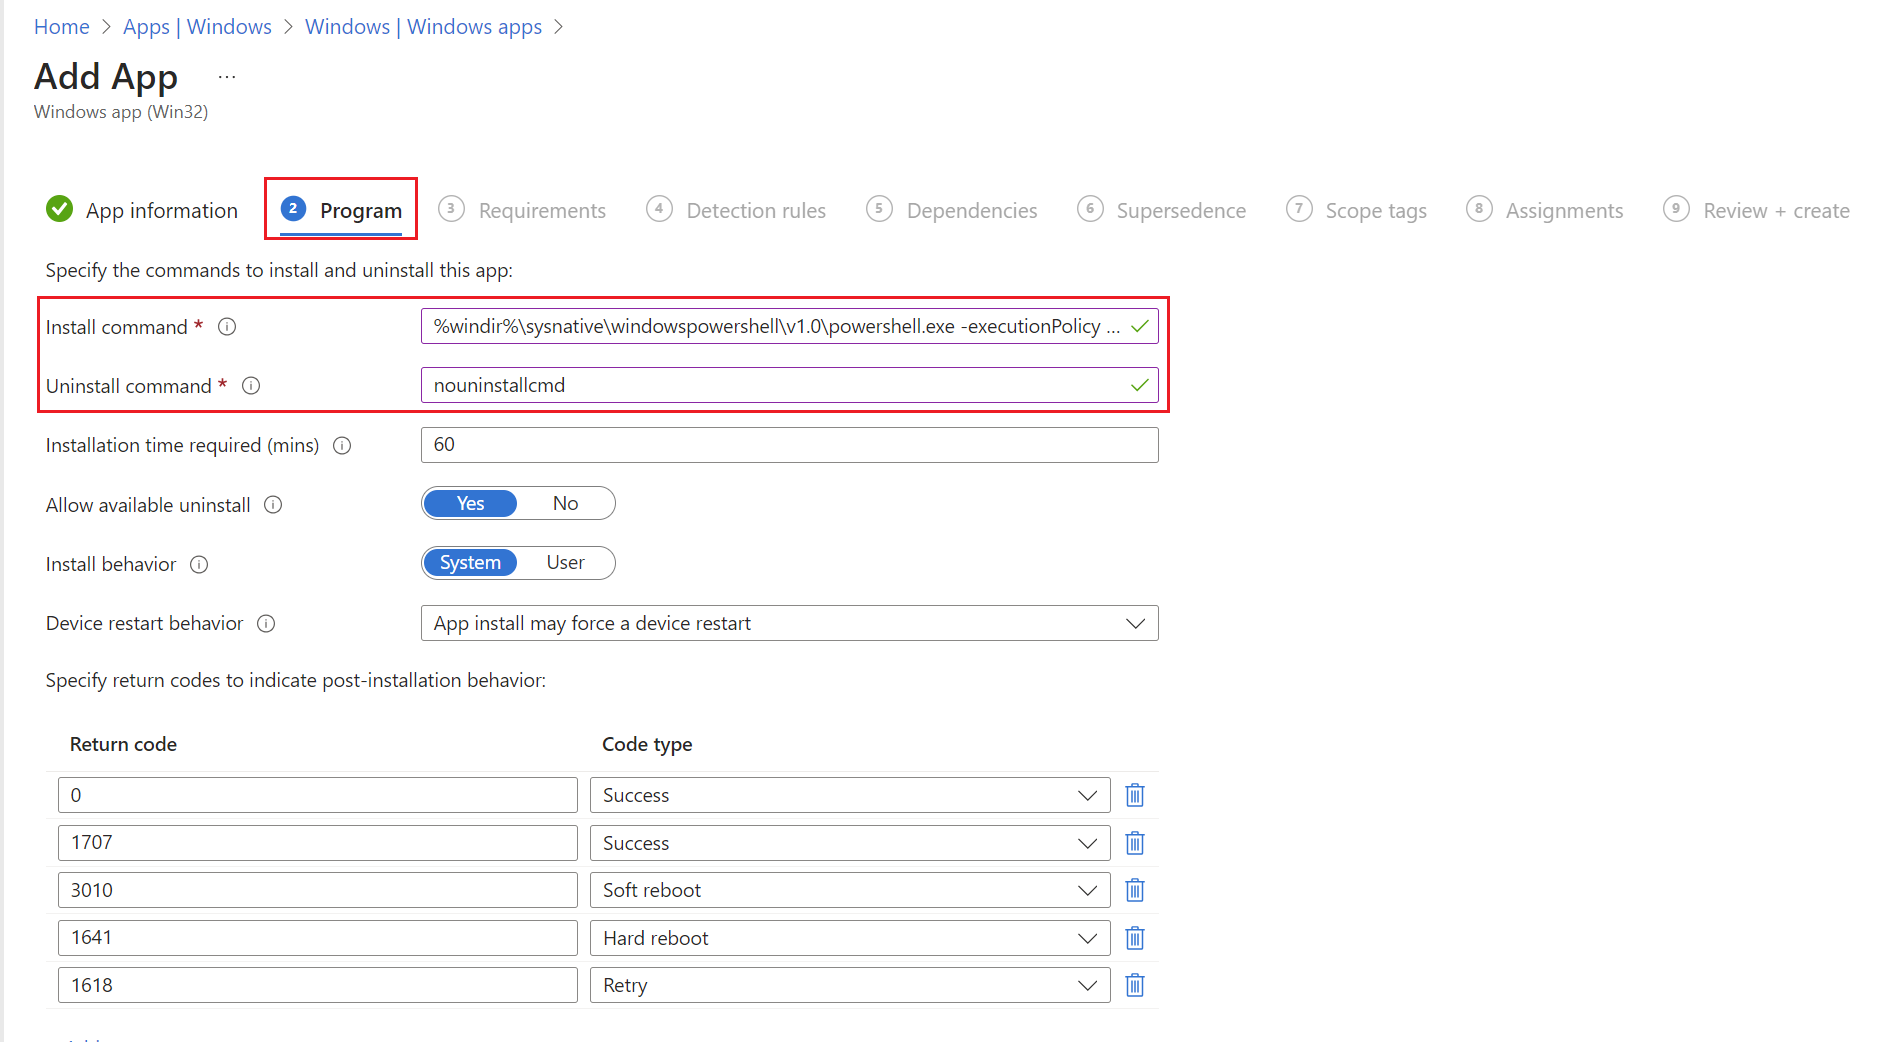
5. Under Requirements, select the following:
Operating system architecture: 64-bit
Minimum operating system: Windows 10 1903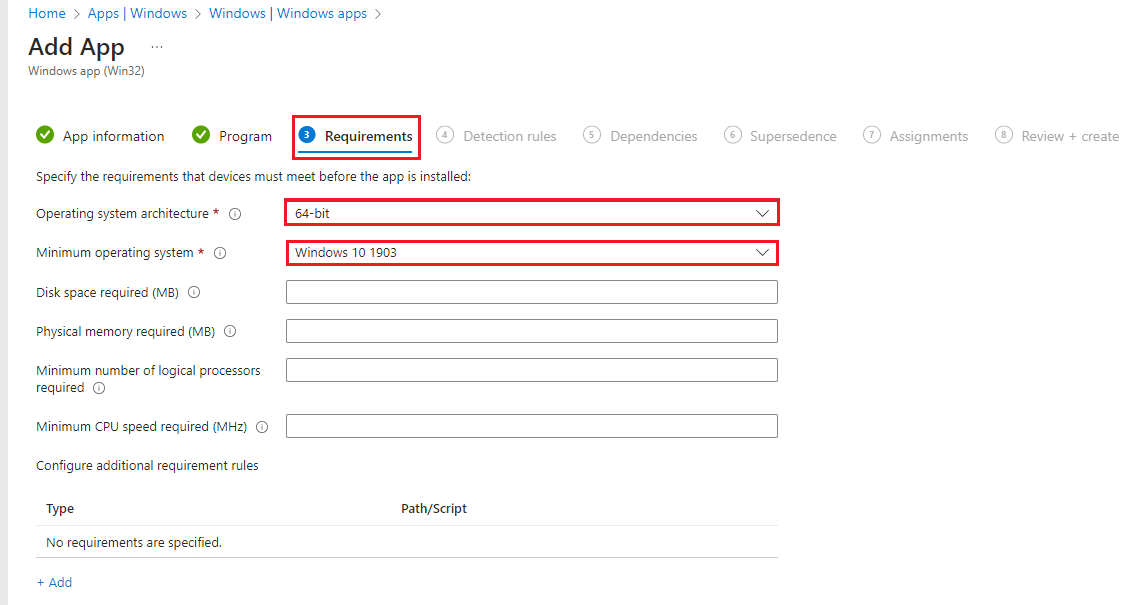
6. Under Detection rules, select 'Use a custom detection script' then select Next.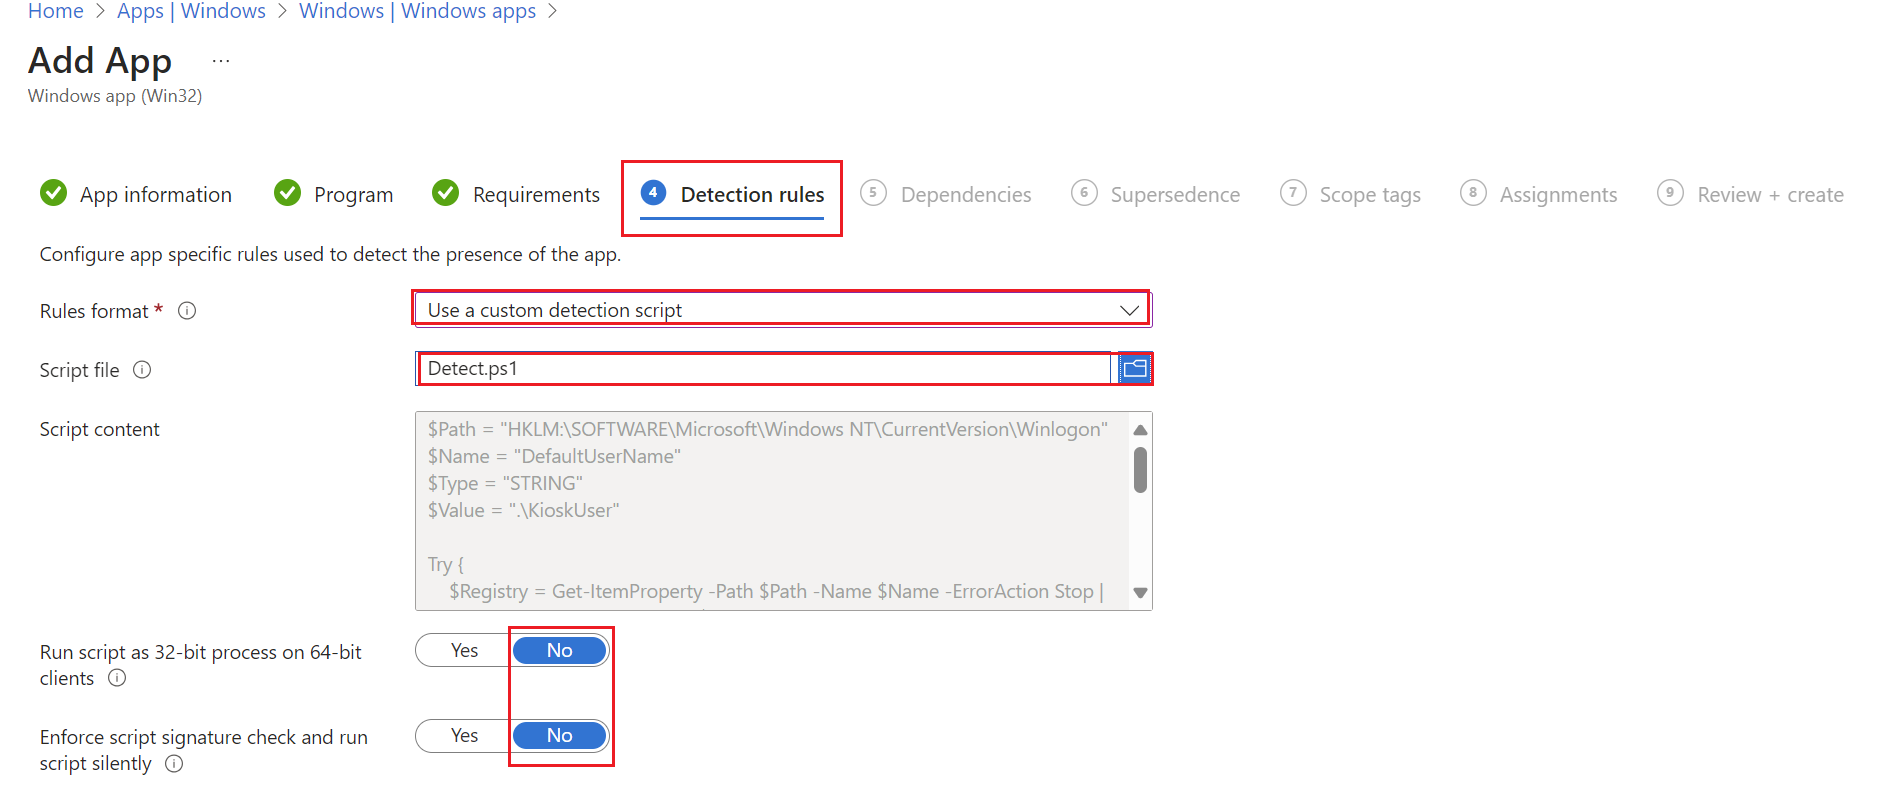
7. Under Dependencies, select Next.
8. Under Supersedence, select Next.
9. Under Assignments, select the required groups, then select Next.
10. Under Review + create, review the settings then select Create.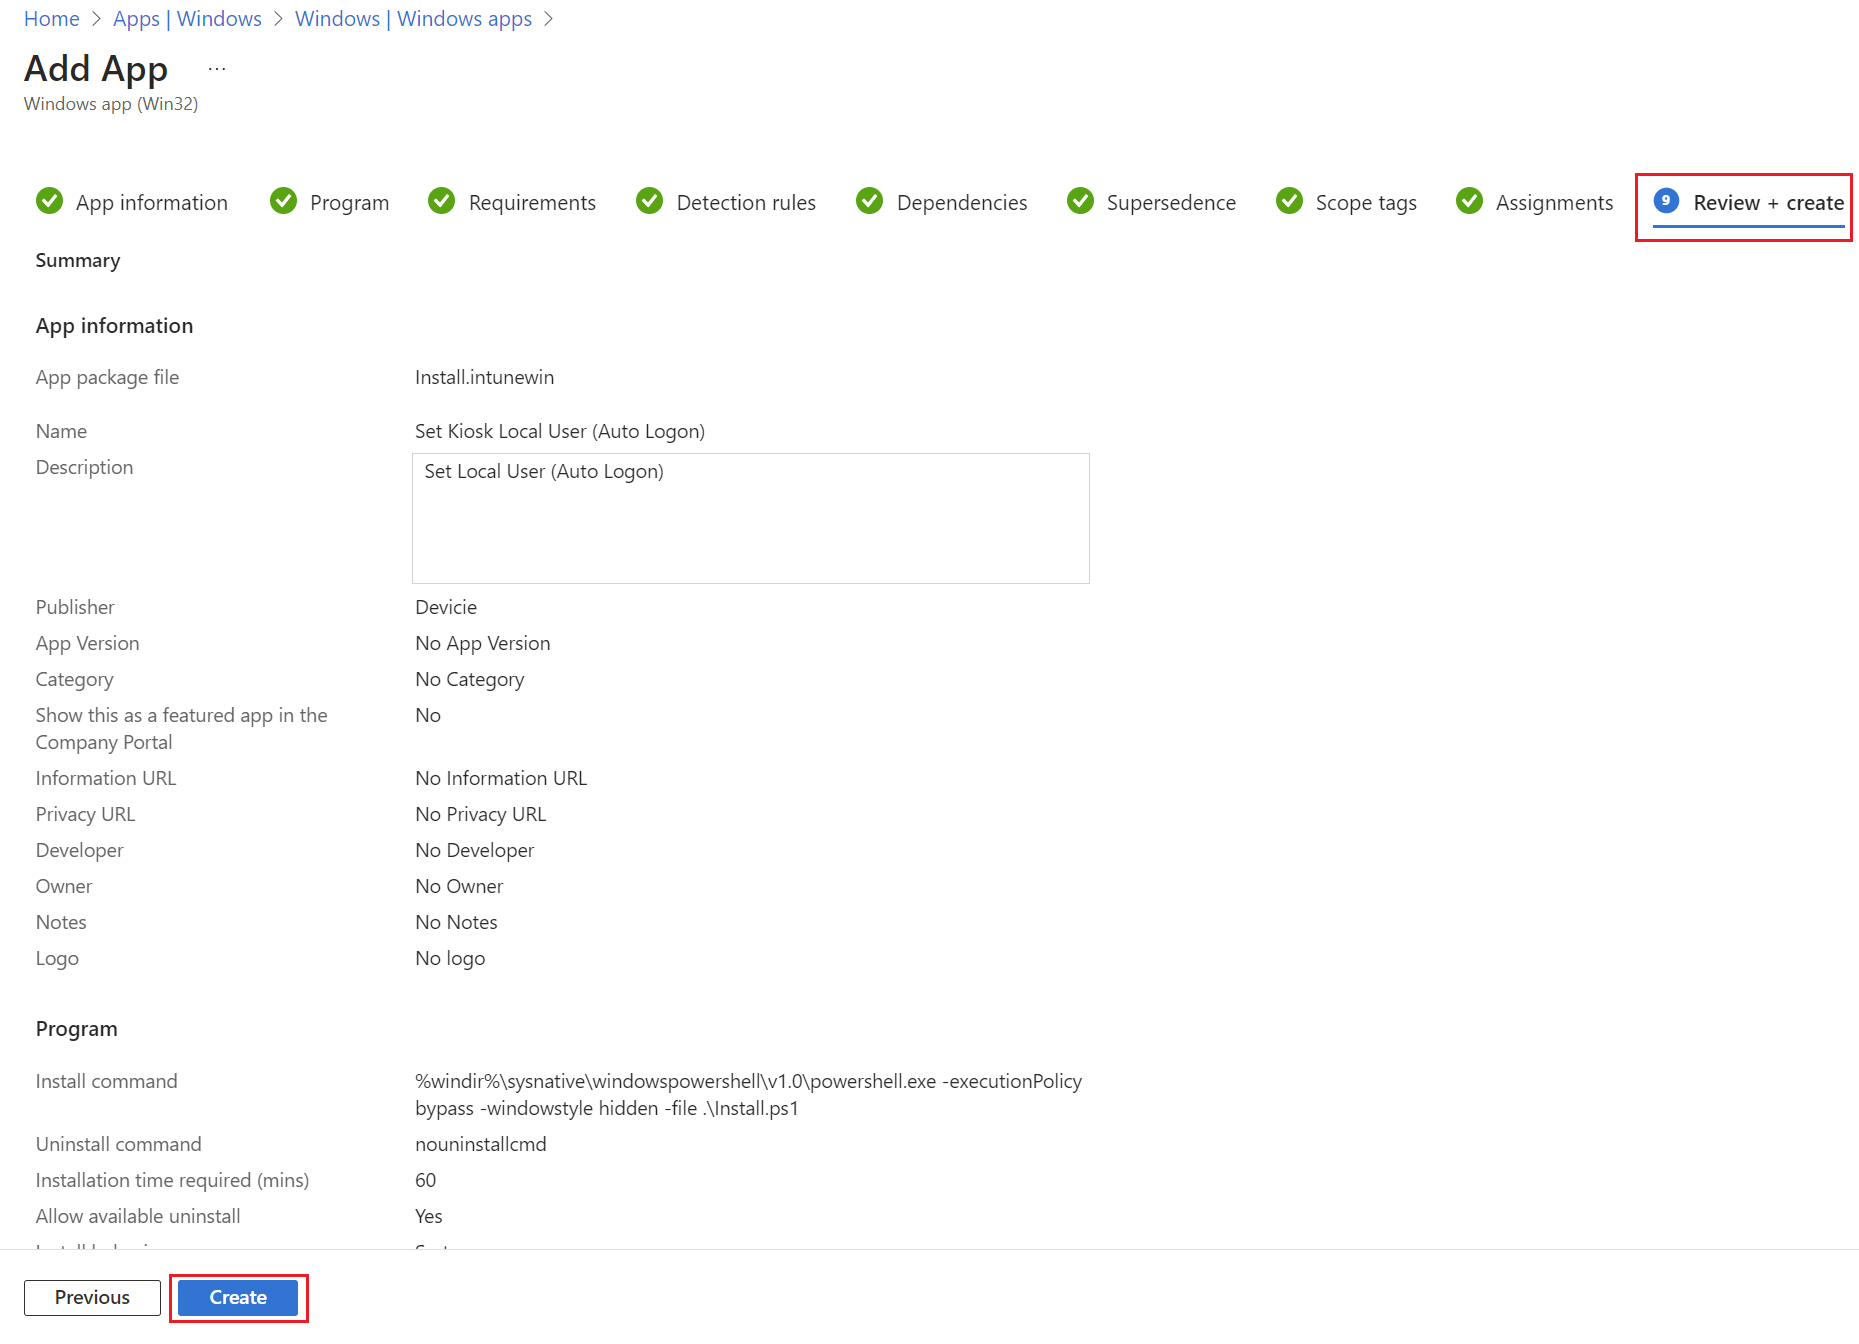
Deploy Win32 Apps
The following applications will need to be deployed as required, similar group with the below Kiosk assignments.
1. By navigating to Microsoft Intune Windows apps, search for:
Google Chrome
Microsoft Edge
Mozilla Firefox
CIS Benchmark 3.0.0 Level 1 + BitLocker - Kiosk without DeviceLock
2. Assign the following applications as Required.
Create Enrolment Status Page (ESP)
1. By navigating to Enrollment Status Page, select Create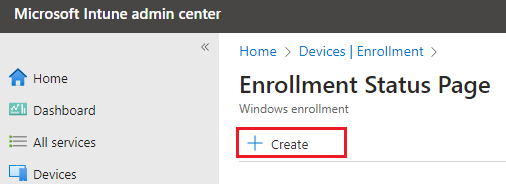
2. Under Basics, enter a name of the Enrolment Status Page like: ESP - Multi-App Kiosk. Then select Next.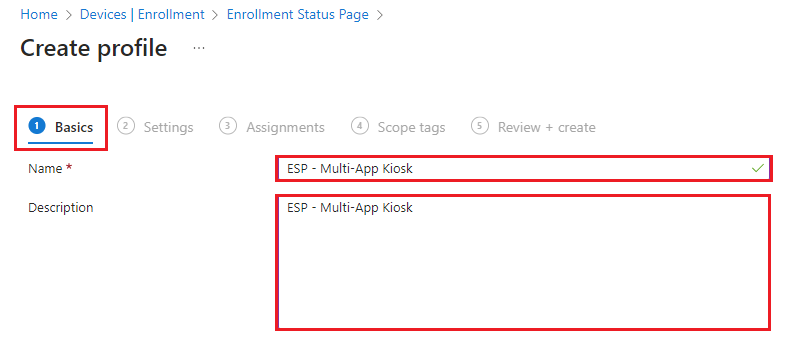
3. Under Settings, select Show app and profile configuration progress to Yes.
Select the other settings highlighted in red.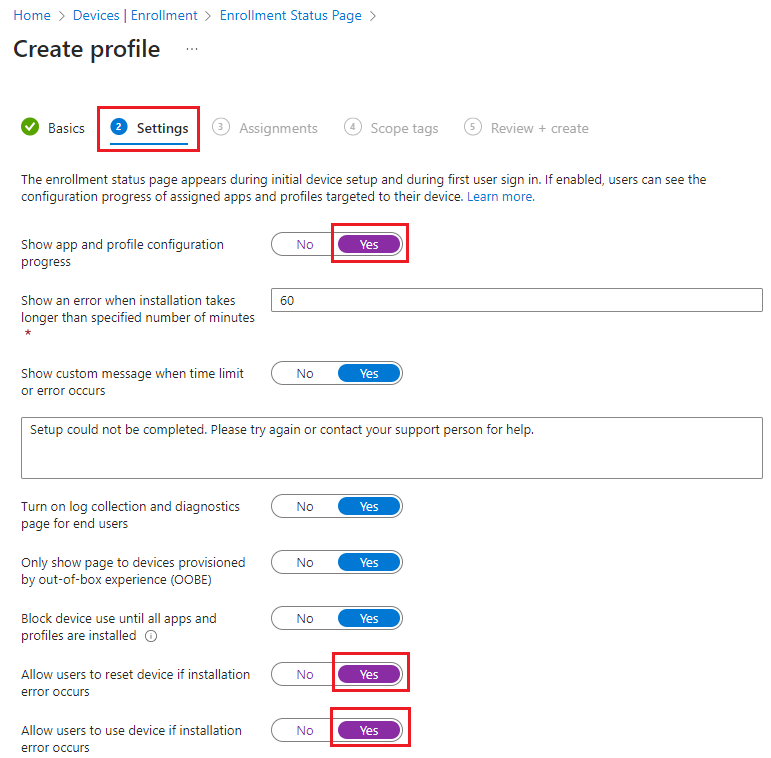
4. Under Block device use until required apps are installed if they are assigned to the user/device, click on Select apps, then choose the required.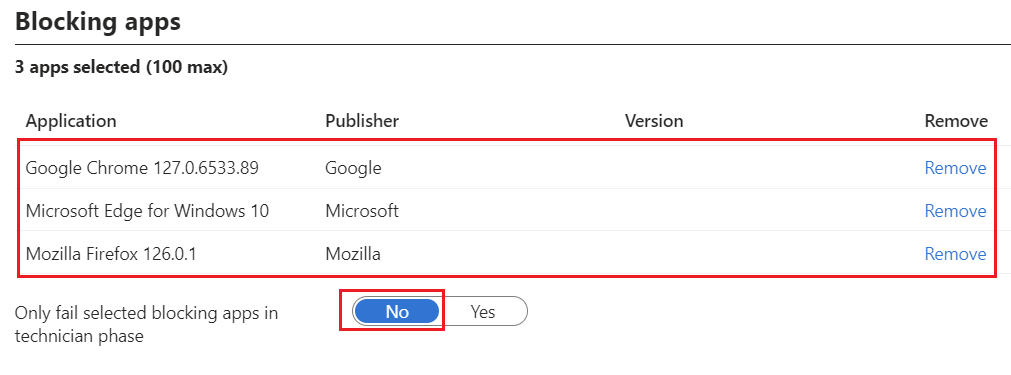
Note: Devicie will upload the Win32 App: CIS Benchmark 3.0.0 Level 1 + BitLocker - Kiosk to your tenant.
5. Under Assignments, select your desired Kiosk Group. Then select Next.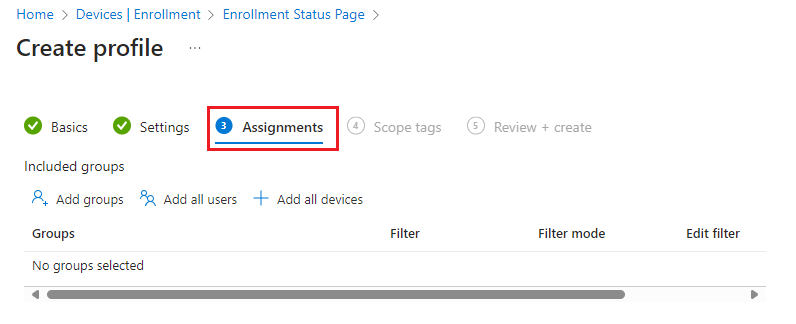
6. Under Scope tags, leave as default and select Next.
7. Under Review + create, review any settings and then select Create.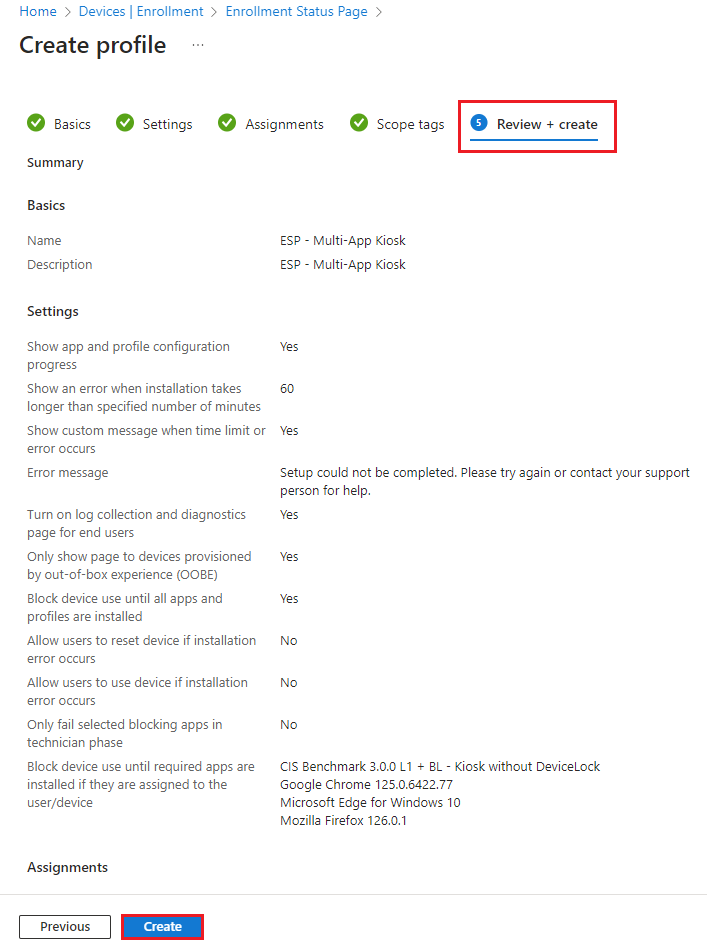
Create Windows Autopilot Deployment Profile
1. By navigating to Windows Autopilot Deployment profile, select Create Profile then select Windows PC. Then select Next.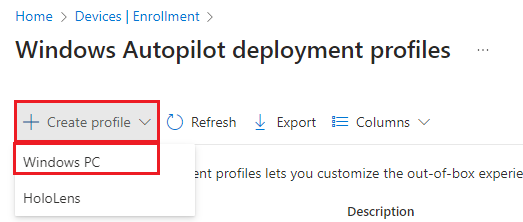
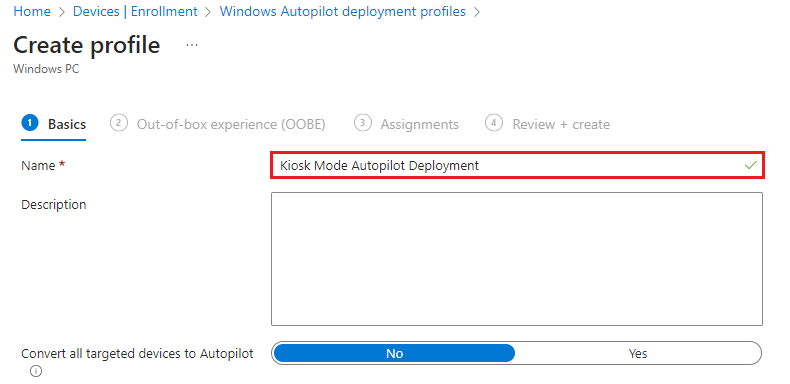
2. Under Basics, enter a name for the deployment profile. Then select Next.
3. Under Out-of-box experience (OOBE), configure the following:
Deployment mode: Self-deploying
Language (Region): Operating system default (Optional to change to English: Australia)
Automatically configure keyboard: Yes
Apply device name template: Yes
Enter a name: KIOSK-%SERIAL%
Then select Next.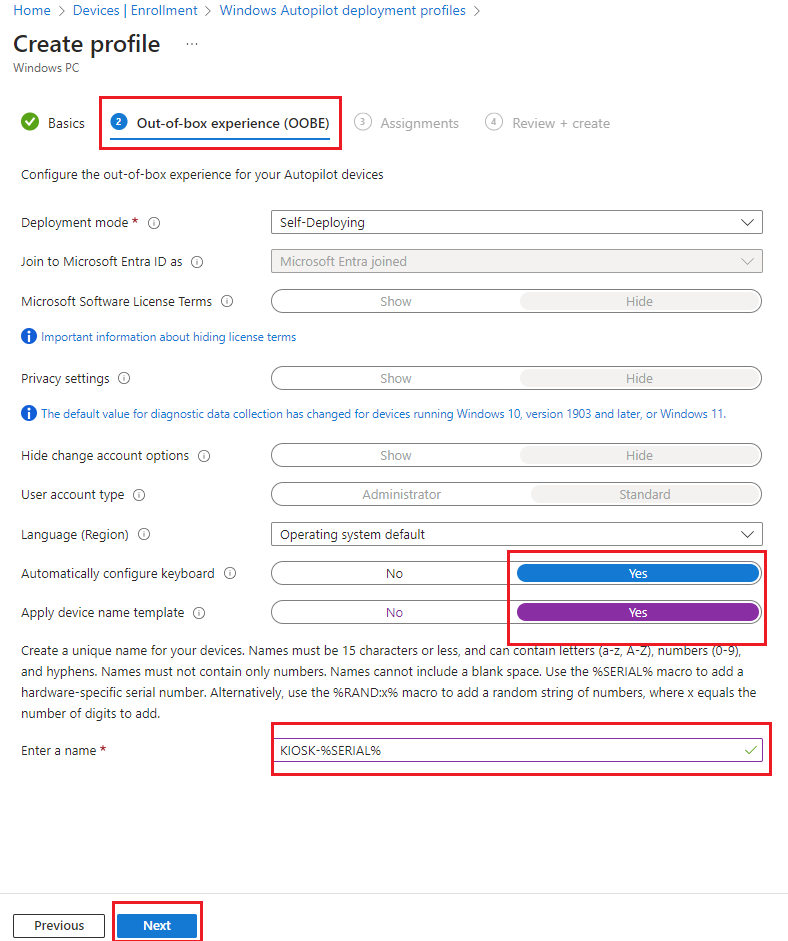
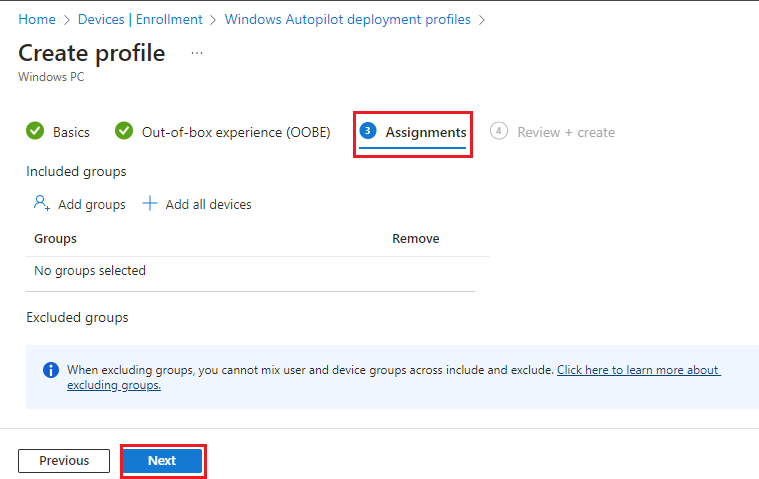
4. Under Assignments, select the required Kiosk assignment then select Next.
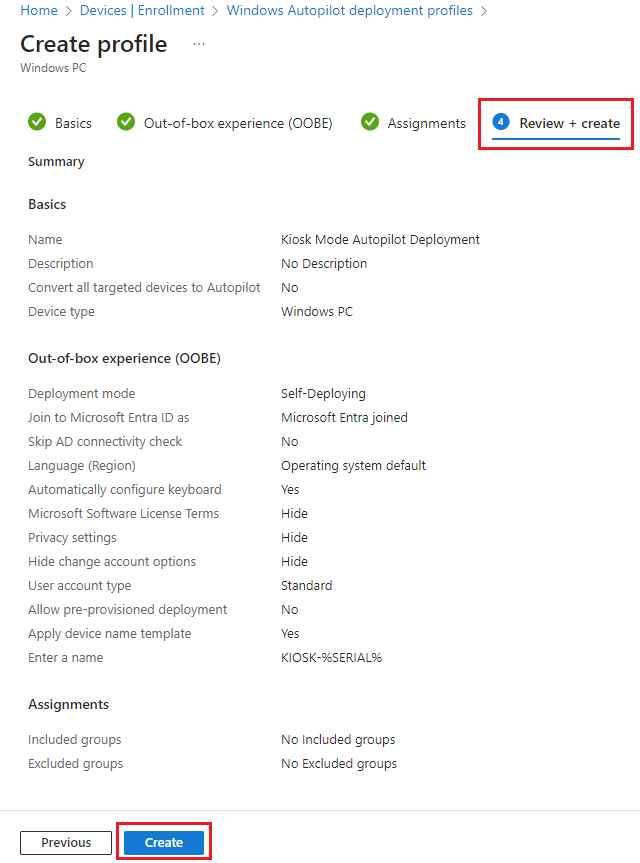
5. Under Review + Create, review the settings then select Create.
Create Device Configuration Profile: Power Management
1. By navigating to Windows Configuration Profiles, select Create then select New Policy then select By platform: Windows 10 and later and Profile type: Settings Catalog then select Create.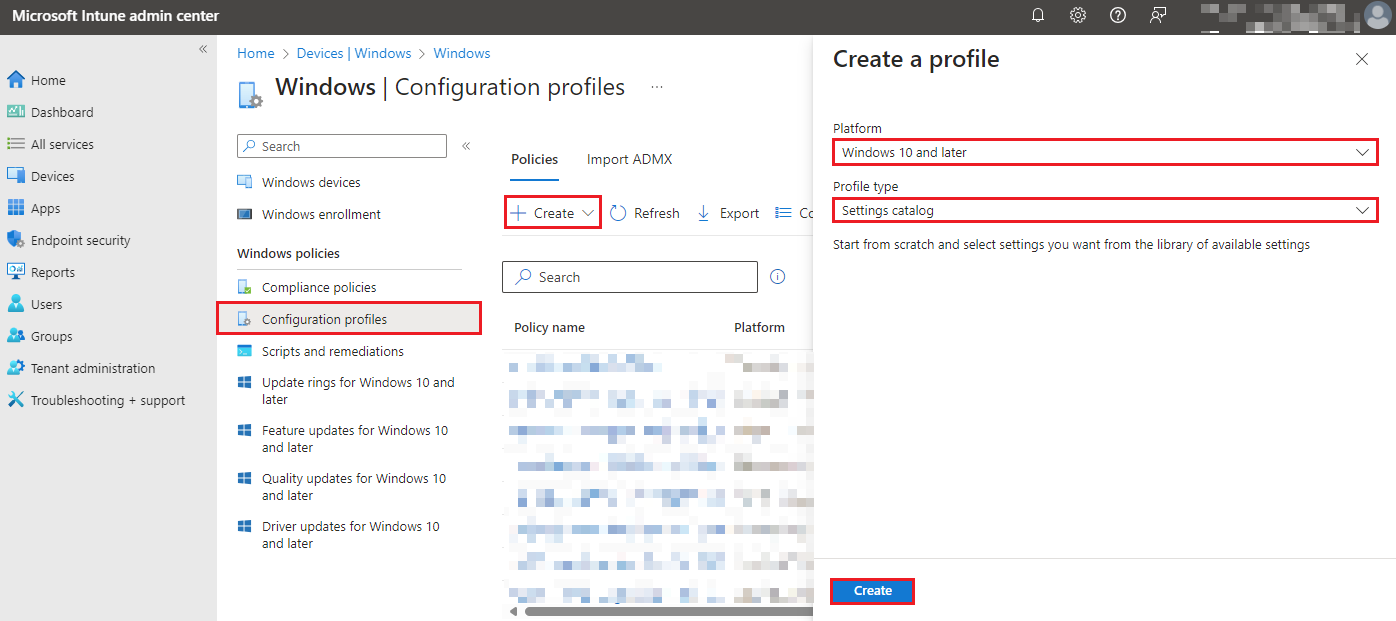
2. Under Basics tab, enter the following:
Name: Kiosk Mode - Power Management
Description: Kiosk Mode - Power Management
Then select Next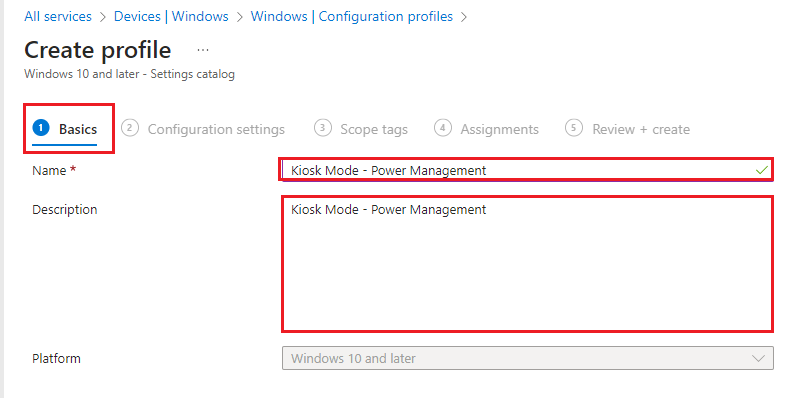
3. Under Configuration Settings tab, select Add Setting. In the search for a setting, enter in: Power Management.
Then select the following:
Administrative Templates\System\Power Management
Administrative Templates\System\Power Management\Hard Disk Settings
Administrative Templates\System\Power Management\Sleep Settings
Administrative Templates\System\Power Management\Video and Display Settings
Under Administrative Templates\System\Power Management, select the following:
- Select an active power plan as Enabled
- Select Action Power Plan (Device): High Performance
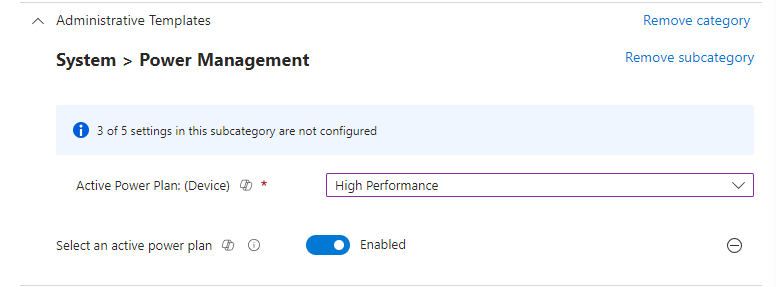
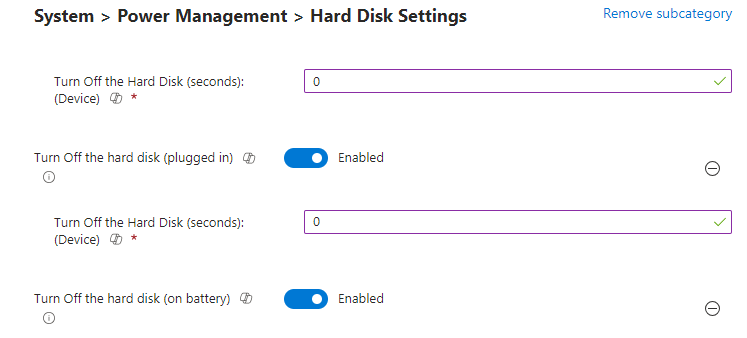
Under Administrative Templates\System\Power Management\Hard Disk Settings, select the following:
- Turn Off the hard disk (on battery) as Enabled
- Turn Off the Hard disk (seconds) Device: 0
- Turn Off the hard disk (plugged in) as Enabled
- Turn Off the Hard disk (seconds) Device: 0
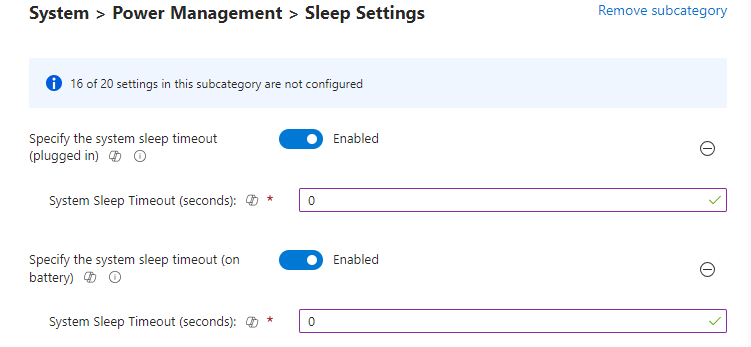
Under Administrative Templates\System\Power Management\Sleep Settings
- Specify the system sleep timeout (on battery) as Enabled
- System Sleep Timeout (seconds): 0
- Specify the system sleep timeout (plugged in) as Enabled
- System Sleep Timeout (seconds): 0
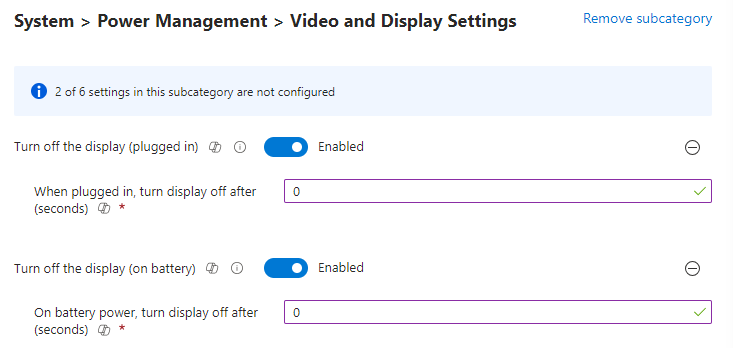
Under Administrative Templates\System\Power Management\Video and Display Settings, select the following:
- Turn off the display (on battery) as Enabled
- When plugged in, turn display off after (seconds): 0
- Turn off the display (plugged in) as Enabled
- On battery power, turn display off after (seconds): 0
Then select Next.
4. Under Scope tags, leave as default then select Next.
5. Under Assignments, select your required Kiosk group then select Next.
6. Under Review + create, review your settings then select Next.
