![Full Logo.png]](https://help.devicie.com/hs-fs/hubfs/Full%20Logo.png?height=30&name=Full%20Logo.png)
Overview:
This knowledge base article provides step-by-step instructions on how to setup Cloud PKI Certificates along with a SaaS RADIUS to deploy an Enteprise Wi-Fi to the organisation.
The following will be covered in setting Cloud PKI with SaaS RADIUS for Enterprise Wi-Fi:
- Creation of Cloud PKI Certificates: Root CA and Issuing CA
- Create Root CA
- Create Issuing CA
- Setup of EZRADIUS (SaaS RADIUS)
- Creation of Windows Trusted Certificates, SCEP Certificate and Wi-Fi Profile
- Create three 'Trusted Certificates' for Windows
- Create one 'SCEP Certificate' for Windows
- Create one 'Wi-Fi Certificate' for Windows
- Creation of macOS Trusted Certificates, SCEP Certificate and Wi-Fi Profile
- Create three 'Trusted Certificates' for macOS
- Create one 'SCEP Certificate' for macOS
- Create one 'Wi-Fi Certificate' for macOS
- Validation Wi-Fi Profile is working
Creation of Cloud PKI Certificates: Root CA and Issuing CA
Create the Cloud PKI by going to https://intune.microsoft.com/ then select Tenant Administration then select Cloud PKI

For testing purposes, use CA keys: Software
For production rollout, use HSM keys (reason behind the use of HSM)
Create Root CA
Under Basics, give a name of your RootCA then select Next.

Under Configuration Settings:
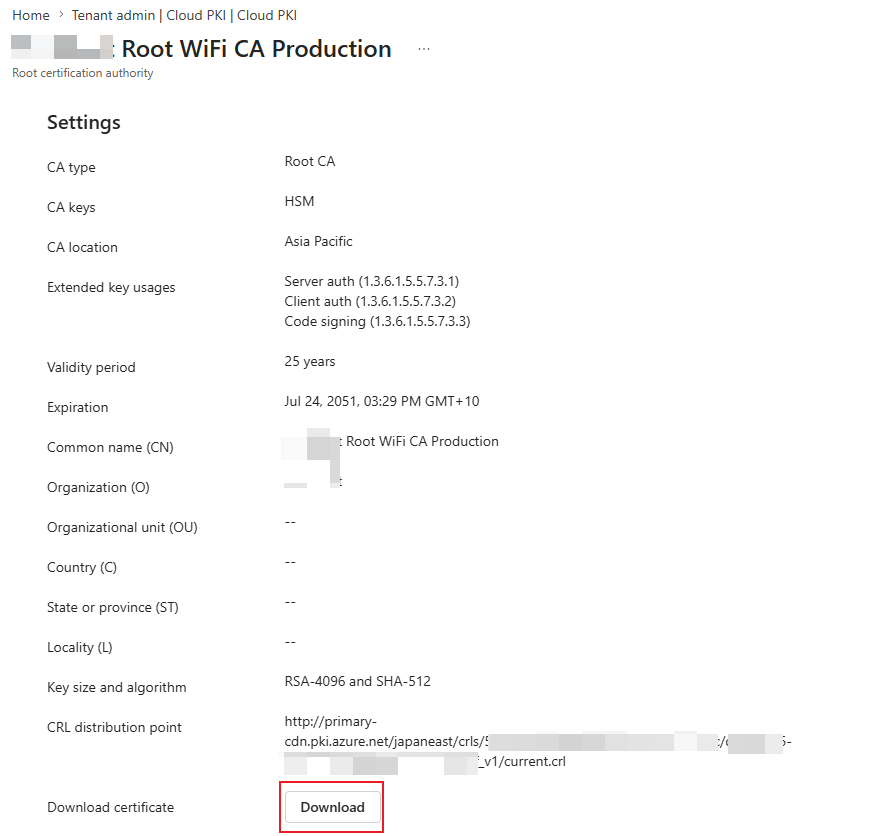
CA Type: Root CA
Validity period: 25 years
CA keys: Hardware security module (HSM)
Extended Key Usages: Select Server Auth, Client Auth and Code Signing
Subject Attributes: Common name (CN): Root CA


Under Configuration items, it takes 2 to 3 hours for the newly Root CA to appear: CA type: Issuing CA
Root CA source: Intune
Root CA: Click on the suggested Root CA within the tenant
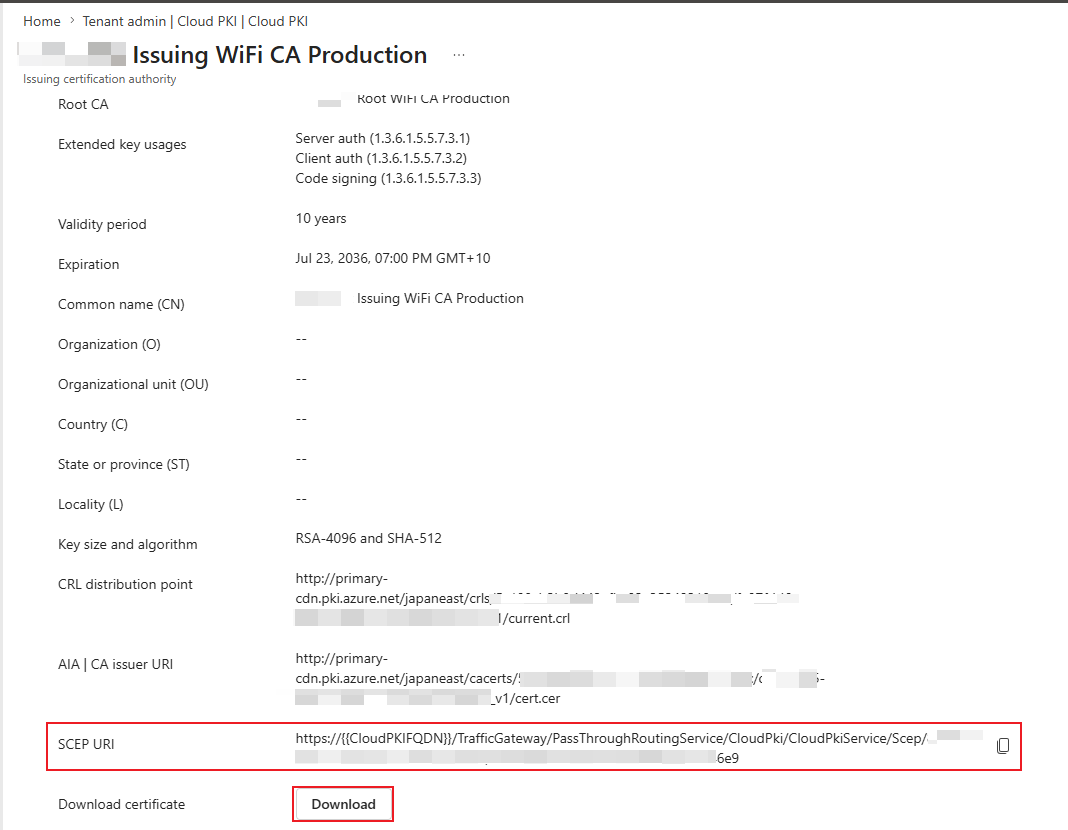
Validity period: 10 years

CA keys: Hardware security module (HSM)
Extended Key Usages: Select Server Auth, Client Auth and Code Signing
Subject Attributes: Common name (CN): Issuing Root CA

Encryption is already set and greyed out to RSA-4096 and SHA-512 which is inherited from Root CA.

Under Review + create, select Create.

Click on Root CA, select Download.
Click on Issuing CA, then select Download and make a copy of your SCEP URI.
After creating the follow the articles Registering the EZRADIUS App in Your Tenant | Keytos Docs within Azure then select your plan: How to Create a Cloud Radius Service in EZRADIUS | Keytos Docs. Once you have access to your dashboard, navigate to 'Settings'. It will pre-define the Radsec IP addresses as shown below.

Under Policy Details, you enter a new name like: Enterprise WIFI Profile then select Enable classic RADIUS.
Under Classic RADIUS Allowed IP Addresses - the IPs and Shared Keys need to be coming from on-prem infrastructure (example: Fortigate Firewall was used, the changes need to be done on the console and the IPs setup under EZRADIUS).

certutil -encode "Input_Certificate.cer" "Output_Certificate.cer"
Once converted to base64, it will look like this:


When uploading the Issuing CA, untick the box "Is Root CA". Then drag the _base64.cer over to the Upload CA Certificate.
Once the certificates have been uploaded, you will notice there is a green tick against the Root CA.

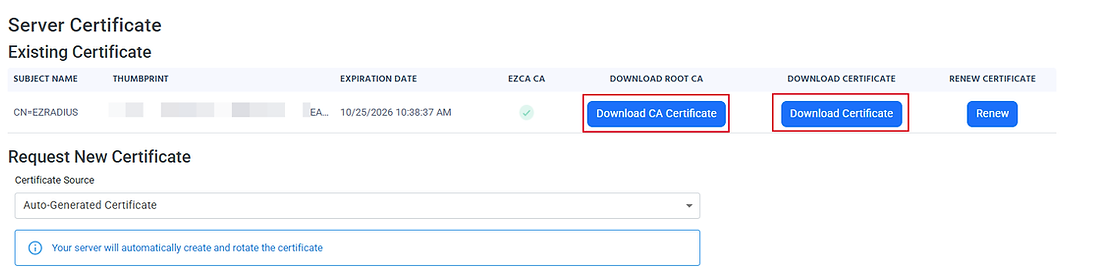
Under Server Certificate, you have the option to use the vendors, Local CA or Auto-generated certificate. For this we have selected Auto-generated Certificate. Select both "Download CA Certificate" for Root CA and "Download Certificate" for Download Certificate.

Match Certificate Attribute with Entra ID: Match with Entra ID Objects
Certificate type: Device
Certificate Name: Subject Alternative Name (DNS)
Device Identifier: Intune Device ID


Create three 'Trusted Certificates' for Windows
You will need to navigate to https://intune.microsoft.com/ then Devices then By platform: Windows then under Configuration then select Create then select New Policy then select Profile type: Windows 10 and later and Profile type: Templates: Trusted Certificate.
Profile name: Root CA Production
Certificate file: Root CA.cer
Destination store: Computer certificate store - Root

Create one 'SCEP Certificate' for Windows
You will need to navigate to https://intune.microsoft.com/ then Devices then By platform: Windows then under Configuration then select Create then select New Policy then select Profile type: Windows 10 and later and Profile type: Templates: SCEP certificate
Under Configuration settings, set the following:

Create one 'Wi-Fi Certificate' for Windows
You will need to navigate to https://intune.microsoft.com/ then Devices then By platform: Windows then under Configuration then select Create then select New Policy then select Profile type: Windows 10 and later and Profile type: Templates: Wi-Fi

Creation of macOS Trusted Certificates, SCEP Certificate and Wi-Fi Profile
Create three 'Trusted Certificates' for macOS
Certificate file: Root.cer

You will need to navigate to https://intune.microsoft.com/ then Devices then By platform: Windows then under Configuration then select Create then select New Policy then select Profile type: macOS and Profile type: Templates: SCEP certificate
Deployment Channel: Device Channel
Certificate type: Devicie
Subject name format: CN=
Subject altnerative name where: Attribute is DNS and Value is CN=
Certificate validity period is Years 1 Key usage: Digital signature, Key encipherment
Key size (bits): 4096
Root Certificate: Select it from the selection where it should be Root WiFi CA Production Extended key usage: Name: Client Authentication
Object Identifier: 1.3.6.1.5.5.7.3.2
Predefined values: Client Authentication
Key storage: Enroll to Trusted Platform Module (TPM) KSP if present, otherwise Software KSP Enrollment settings: 20%
SCEP Server URL: Copy and paste the URL from the Issuing CA
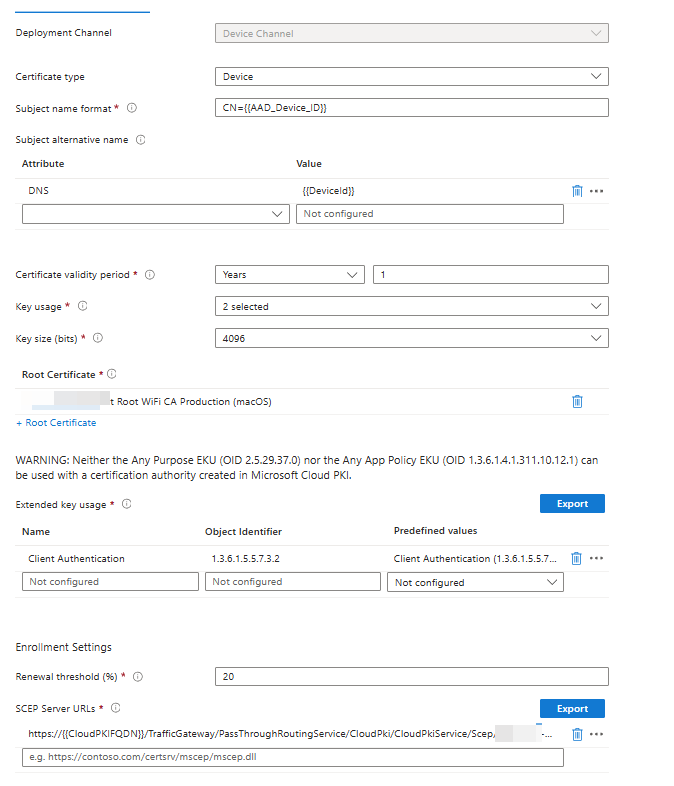
Note: The only thing to note for macOS SCEP, the key size (bits) needs to be set to 4096.
Create one 'Wi-Fi Certificate' for macOS
You will need to navigate to https://intune.microsoft.com/ then Devices then By platform: Windows then under Configuration then select Create then select New Policy then select Profile type: macOS and Profile type: Templates: Wi-Fi
Under Configuration settings, set the following:
Deployment Channel: Device Channel
Wi-Fi type: Enterprise
Wi-Fi name: Enter SSID Name
Connect automatically: Yes
Hidden network: Disable
EAP type: EAP - TLS
Server Trust: Certificate server names. Open the Server.cer and go to Details, look for Subject Alternative name. The IP addresses need to be added into the Wi-Fi profile.
Root certificates for server validation: Select your Keytos CA Production
Client certificate for client authentication (Identity certificate): Select your SCEP Cert Production Identity privacy (outer identity): Not configured
Proxy settings: None

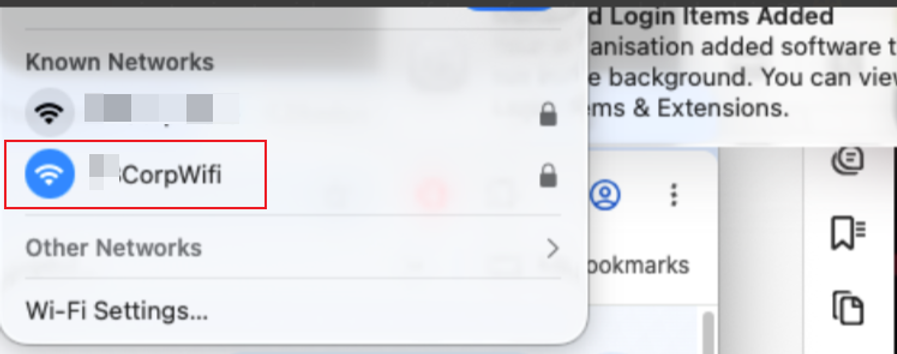
Make sure to deploy all five profiles to your pilot group for testing.
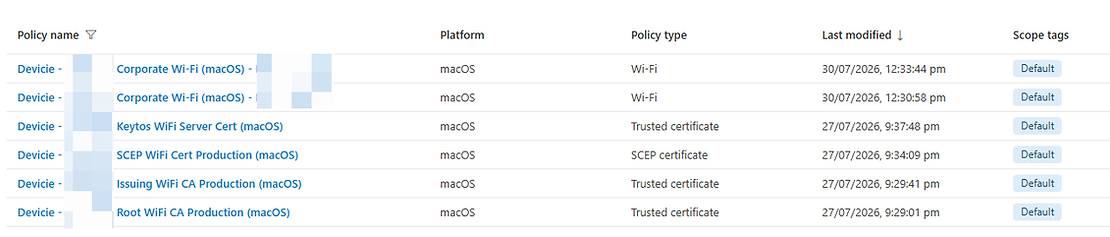
Validation Wi-Fi Profile is working
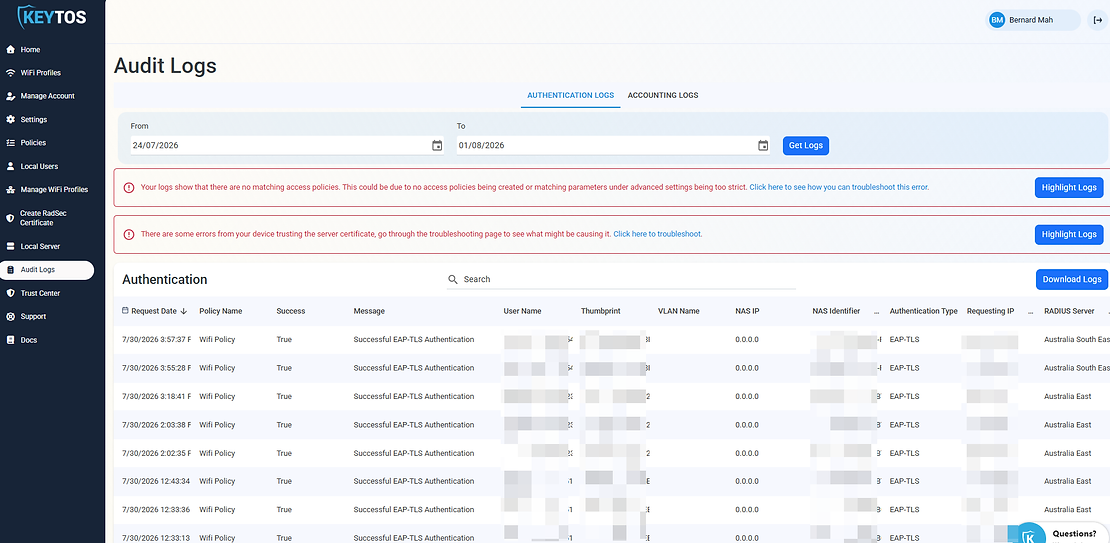
To make sure it works, go to EZRadius Audit Logs and select Get Logs