Overview
This knowledge base will show you how to automatically update Zoom Desktop using Microsoft Intune from a user context where (.exe has been installed manually by the user).
Steps
- Before we begin, we will need to download Zoom ADMX Templates. Make sure to choose policies closer to your current version of Zoom, example Zoom Desktop version 5.17.5.
- Make sure the Windows.admx and Windows.adml has been uploaded to Microsoft Intune, if not the upload will fail. To download Windows ADMX Templates for Windows 11 23H2.
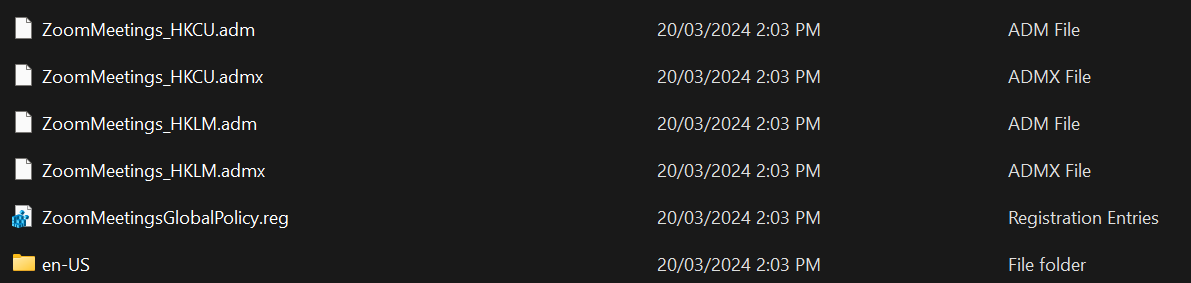
- Extract the Zoom ADMX Templates which should look like this.
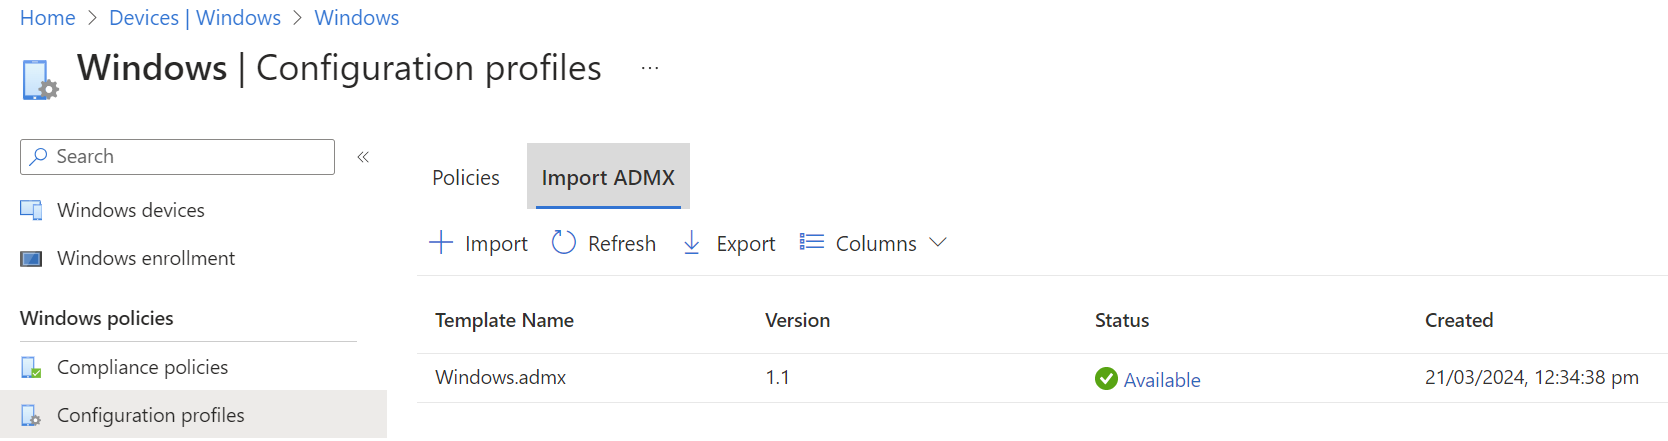
- Log in to the Microsoft Intune.
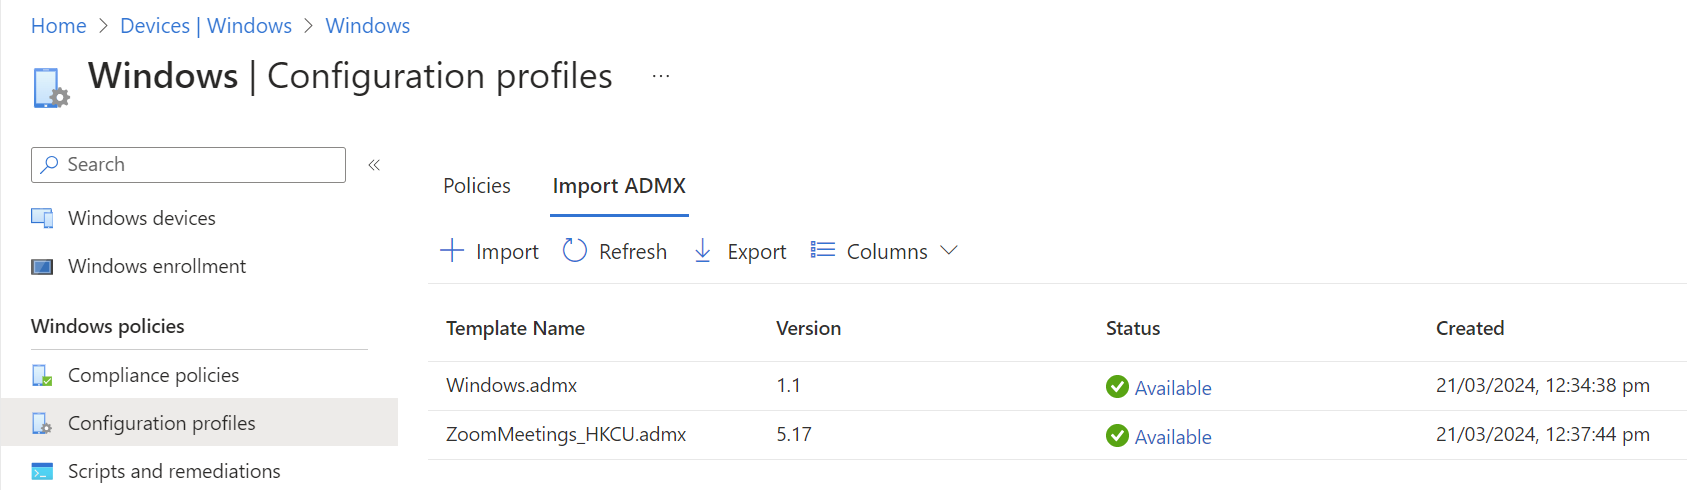
- Navigate to Devices > Windows > Configuration Profiles > Import ADMX
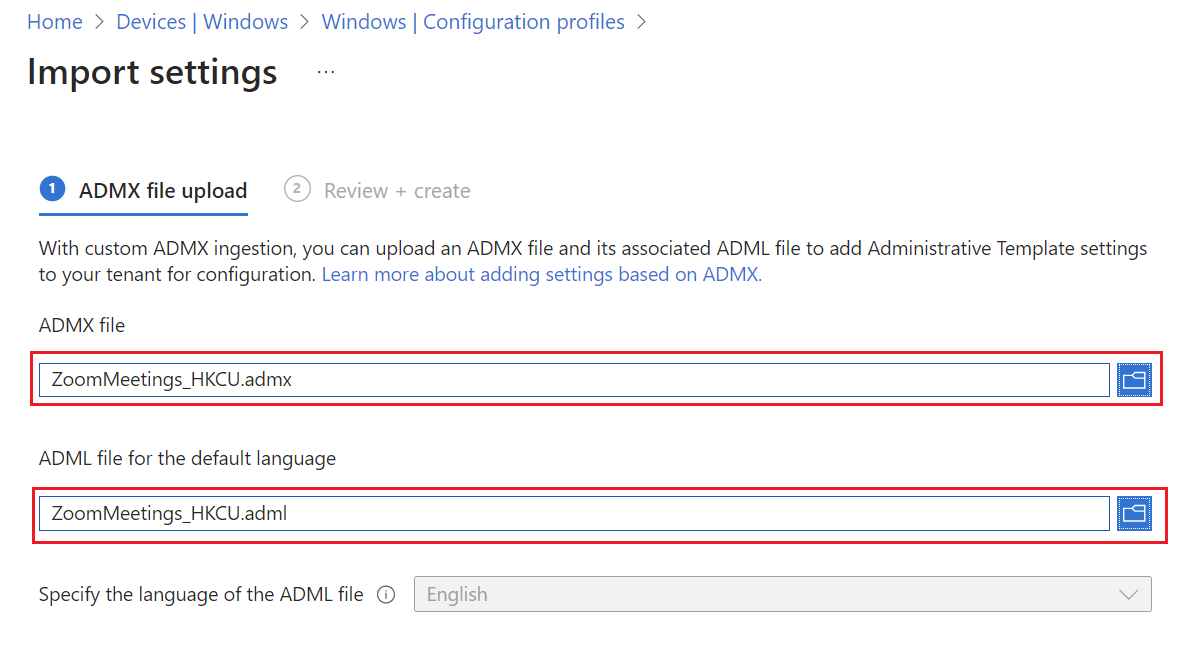
- Select Import, then navigate to where the Zoom ADMX Templates have been extracted to.
- For ADMX file, select ZoomMeetings_HKCU.admx and ADML file for the default language select ZoomMeetings_HKCU.adml
Then select Next > Create. - Under Import ADMX, ZoomMeetings_HKCU will show as Upload in progress. Allow up to 30 seconds, before you select Refresh.
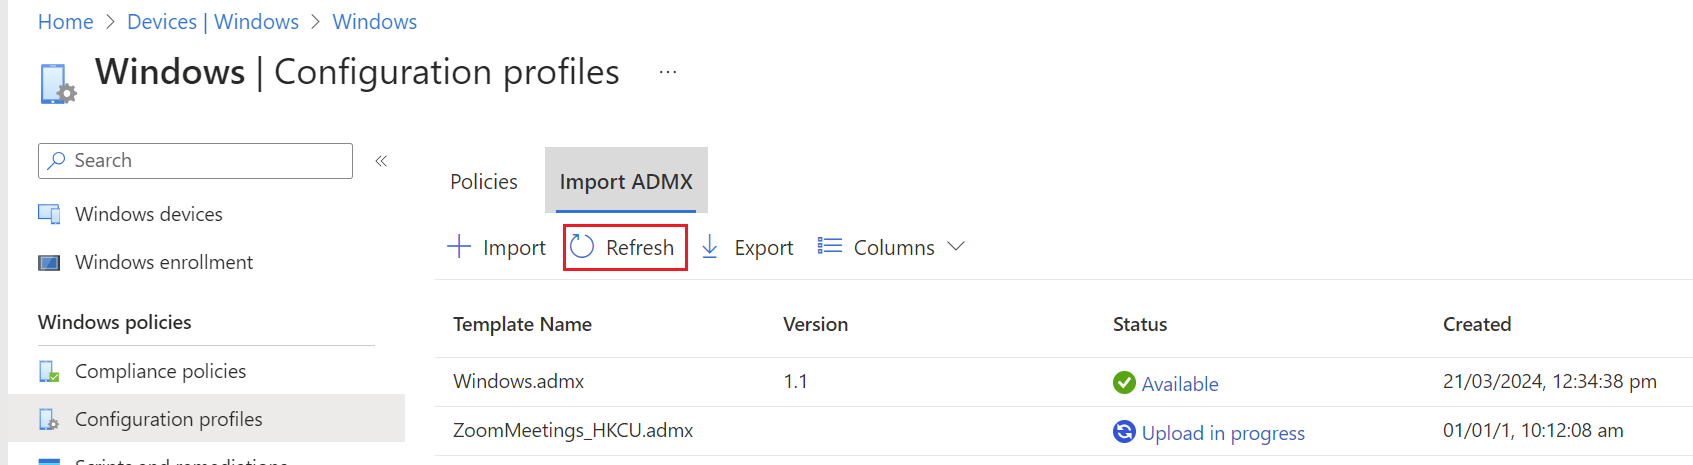
- Now the ZoomMeetings_HKCU.admx has been uploaded successfully.
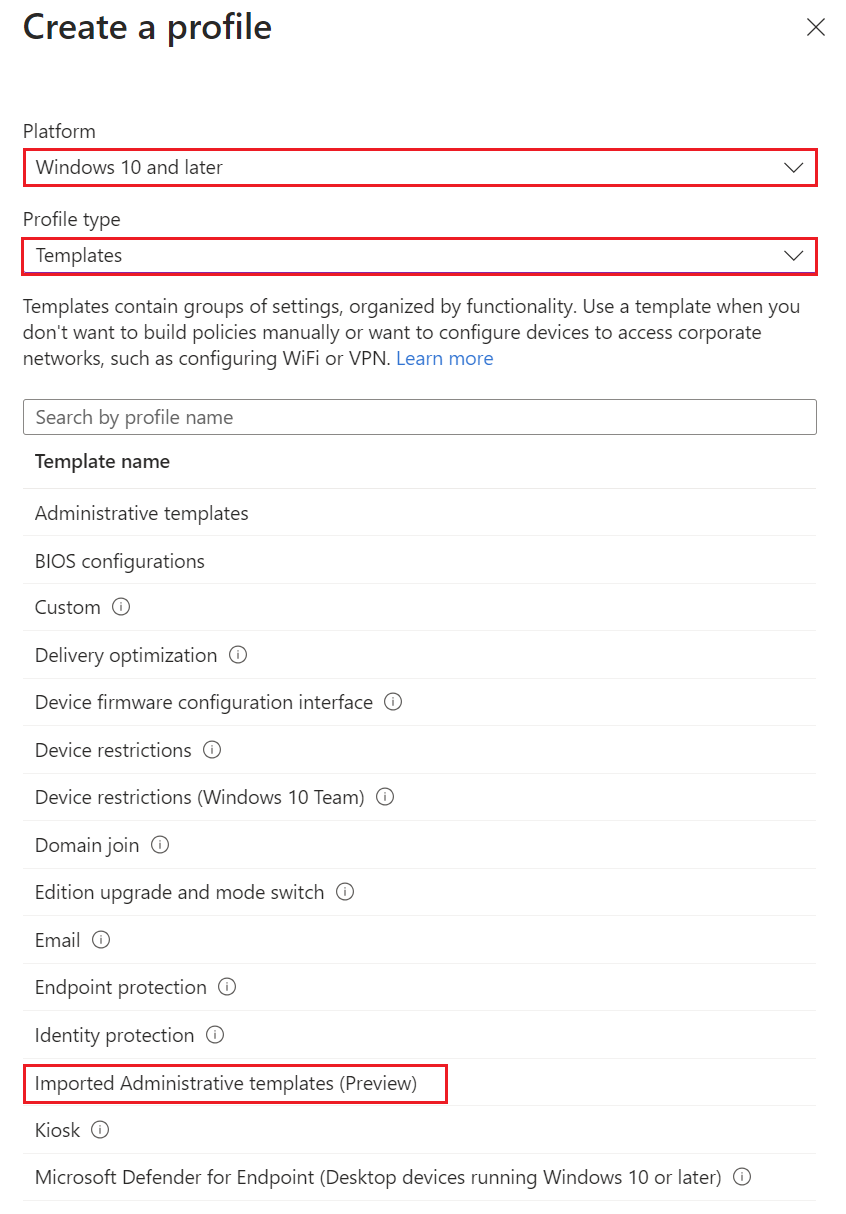
- Select Policies tab, then select Create > New Policy > Platform: Windows 10 and later > Profile type: Templates. Then select Imported Administrative templates > select Create.
- Enter a name for the profile, select Next.
- Under Configuration settings, select User Configuration which will show Zoom Meetings.
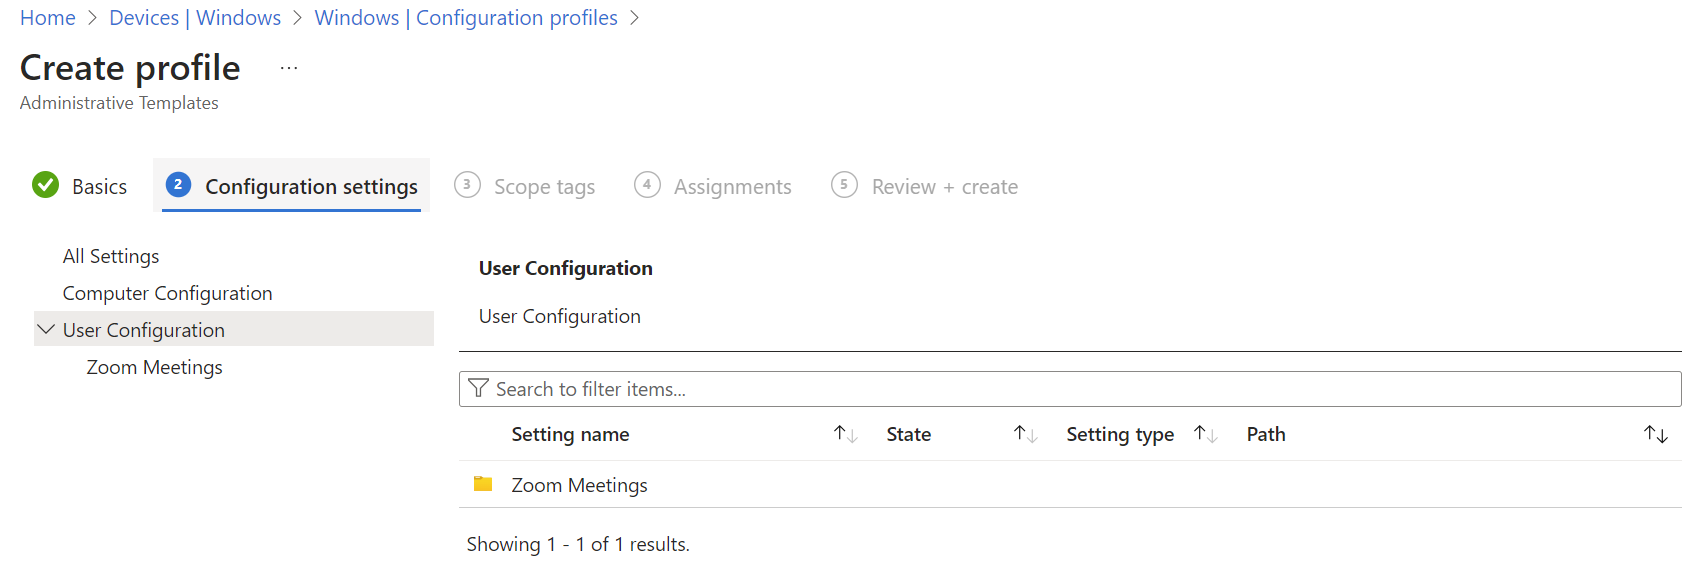
- Search and configure for the following listed below.
Under Zoom Update Settings:
Set auto update schedule to "Enabled". Set the specified time from: 0600-1800.
(Note: 0600 is 6 AM and 1800 is 6 PM. Optional to change suitable times for your organization)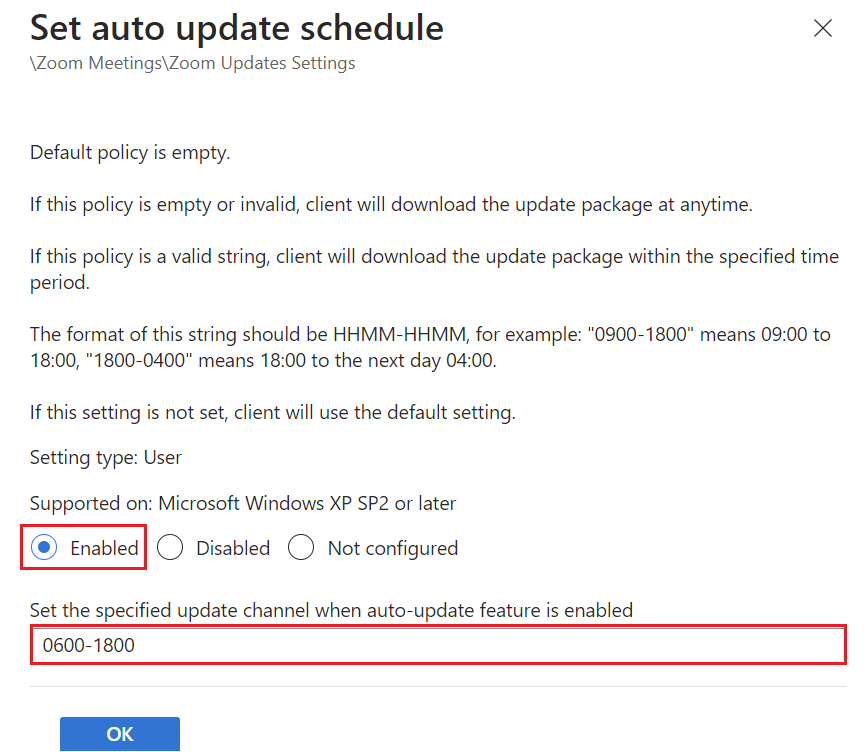
Set the specified update channel when auto-update feature is enabled to "Enabled". Set the specified updated channel to 1.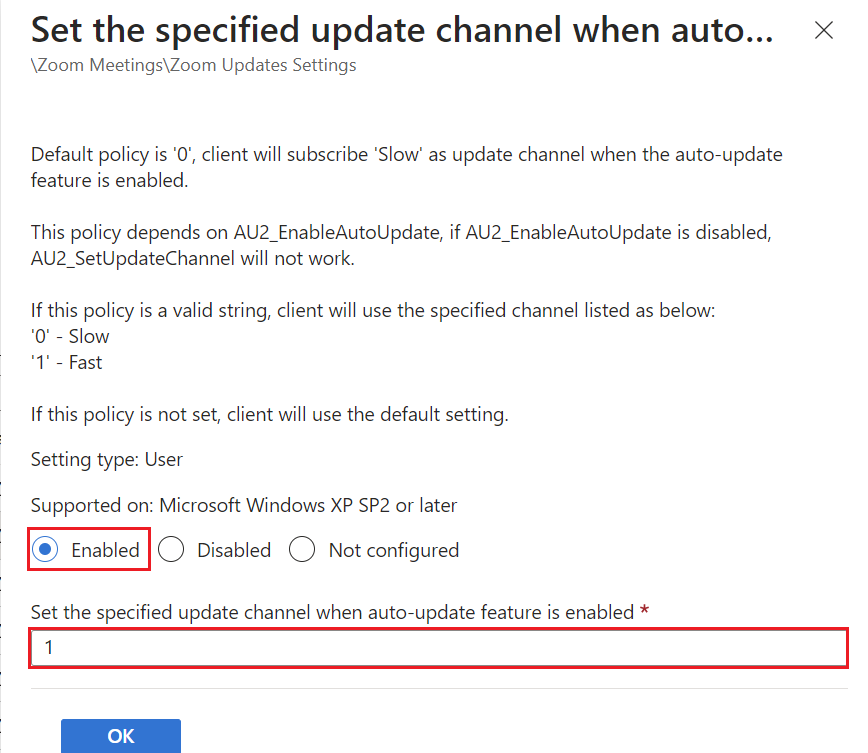
Set the update channel list to "Enabled" Set the update channel list to 1.
Set to enable auto update installation when idle to "Enabled".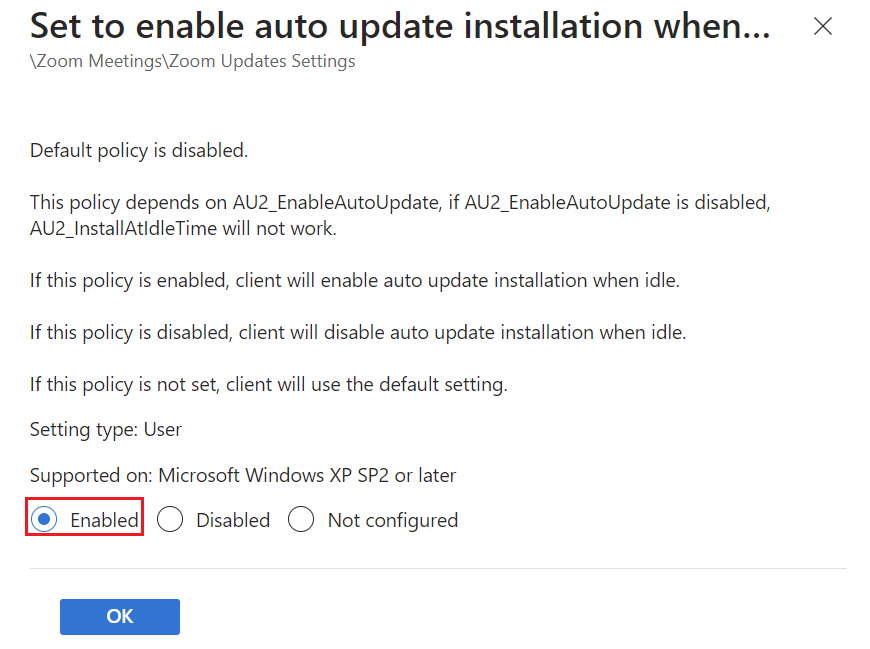
Set to enable the auto-update feature to "Enabled".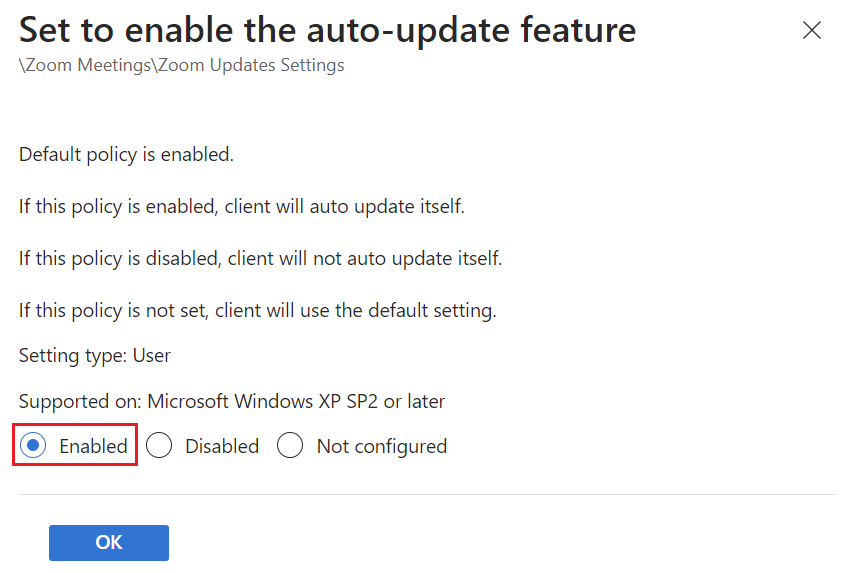
Set to install auto updates within a specified time period to "Enabled" where specified time from: 0600-1800.
(Note: 0600 is 6 AM and 1800 is 6 PM. Optional to change suitable times for your organization)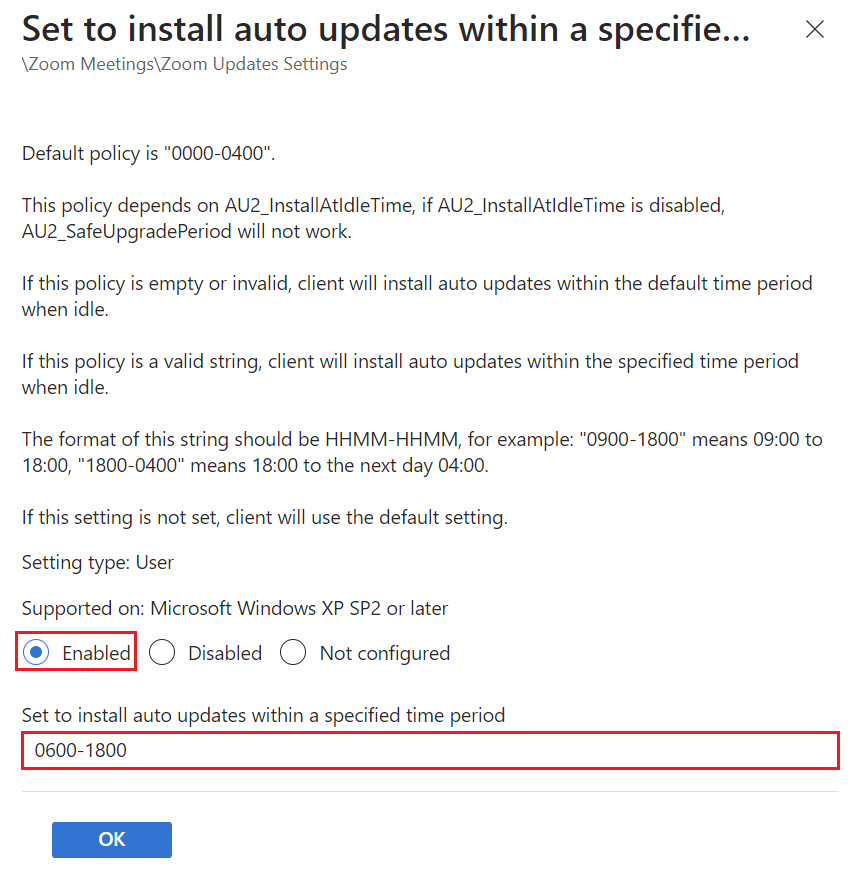
Set to prompt the user to update when exiting a meeting or webinar if an update is available to "Enabled".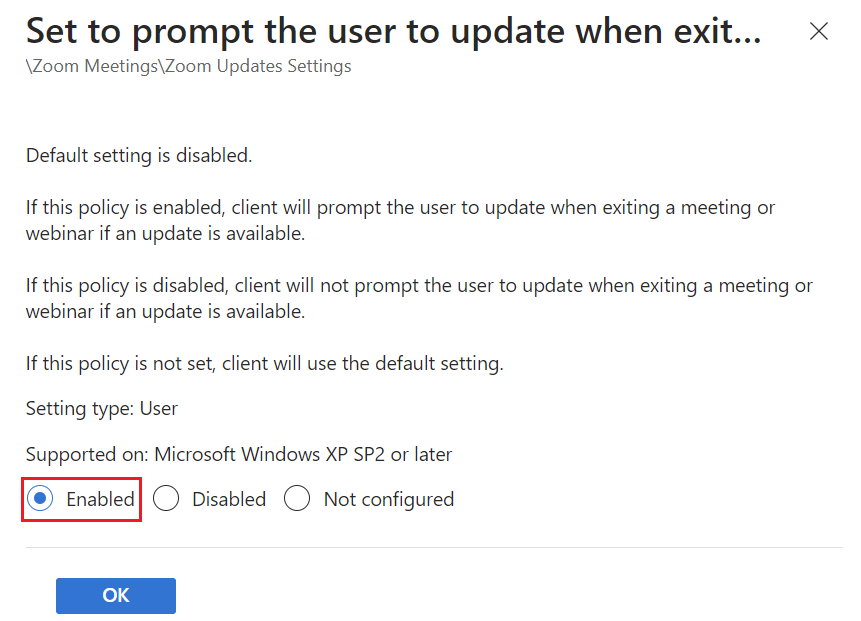
Set to show a toast indicating that an update has been successfully applied to "Enabled".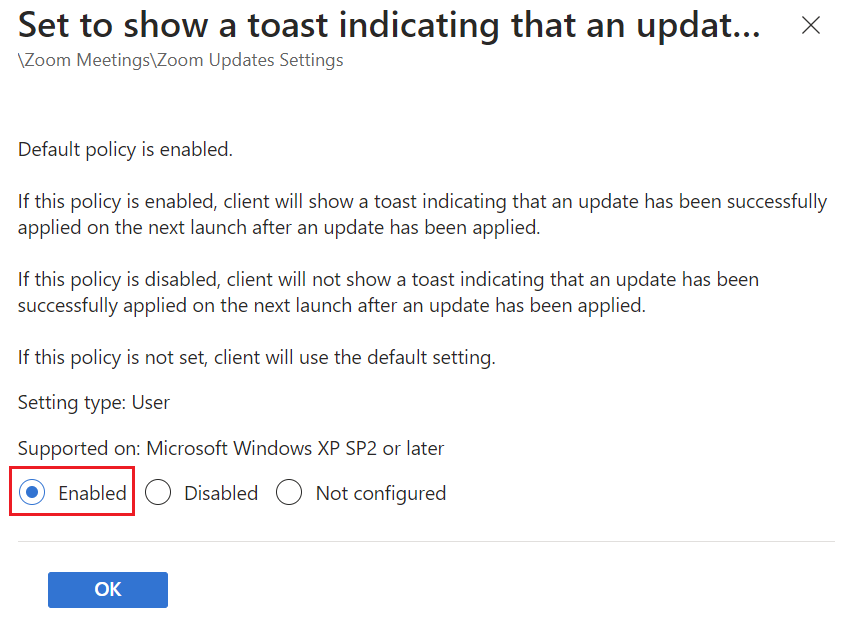
Under Zoom General Settings:
Enable client to auto update to "Enabled"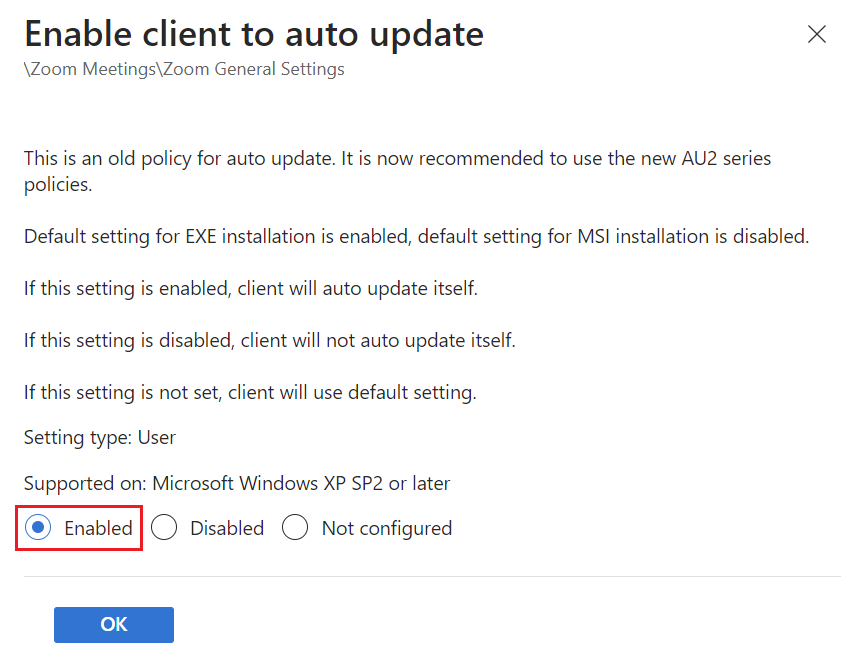
Enable client to auto update silently to "Enabled"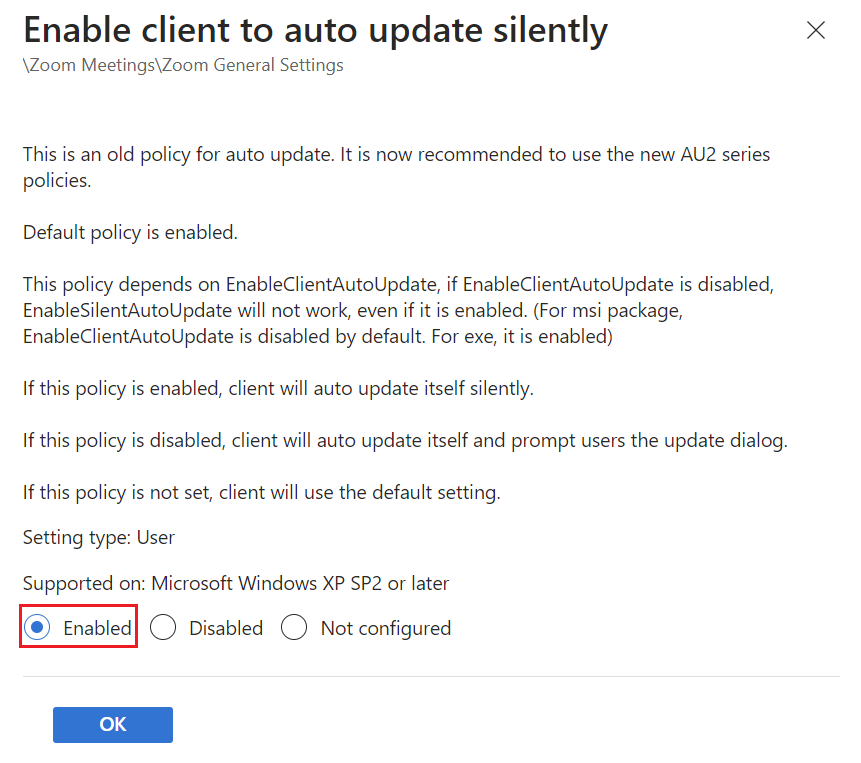
- Under Scope Tags, select Next.
- Under Assignments, under Included groups, select an assignment. Select Next.
- Under Review + Create, review all the settings then select Create.