Overview
One way to force OneDrive to sync, both in Windows 11 and Windows 10, is to restart the OneDrive application using Task Manager.
How to force OneDrive to sync using Task Manager
Open Task Manager and select the Processes tab. Then, find the Microsoft OneDrive process, right-click (press-and-hold) on it and select End Task to stop its process.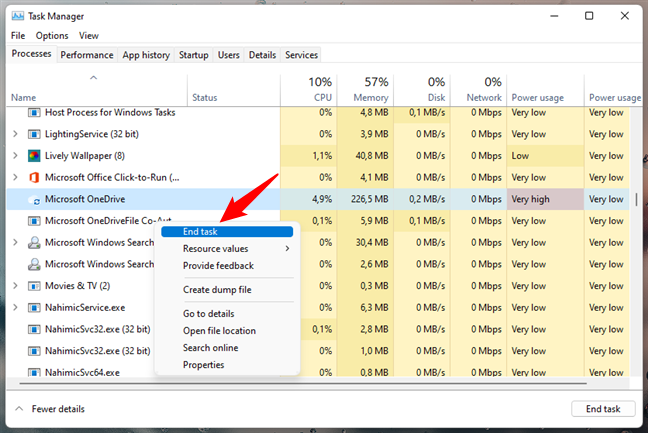
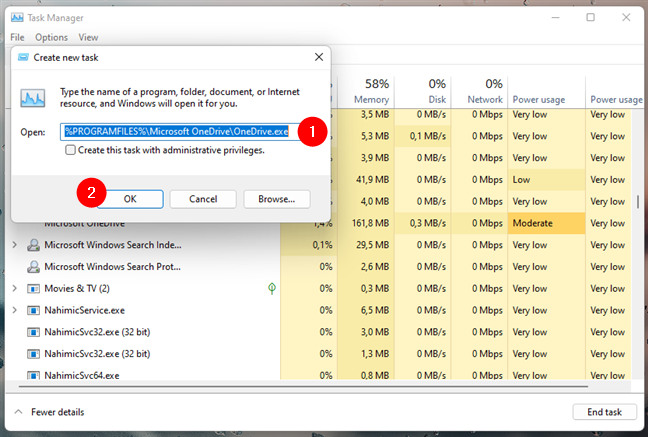
In the same Task Manager window, open the File menu and click or tap on Run new task.
Task Manager now launches a new window called “Create new task.” In the Open field, if you use Windows 11, type this path:
%programfiles%\Microsoft OneDrive\OneDrive.exe
If you use Windows 10, use this path instead:
%localappdata%\Microsoft\OneDrive\OneDrive.exe
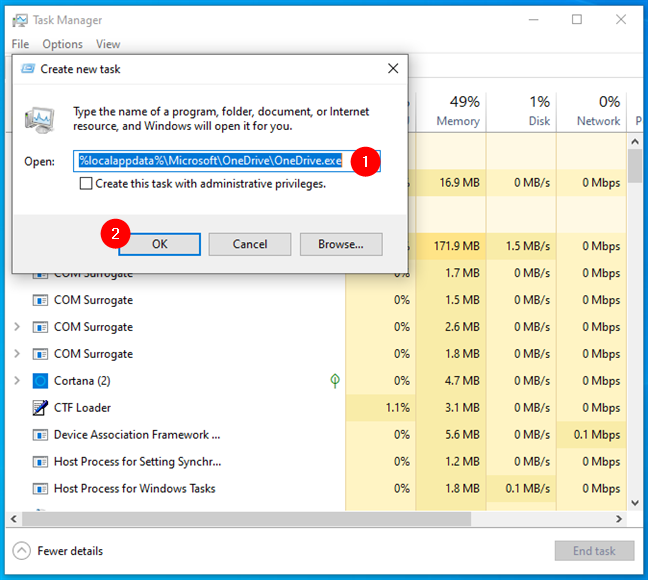
In either case, after you’ve entered the proper path, click or tap on OK or press Enter on your keyboard. OneDrive's process should now start again. Once it’s launched, it automatically triggers a file check, and if any change is detected, it also starts syncing your files.
How to do a OneDrive force sync using Command Prompt
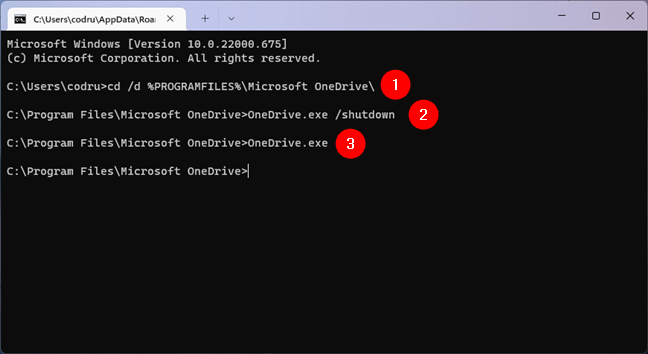
Command Prompt also offers an alternative solution to the OneDrive not syncing problem. If you’re using Windows 11, open CMD and run the following commands, one after the other:
cd /d %PROGRAMFILES%\Microsoft OneDrive
OneDrive.exe /shutdown
OneDrive.exe
If you’re using Windows 10, run these commands:
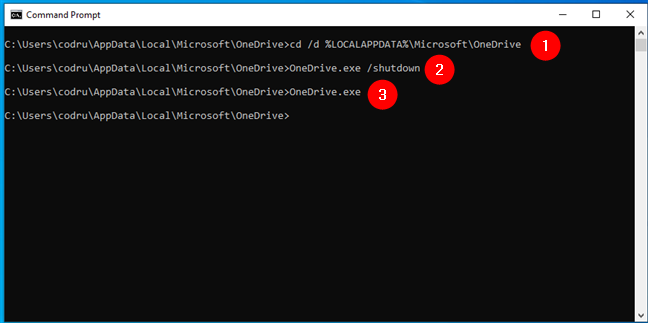
cd /d %LOCALAPPDATA%\Microsoft\OneDrive
OneDrive.exe /shutdown
OneDrive.exe
How to do a OneDrive force sync using PowerShell
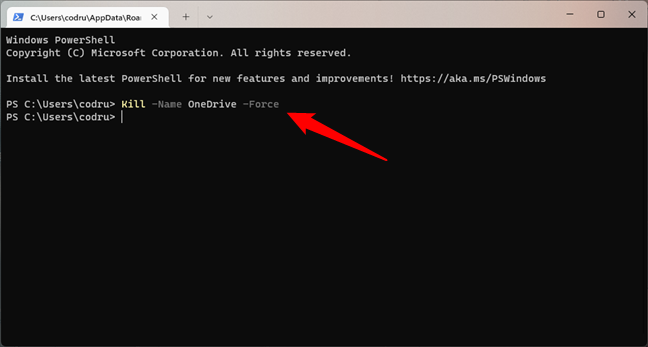
Finally, our final solution to the OneDrive not syncing issues is to restart OneDrive using PowerShell. PowerShell and run the following command to close the OneDrive app:
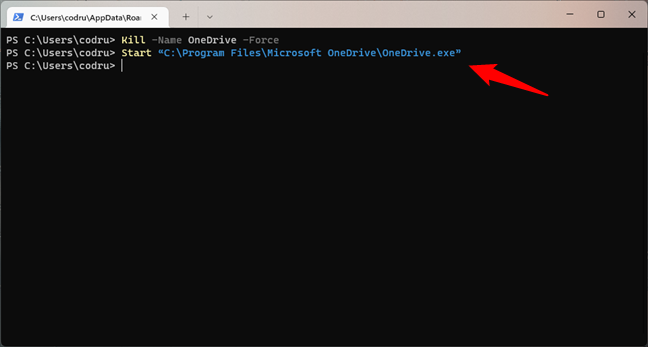
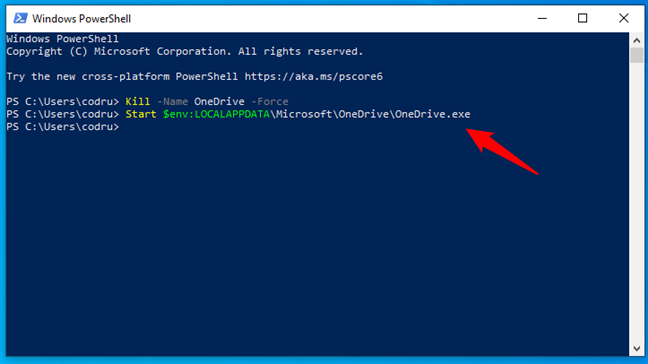
Kill -Name OneDrive -Force
Then, if you use Windows 11, run the next command to relaunch OneDrive:
Start “C:\Program Files\Microsoft OneDrive\OneDrive.exe”
If you use Windows 10, run this command instead:
Start $env:LOCALAPPDATA\Microsoft\OneDrive\OneDrive.exe
Regardless of whether you use Windows 11 or Windows 10, now the app is restarted, which should force OneDrive to sync.