Incoming webhook in Microsoft Teams is required by Devicie to send you notifications when changes happen in your Intune tenant.
Adding a new Webhook Connector
To create a new incoming webhook on Microsoft Teams, follow the below steps:
- Open Microsoft Teams and select or create a channel where you would like to receive the notifications.
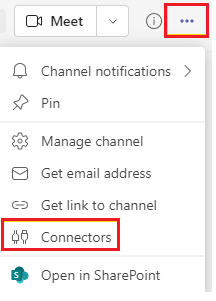
- From the top right of the channel, click on the 3 dots ... and click on Connectors.
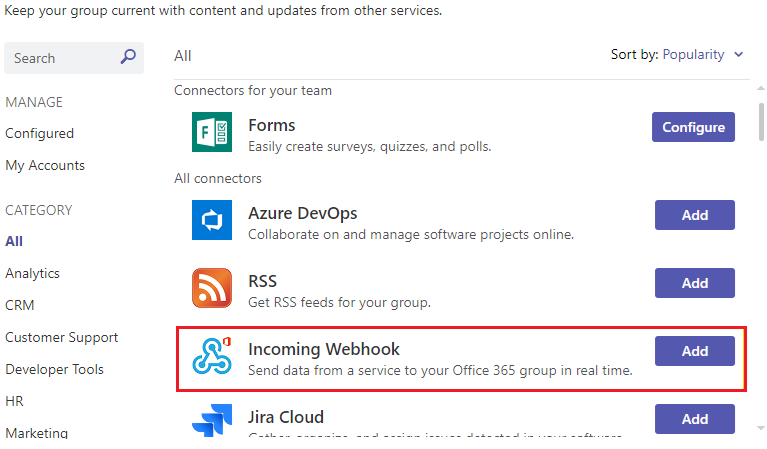
- Locate Incoming Webhook and click Add.
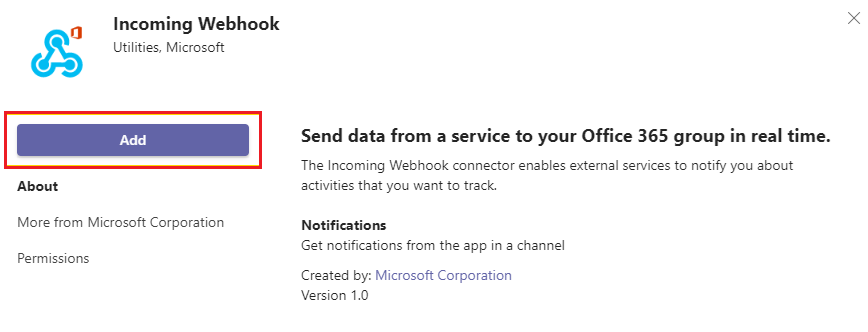
- Click Add below the Incoming Webhook icon.
- Click back on the 3 dots ... from the top right of the channel and click on Connectors.

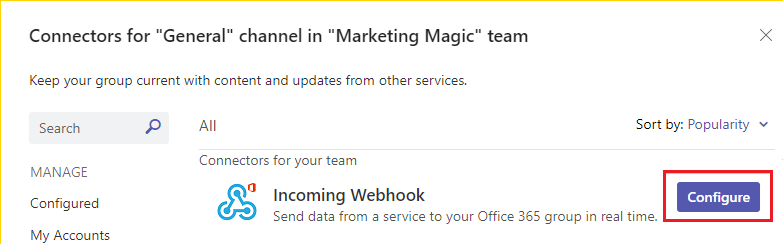
- Next to Incoming Webhook, click on Configure.
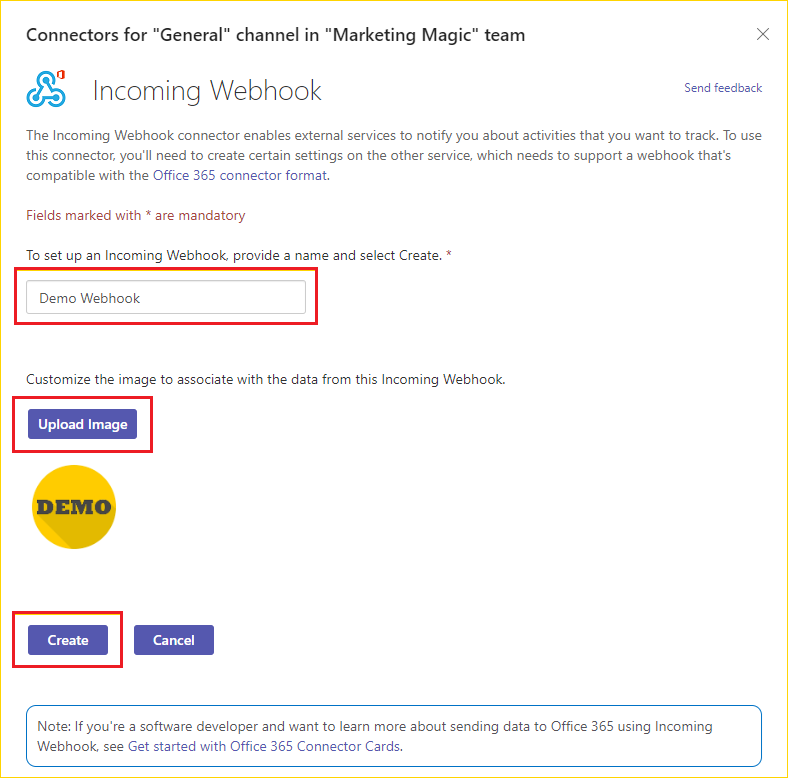
- Give the Incoming Webhook a name and upload an image if you would like to do so and click Create.
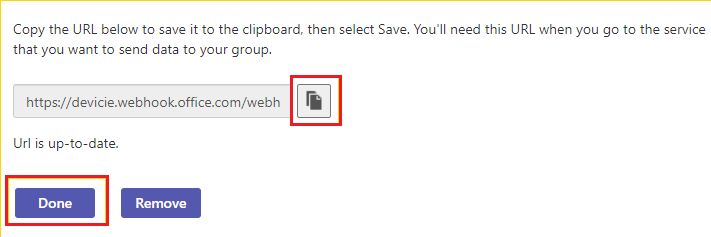
- Once you create the connector, it will generate a URL for the webhook. Copy the URL by clicking on the copy icon next to it, take note of the URL then click on Done.
- Supply Devicie with the webhook URL to setup notifications on your tenant.
Retrieving URL, Editing or Removing a Webhook Connector
If you need to retrieve the webhook URL, edit, or completely remove a configured webhook connector, follow the below steps:
- Open Microsoft Teams and select the channel where the connector is configure.
- From the top right of the channel, click on the 3 dots ... and click on Connectors.

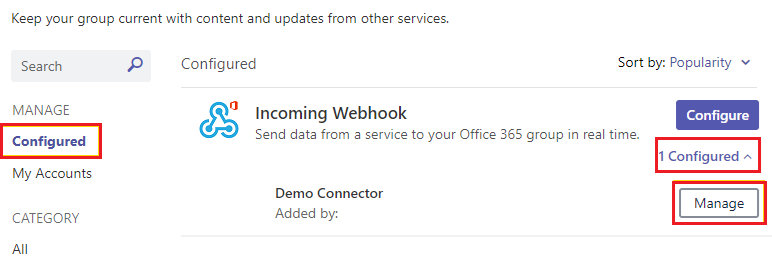
- From the left panel, below MANAGE, click on Configured. Expand the arrow down below the connector and click on Manage.
- To retrieve the URL in case you lost it, click on the copy icon next to the URL then click Cancel.
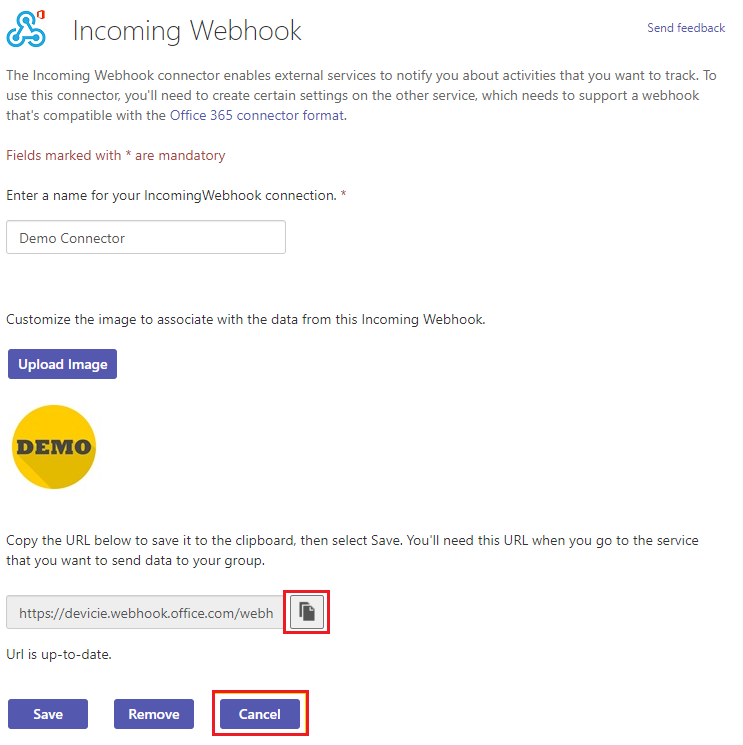
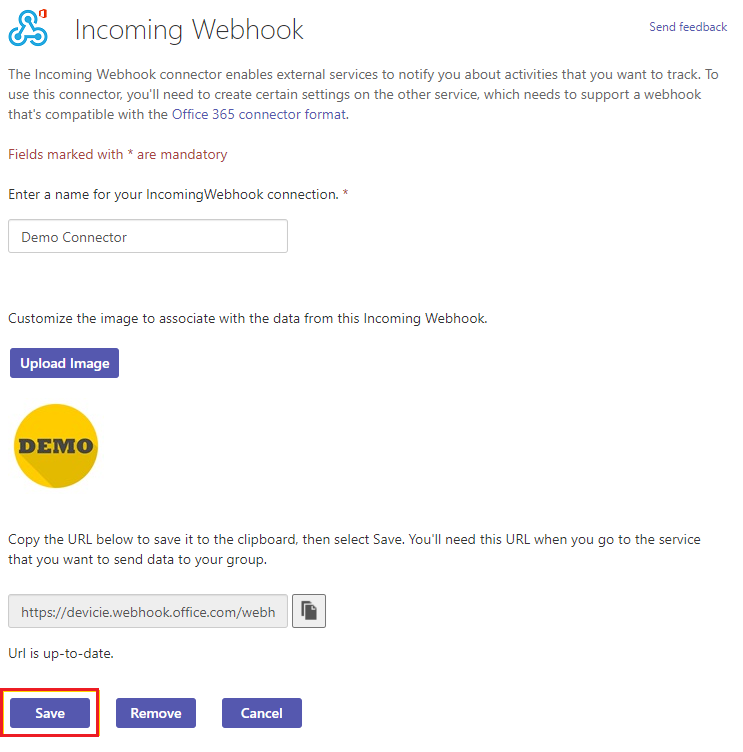
- To Edit a connector, change the details you want to edit and click on Save.
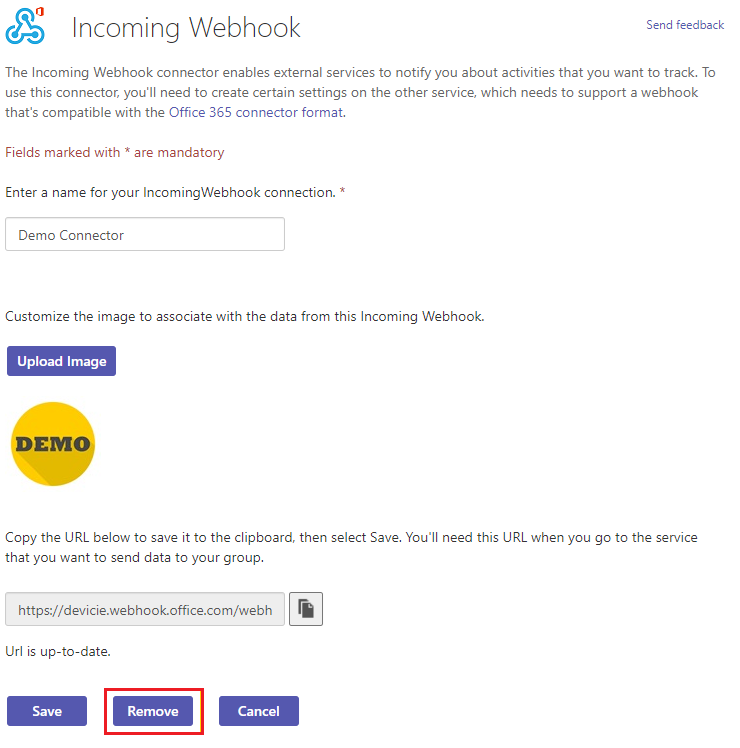
- If you want to completely remove the connector, click on Remove.
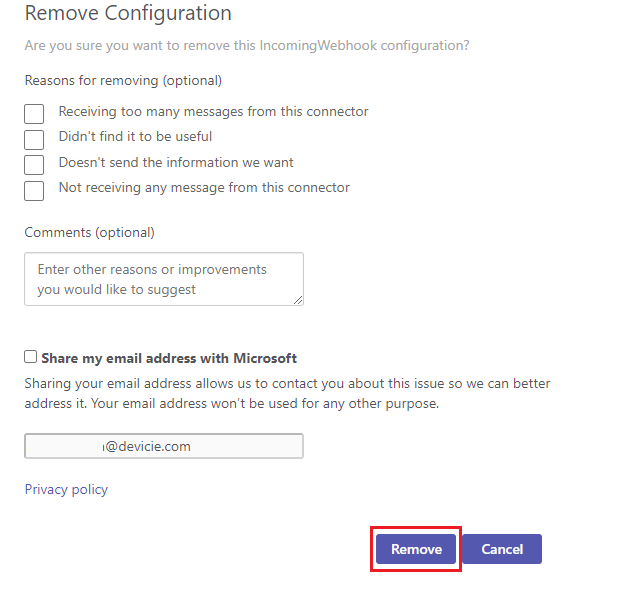
- Then from the popup window (no need to fill in any details or share your email) click on Remove.
- To retrieve the URL in case you lost it, click on the copy icon next to the URL then click Cancel.