![Full Logo.png]](https://help.devicie.com/hs-fs/hubfs/Full%20Logo.png?height=30&name=Full%20Logo.png)
Overview:
This knowledge base article provides step-by-step instructions on how to setup Azure Automation to help automate cleanup with old and inactive devices. With using Azure Automation, you can fully automate this process and remove devices that have been inactive for more than 180 days.
The following will be covered in clean up inactive Entra ID Devices using Azure Automation:
- Setup Automation Account
- Configure Managed Identity
- Install needed modules
- Create the PowerShell Runbook
- Testing the Runbook Script
- Schedule to run Runbook automatically
Setup Automation account
Navigate to https://portal.azure.com/ then in the search resources field, enter in Automation Accounts. Click on Automation Accounts.

Under Basics, select your subscription if you have more than one, create a new resource group. Enter the details of the Automation account name and select a Region. Then select Next.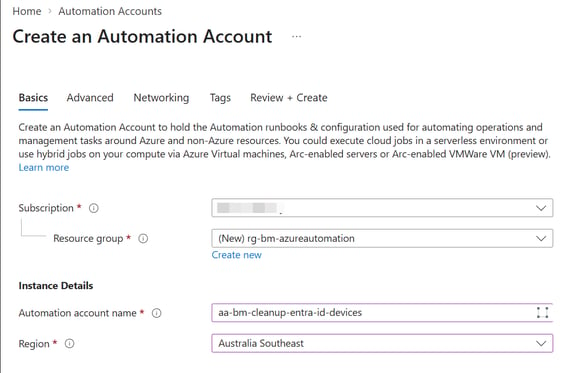
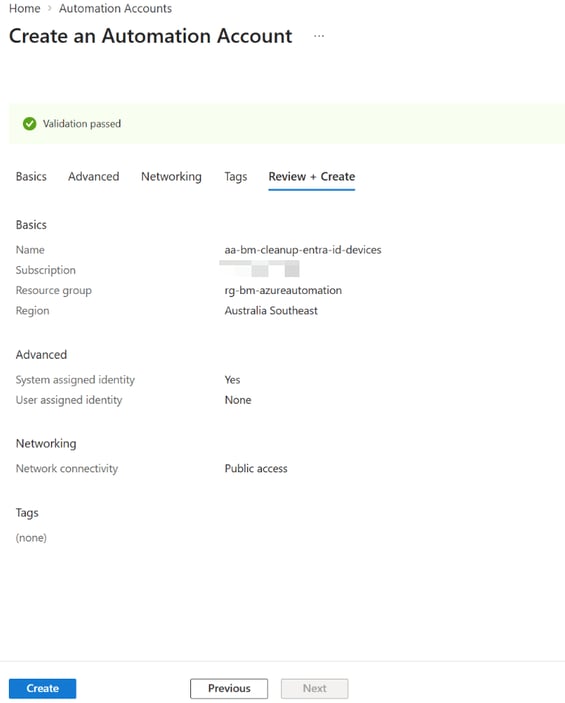
Under Advanced, select System assigned. Then select Next.


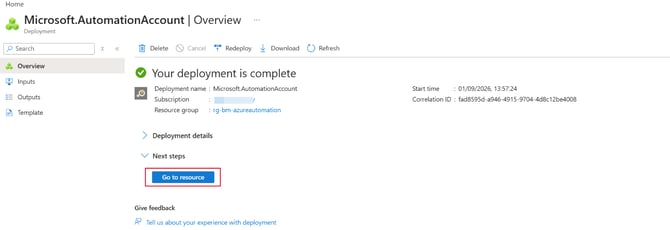
Configure Managed Identity
Under the 'Automation account', expand Account Settings then select Identity.
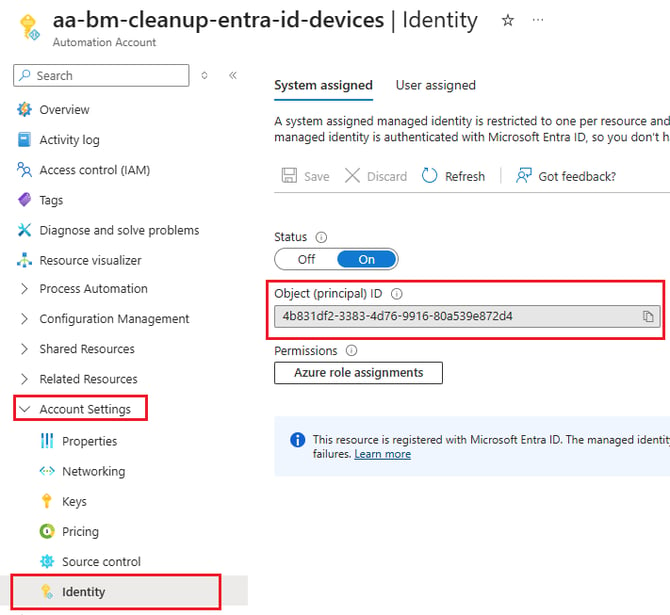
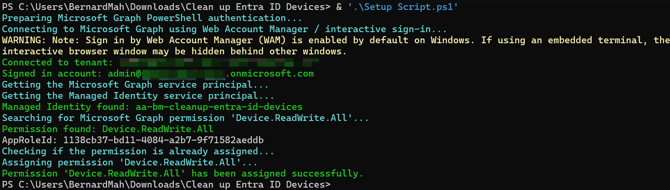
Copy and paste the Object (Principal ID) into the script. Please ensure you save the script locally onto your device.
This script will give the required permissions to a Service Principal, this will be a once off setup.

 You will be prompted to login with your credentials, if this is your first seeing this click Accept.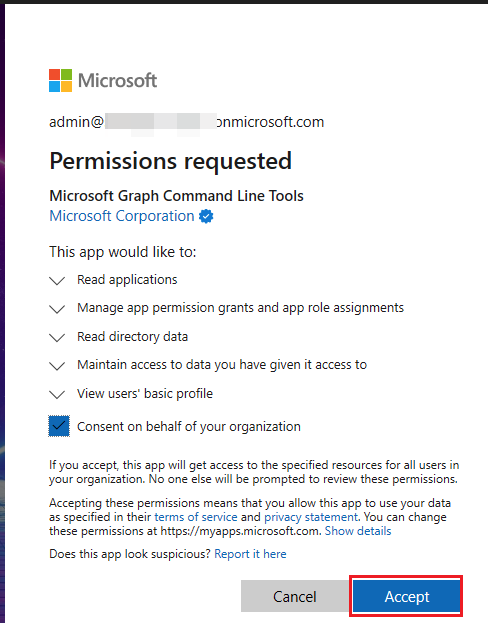
Install needed modules

You will need to install two modules:
- Microsoft.Graph.Authentication
- Microsoft.Graph.Identity.DirectoryManagement
From the Browse Gallery, click on Microsoft.Graph.Authentication

Then click on Select.
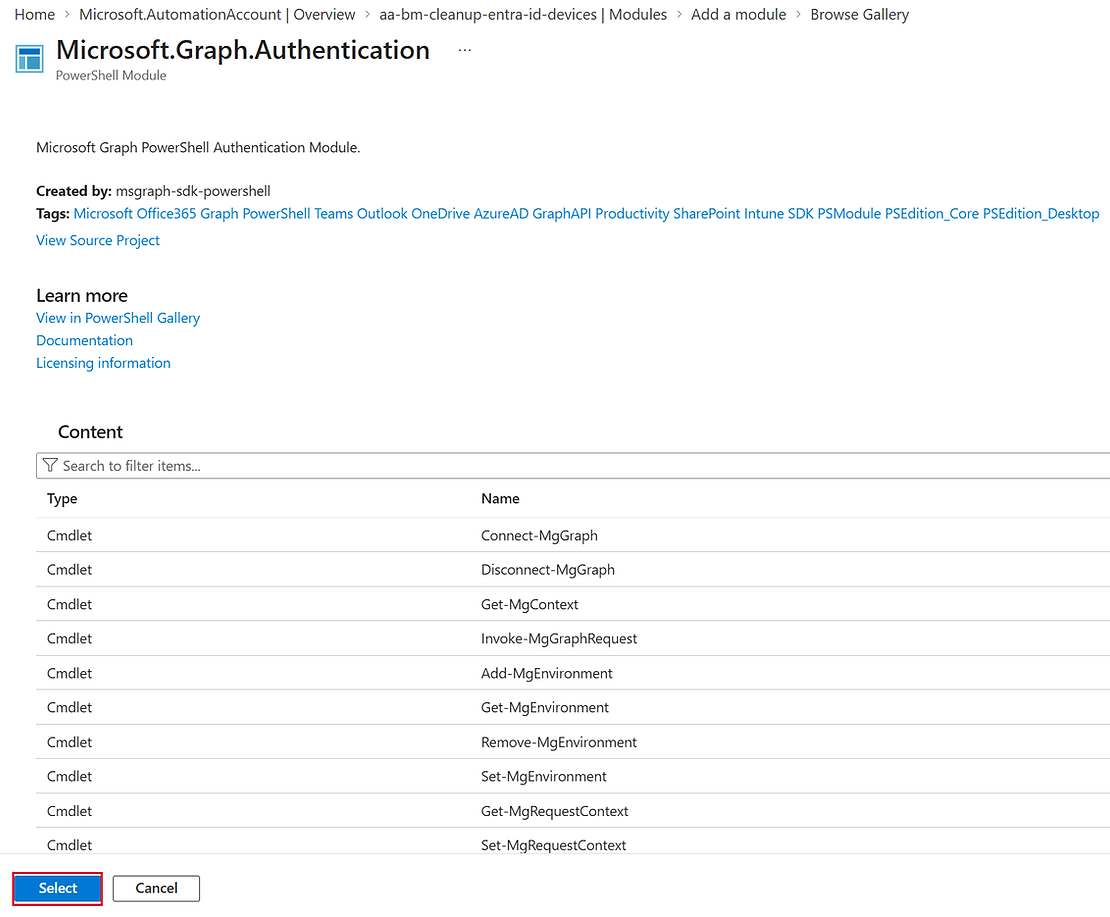
Make sure to select Runtime version to 7.2 then select Import.

Do the same for Microsoft.Graph.Identity.DirectoryManagement, then click on Select.

Make sure the Runtime version is set to 7.2. Select Import.

Once the modules have been added, you will notice that both of the modules have been installed.

Create the PowerShell Runbook
Under Automation Account, expand Process Automation then select Runbooks then select Create a runbook.

Under Basics, enter the desired info for the creating the runbook, in this instance I am using:
Name: Clean-Stale-Devicies-In-Entra
Runbook type: PowerShell
Runtime version: 7.2
Description: Entra ID Stale Device Cleanup
Then select Next.

Under Review + Create, select Create

Copy and paste the script into "Edit PowerShell Runbook", then click Save.
Change the $InactiveDays and $Action to what you want.

Then select Publish, then select Yes when prompted.

Testing the Runbook script
Then click on the recent added Runbook. Then click Start then click "Yes" to start runbook.

If you select Output, you will see what has been deleted.

Schedule runbook to run automatically
Under the Automation account, expand Shared Resources then Schedules

Select Add a schedule, then enter a name for the new schedule then choose the dates and timezone on when the automation should should run then select Create.

In the Automation Account, expand Process Automation then select Runbooks then select the one the most recent runbook then select Link to Schedule.

Select Schedule then Select the Runbook that was created.

Under Parameters, select Azure and click OK.

Now the runbook has been set to run depending on the scheduled date.
